Mobile Inventory Management
From the Zinier mobile app, field technicians can view their inventory on hand, accept inventory requests from the field, and request/return inventory.
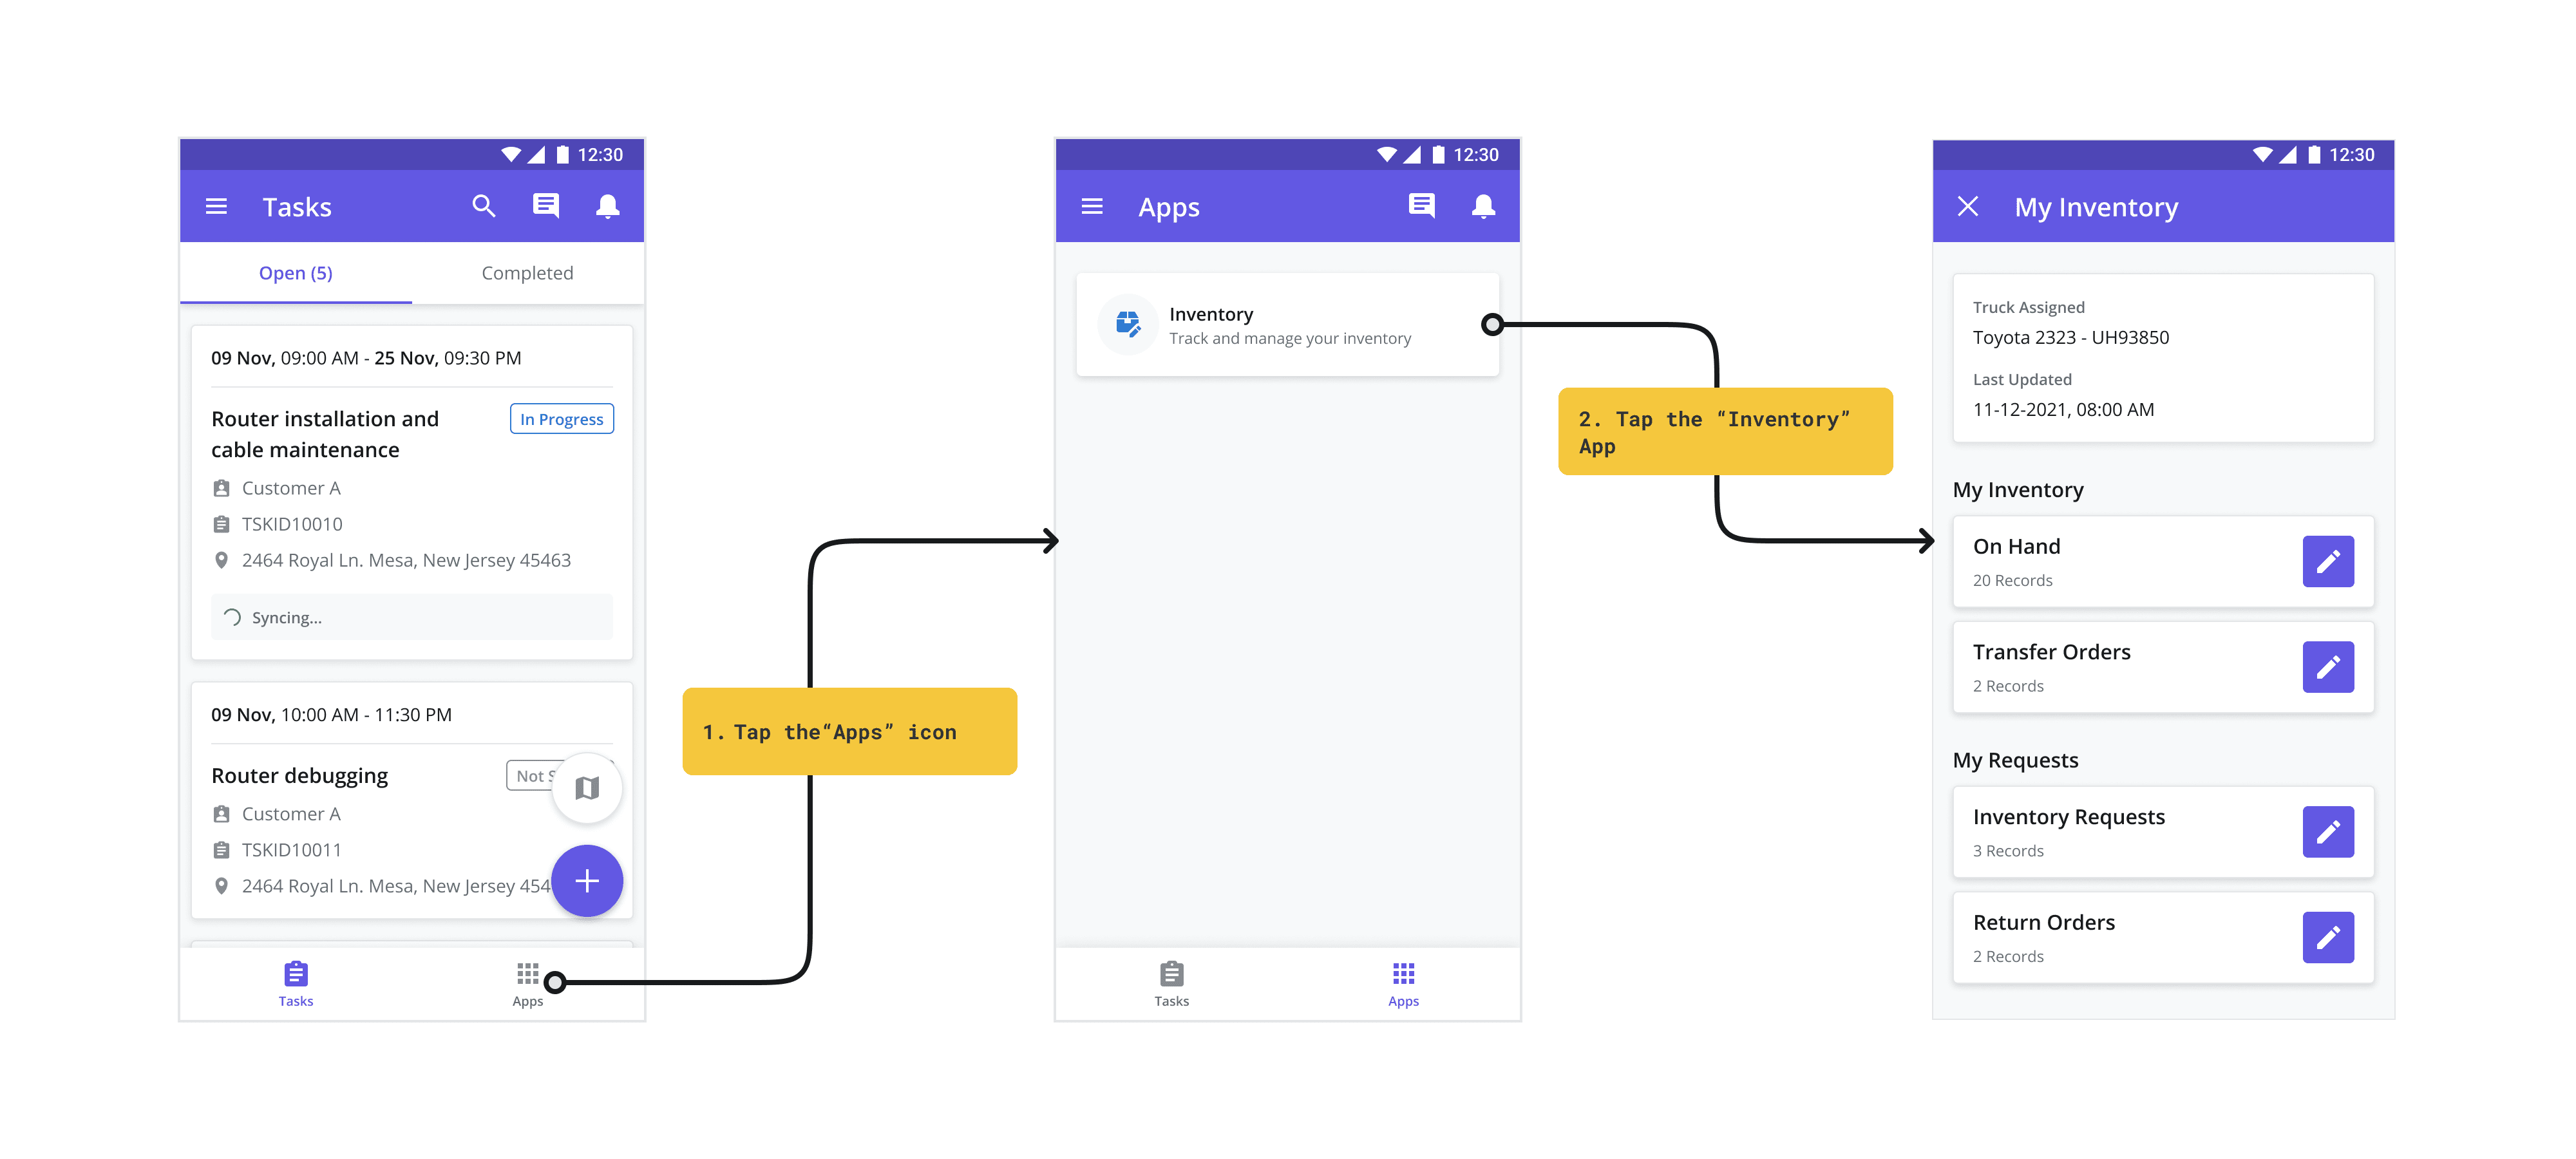
Accessing Inventory on Mobile
The Inventory Management module on the mobile app can be accessed by tapping the “Apps” icon on the bottom navigation bar from the home screen / Tasks screen.
View On Hand Inventory
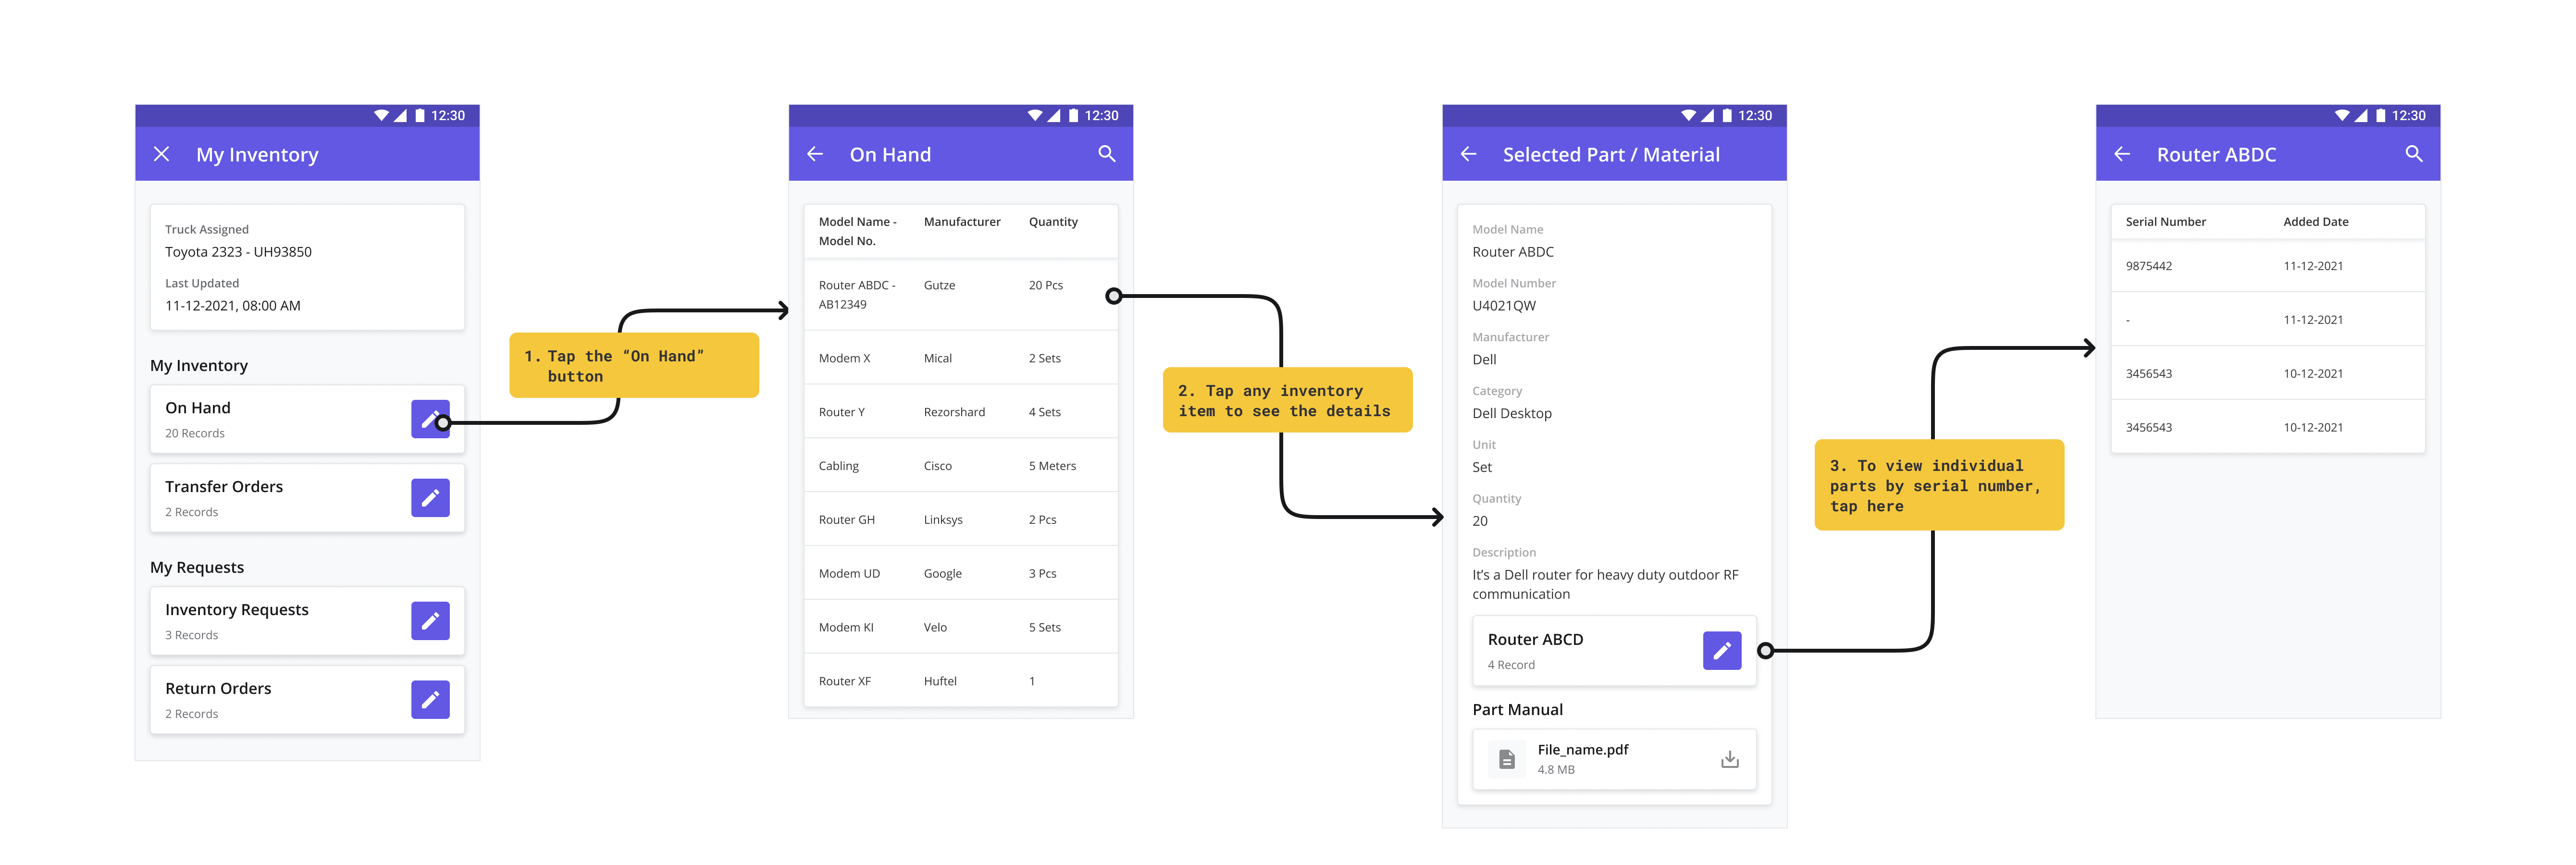
While on the field, Technicians can directly check their On Hand Inventory from the Zinier mobile app, by opening the Inventory Management module and tapping on ‘On Hand’.
The On Hand inventory shows the list of parts/materials that the Technician has in their truck, along with the quantity. On selecting any part/material, a page opens up with all the details regarding the catalog item, along with any manual that may be associated with it, allowing Technicians to easily access knowledge articles for the item.
To access Inventory On Hand from the mobile app, follow the steps below:
Tap the “On Hand” button from the Inventory Management module on the mobile app
Tap any inventory item to see the details
To view individual parts by serial number, tap the button shown below.
If a Part Manual has been uploaded, it can be viewed by tapping the Part Manual PDF button.
Accept Inventory from the Field
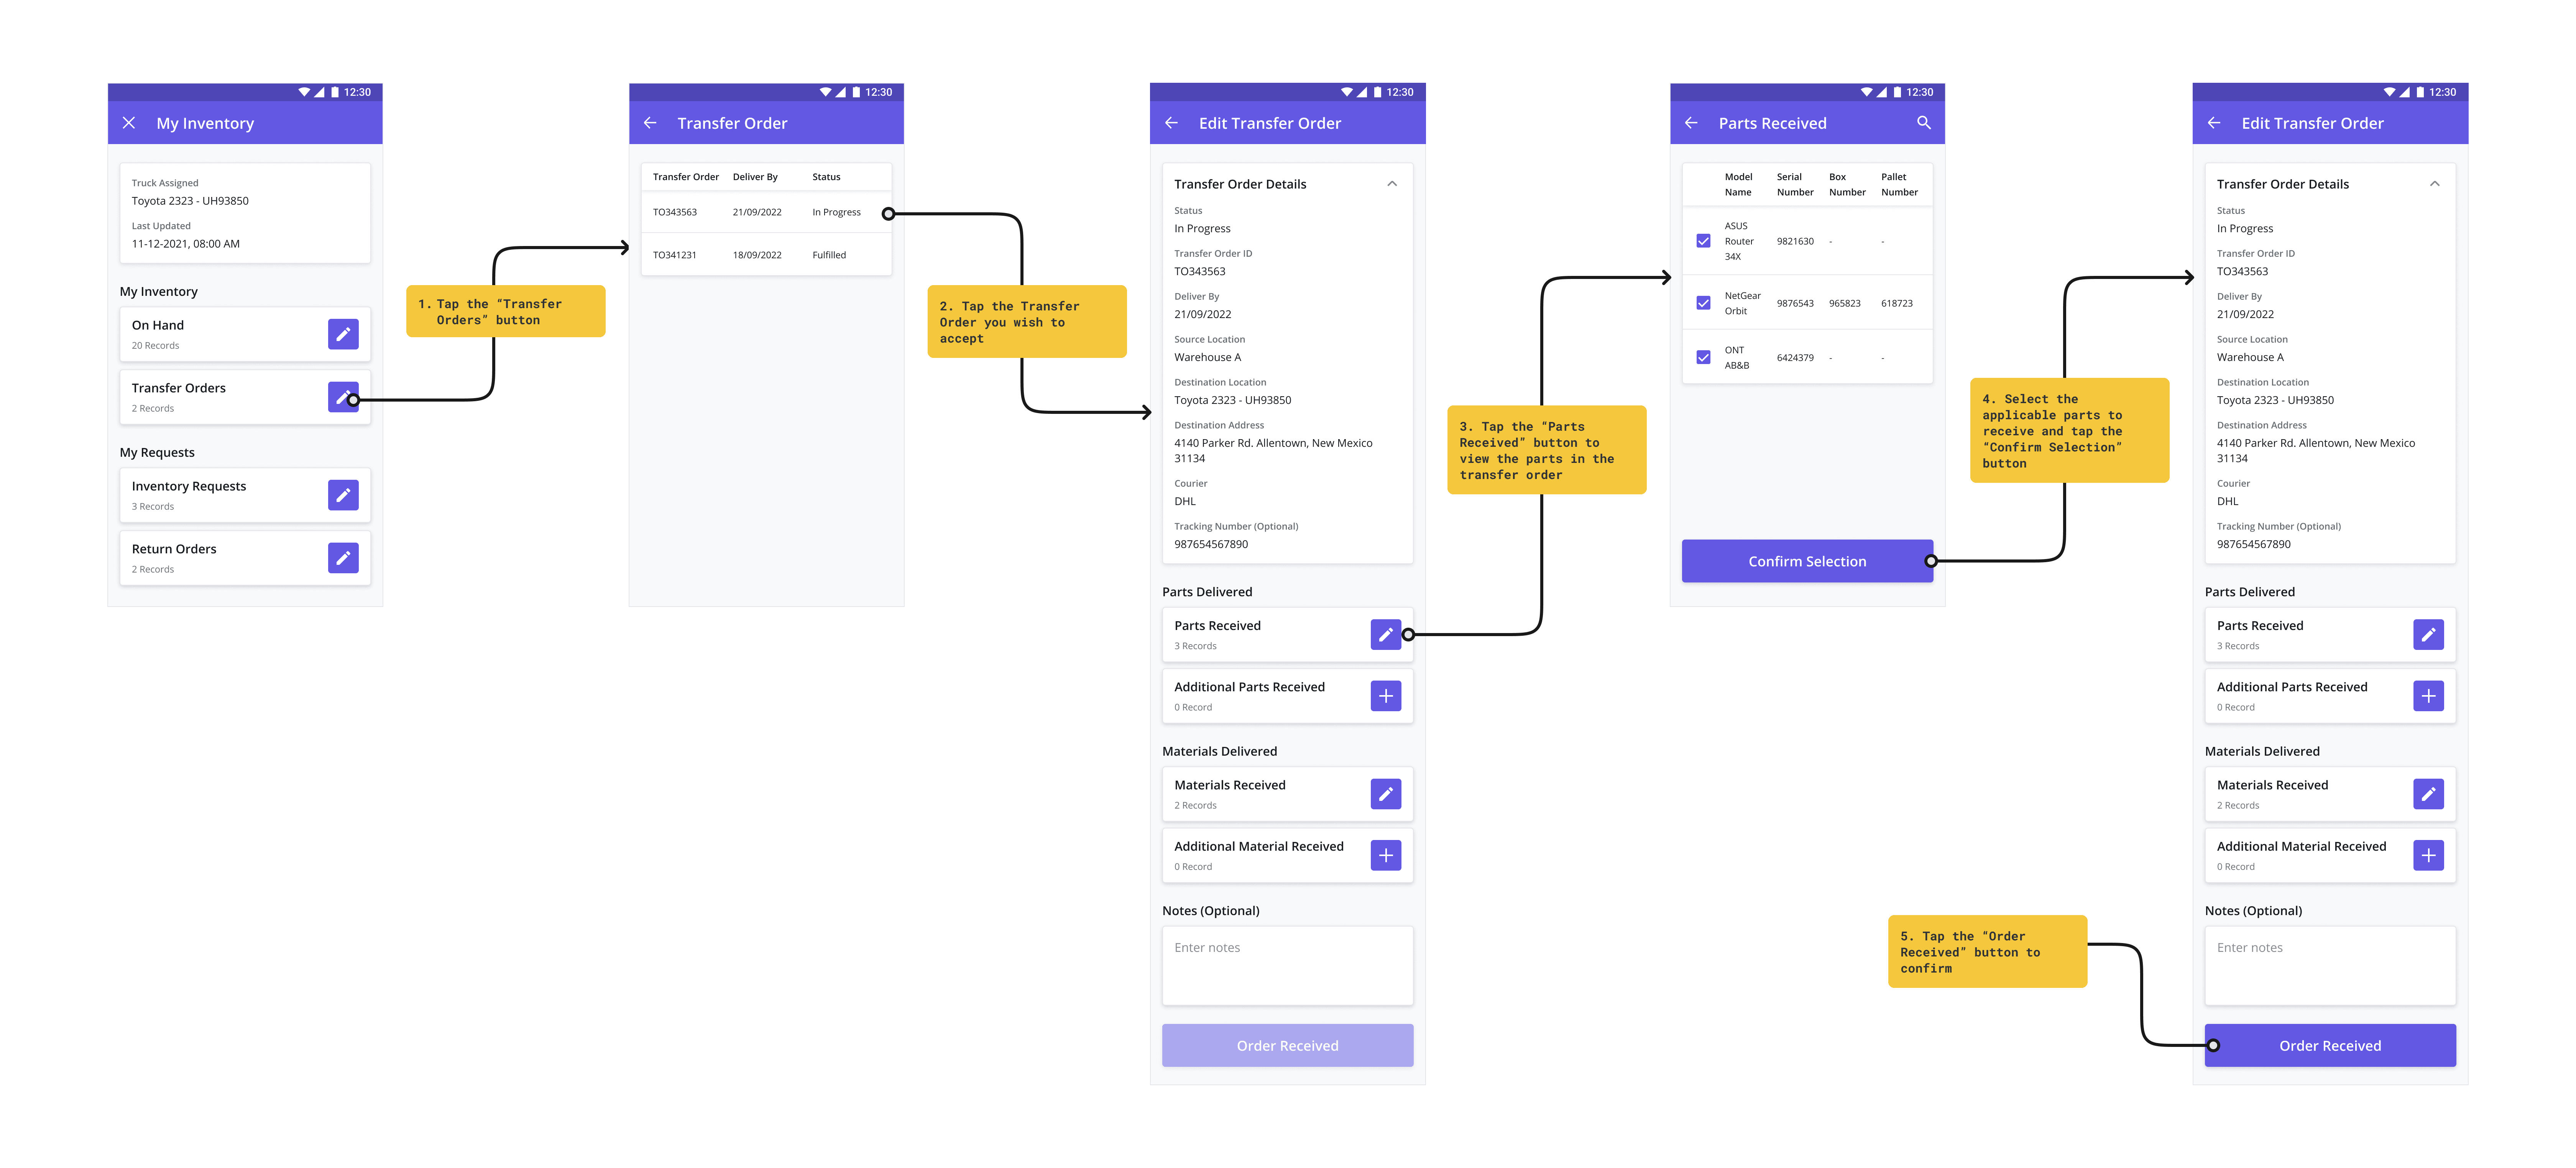
While in the field Technicians can receive parts/materials that have been transferred to them. They can accept these Transfer Orders to add the received parts/materials to their truck. To accept inventory from the field from the mobile app, follow the steps below:
Tap the “Transfer Orders” button from the Inventory Management module on the mobile app
Tap the Transfer Order you wish to accept
Tap the “Parts Received” button to view the parts in the transfer order
Select the applicable parts to receive and tap the “Confirm Selection” button
Once complete, tap the “Order Received” button to confirm.
If you have Materials to accept, repeat the process above by tapping the “Materials Received” button at step 3
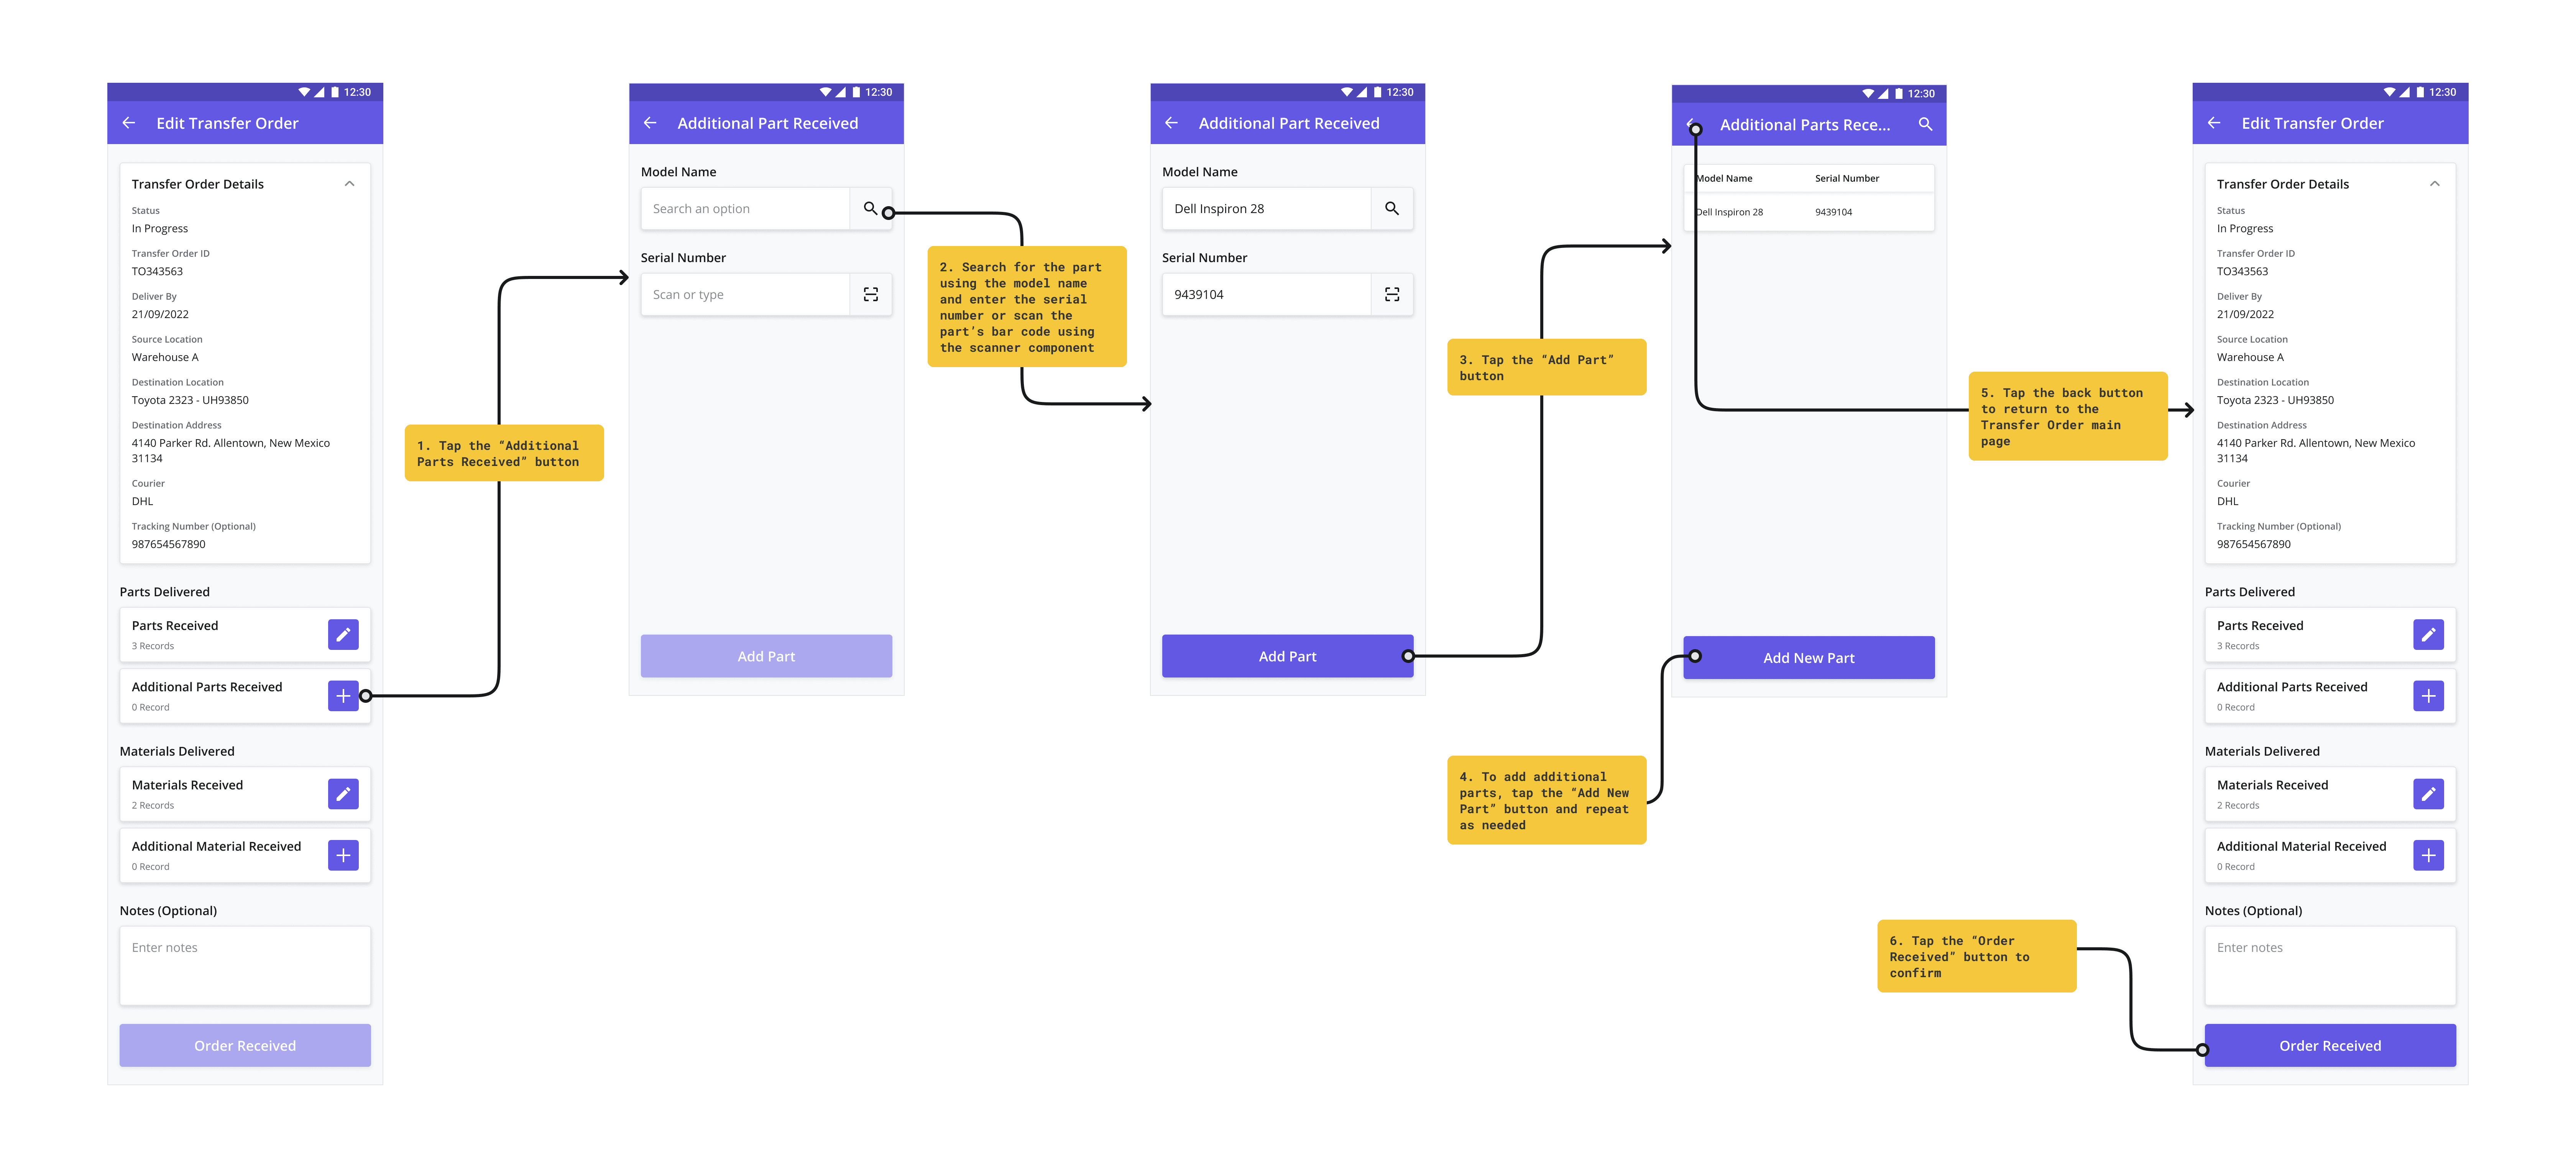
If you received additional parts or materials as part of the transfer order, follow the steps below before tapping “Order Received”
Adding Additional Parts or Materials Received
At times, you may receive additional parts or materials not originally included in the Transfer Order. If you received additional parts or materials as part of the transfer order, follow the steps below:
Tap the “Additional Parts Received” button to add the parts
Search for the part using the Model Name and enter the Serial Number or scan the part’s bar code using the scanner component
Tap the “Add Part” button
To add additional parts, tap the “Add New Part” button and repeat as needed
Tap the back button to return to the Transfer Order main page.
If you have Additional Materials Received, repeat the process above by tapping the “Additional Materials Received” button at step 1
Once complete, tap the “Order Received” button to confirm.
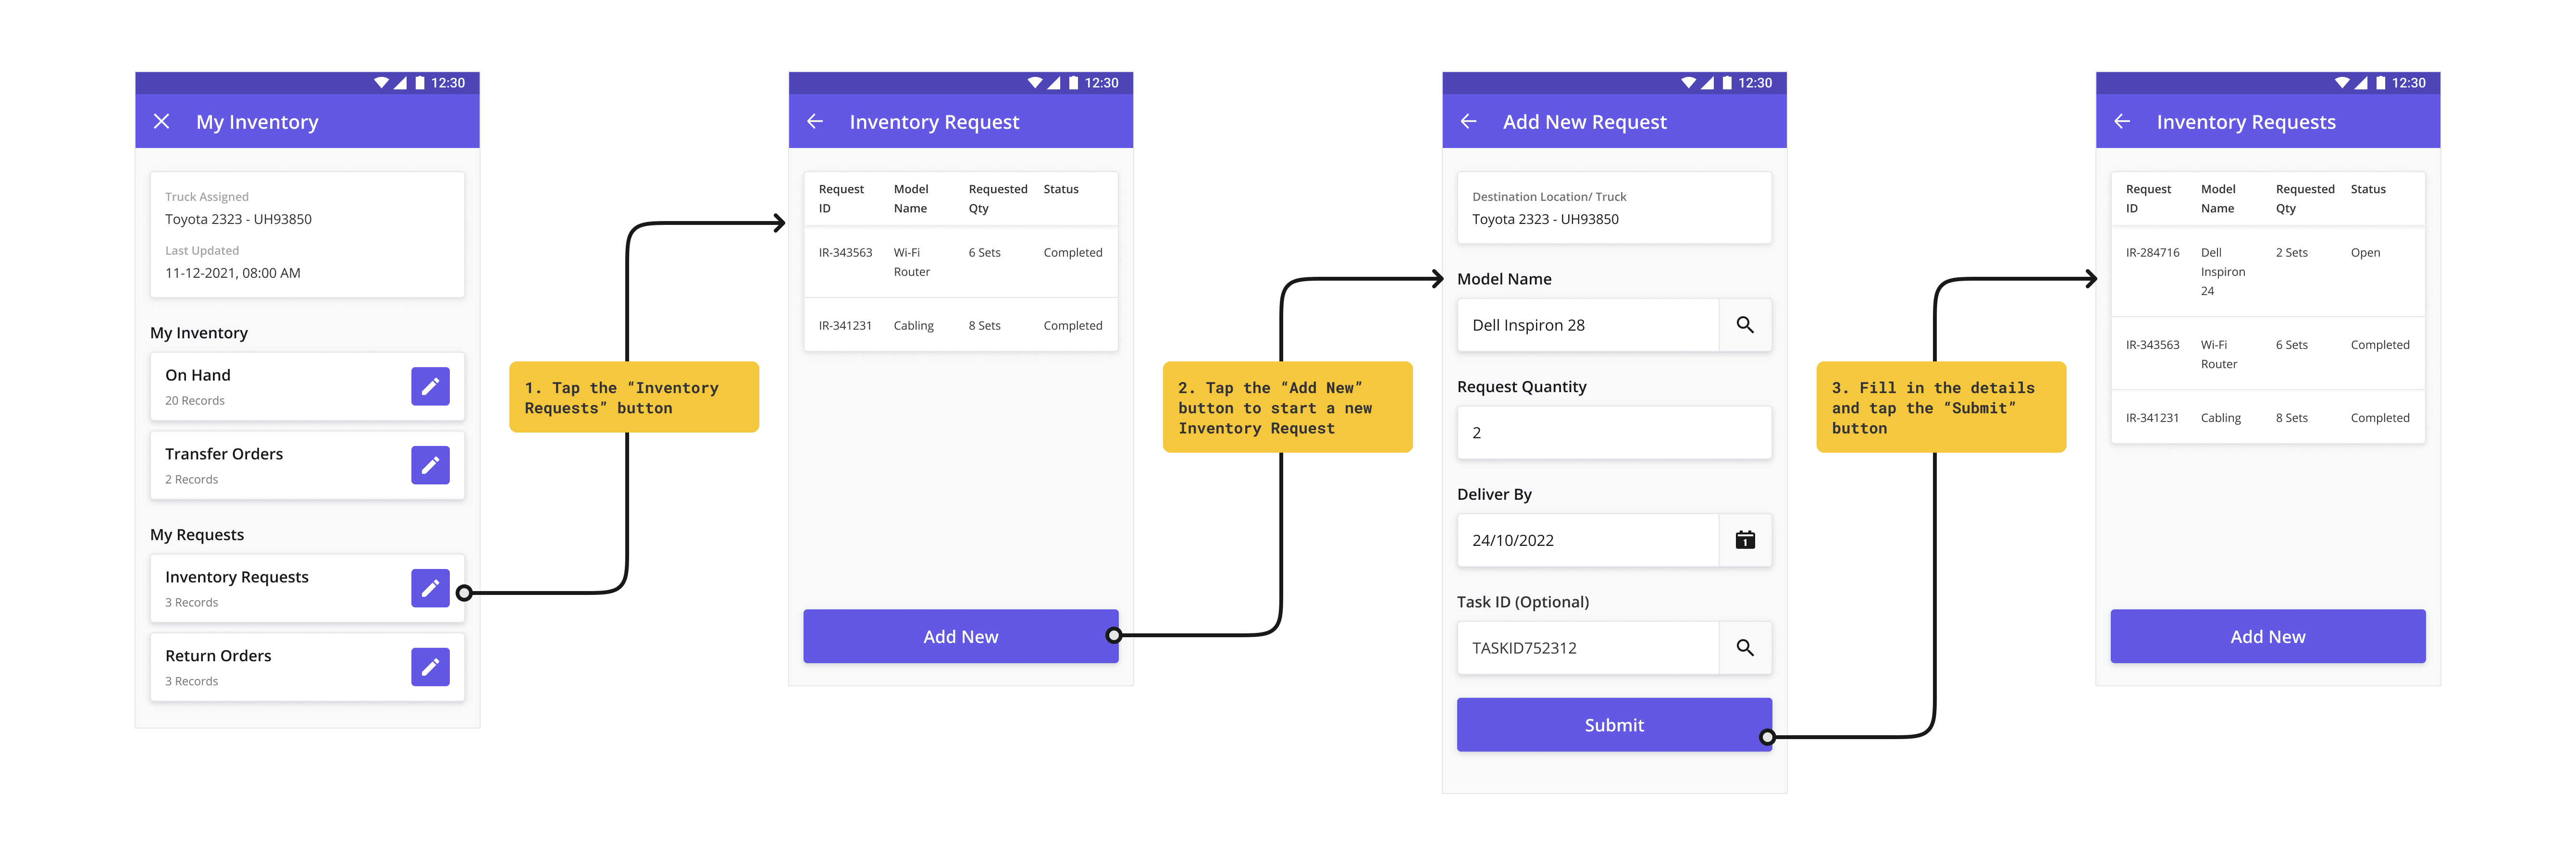
Requesting Inventory from the Field
While in the field, Technicians can request additional inventory as needed and tie the request to a specific Task if relevant.
Once created by the Technician, the Inventory Request is sent to the backoffice to ensure fulfillment.
To request inventory from the mobile app, follow the steps below:
Tap the “Inventory Requests” button from the Inventory Management module on the mobile app
Tap the “Add New” button to start a new Inventory Request
Fill in the details as described below and tap the “Submit” button
By default, the Destination Location will list your truck as the delivery location
Tap the Model Name field to search for and select the Part
Enter the Request Quantity to indicate how many items you are requesting
Choose a Deliver By date to request the parts by a specific date
If it is related to a specific Task, search for and select the Task ID here. When searching for a Task to associate the request with, only Tasks assigned to you will be visible.
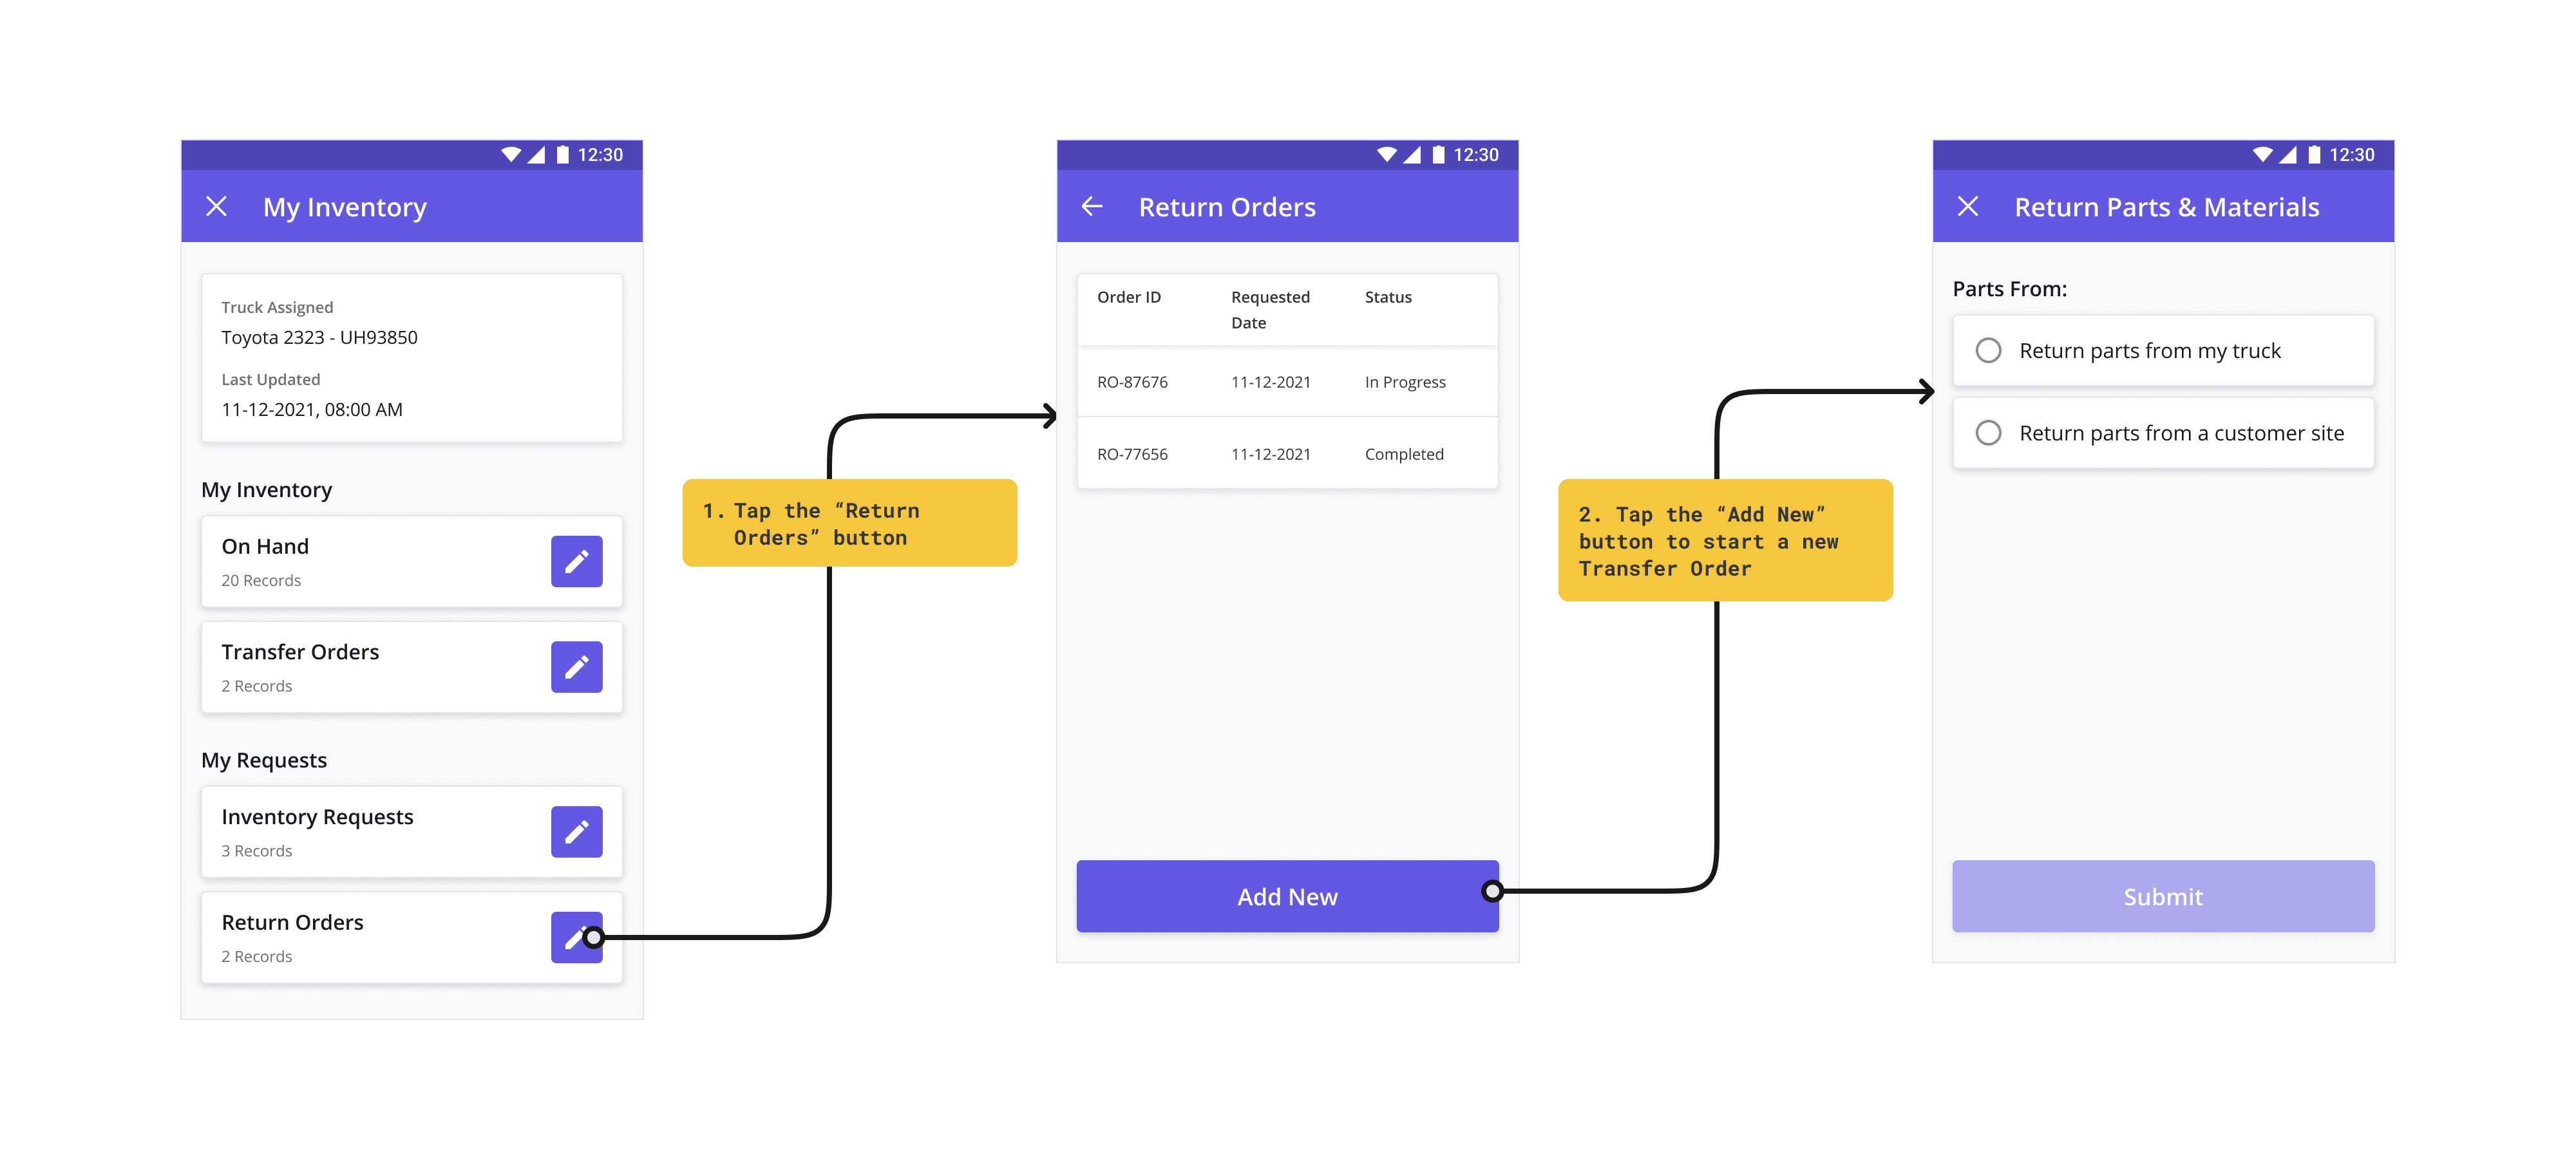
Returning Inventory from the field
With the Return Orders capability on mobile, technicians can return inventory from their Truck or a Customer Site back to a Warehouse or other Stock Location. Once a Return Order is created by a Technician, it is then sent to the backoffice to decide whether the returned parts/materials should be restocked or discarded.
To return inventory from the mobile app, follow the steps below:
Create the Return Order
Tap the “Return Orders” button from the Inventory Management module on the mobile app
Tap the “Add New” button to start a Return Order
In the Parts From section, select the place from which the inventory is being returned:
Return parts from my truck: Select this if you wish to return inventory from your truck
Return parts from customer site: Select this if you wish to return inventory taken from a customer site. If this is selected, then you need to select a source location
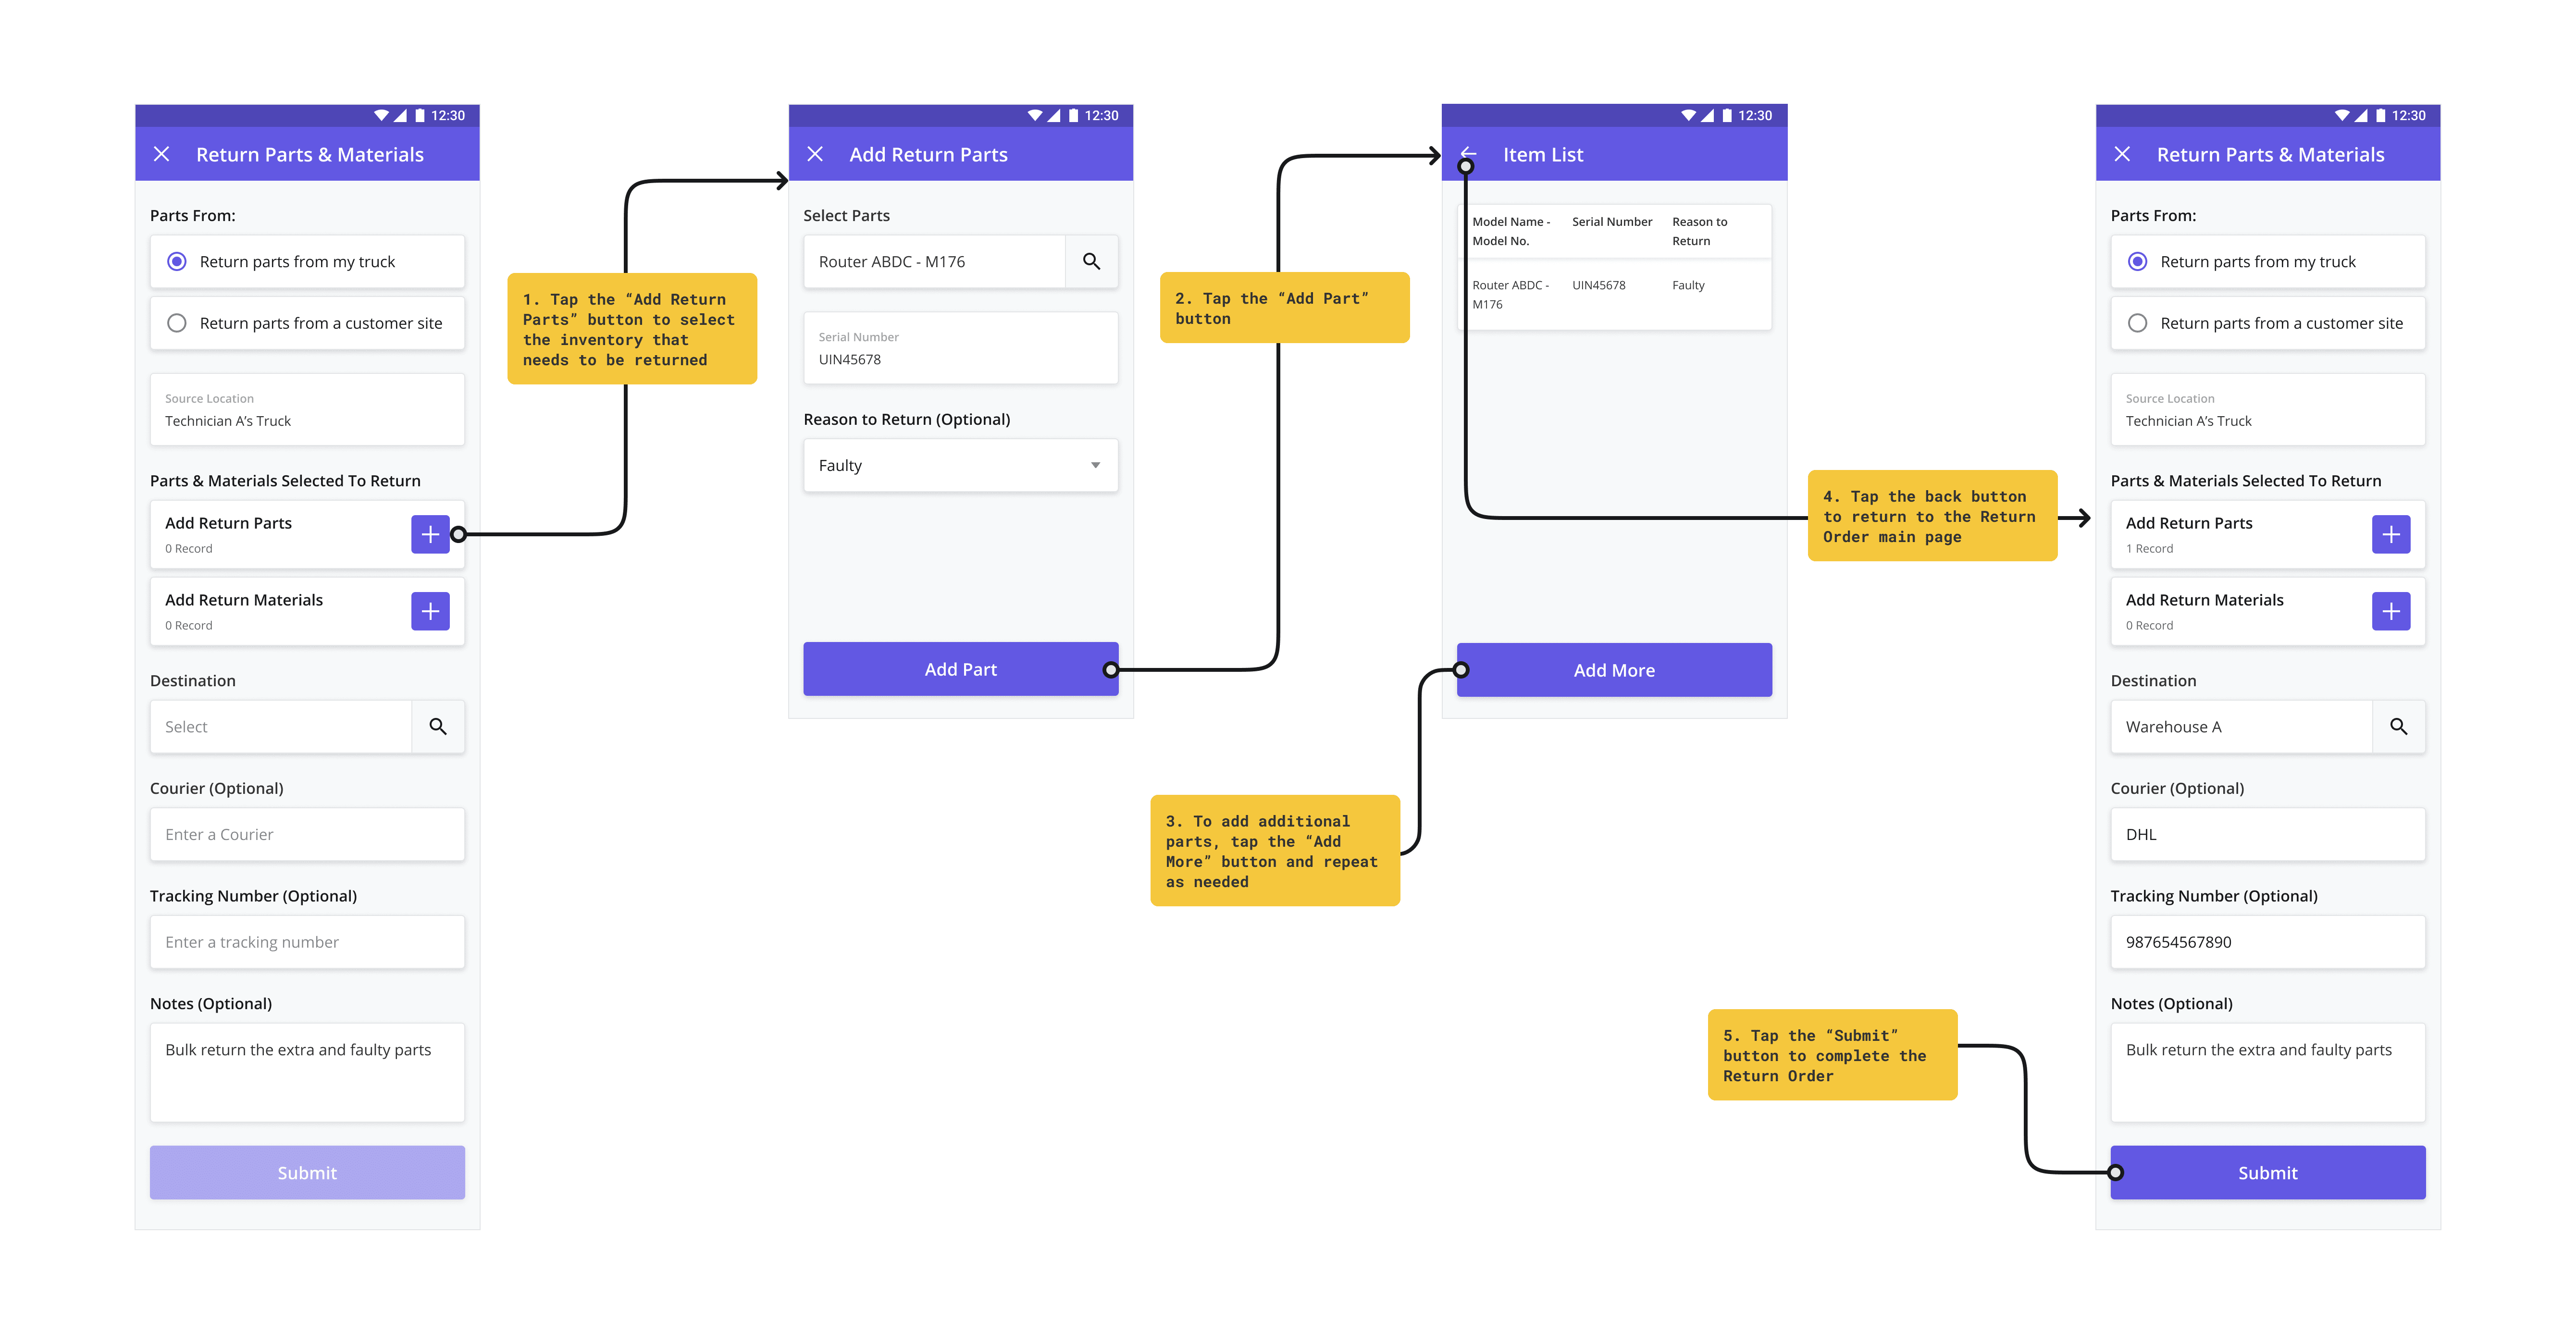
Returning inventory from your truck
If returning inventory from your truck, tap the Add Returns Parts / Materials button to select from the list of all the inventory in your truck that needs to be returned.
Add the parts to return by filling in the details below and tapping the “Add Part” button:
Tap the Select Parts button to search for the part to return
Select a Reason to Return (Optional) to provide a reason for returning the selected part. The default options are: Unused Parts, Faulty, Old Model, and Others
To add additional parts, tap the “Add More” button and repeat as needed
Tap the back button to return to the Return Order main page.
If you have Additional Materials Received, repeat the process above by tapping the “Add Return Materials” button
Fill in the remaining delivery details as described below and tap the “Submit” button to complete the Return Order and send it to the backoffice
If applicable, enter the name of the Courier (Optional) that will be returning the inventory
If applicable, enter the Tracking Number (Optional) from the courier
Add any additional Notes (Optional) that may be needed
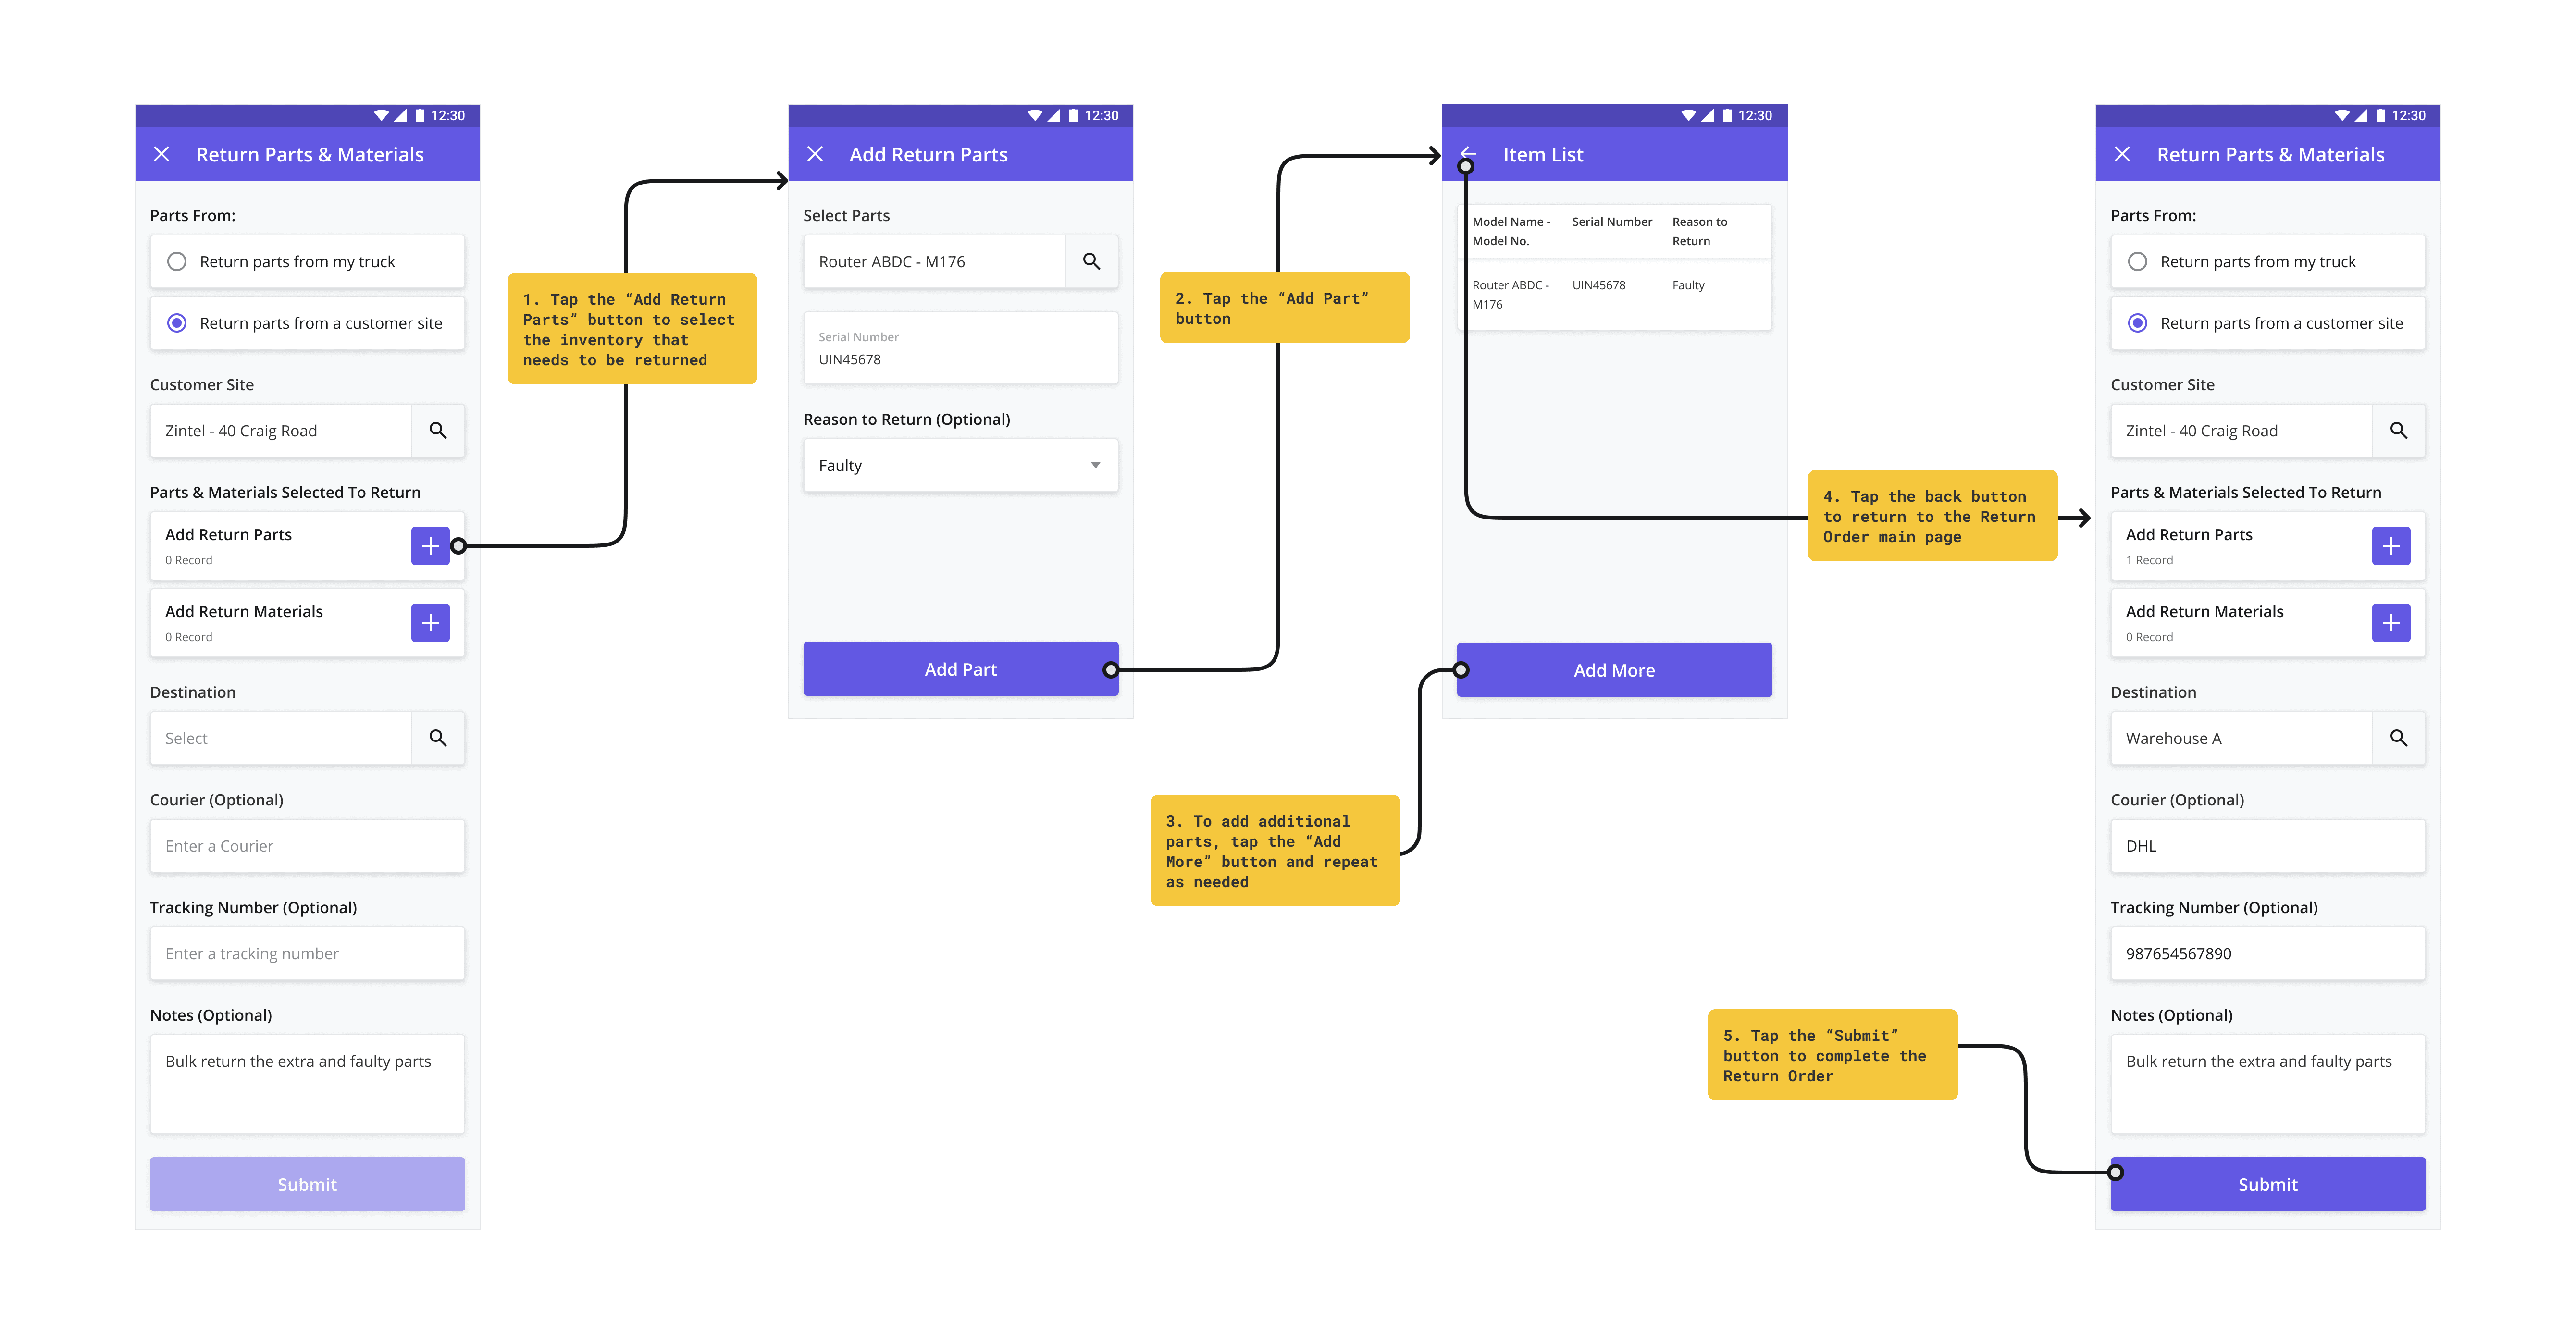
Returning inventory from a Customer Site
If returning inventory from a Customer Site, tap the “Add Return Parts” button to select the inventory in your truck that needs to be returned
Add the parts to return by filling in the details below and tapping the “Add Part” button:
Tap the Select Parts button to search for the part to return
Select a Reason to Return (Optional) to provide a reason for returning the selected part. The default options are: Unused Parts, Faulty, Old Model, and Others
To add additional parts, tap the “Add More” button and repeat as needed
Tap the back button to return to the Return Order main page.
If you have Additional Materials Received, repeat the process above by tapping the “Add Return Materials” button
Fill in the remaining delivery details as described below and tap the “Submit” button to complete the Return Order and send it to the backoffice
If applicable, enter the name of the Courier (Optional) that will be returning the inventory
If applicable, enter the Tracking Number (Optional) from the courier
Add any additional Notes (Optional) that may be needed
Fill in the details as described below and tap the “Submit” button
Once submitted, you can check on the status of the Return Order at any time by again tapping the “Return Orders” button from the Inventory Management module home page