How the Task Builder Works
With the No-code Task Builder, creating mobile tasks has never been easier. The following page explains how the Task Builder template is structured to give you a framework to understand how best to approach configuring tasks using the builder.
How the Task Builder Template is Structured
The Task Builder uses a single mobile workflow template as the basis for task creation and allows you to configure the mobile pages in that template dynamically using a no-code, drag-and-drop interface.
Default Mobile Pages: Settings in the Task Builder allow you to enable and disable certain default mobile pages in the template (or at times, components on a particular mobile page). For example, if geo-check-in is enabled, the geo-check-in page will appear as part of the mobile workflow. If disabled, the page will be hidden.
Dynamic Pages: In addition to modifying the attributes of the default mobile pages in the template, you can also add your own mobile pages to the template. We refer to these as dynamic pages as they are built and ordered by you using the drag-and-drop builder interface.
Dynamic Subpages: In addition to building dynamic pages, you can also build dynamic subpages. These are the “child” pages of the dynamic pages and are created using the Subpage component. For example, if you add a Subpage component to a dynamic page, clicking on that Subpage component will bring you to the Subpage mobile screen.
Workflow Actions: Settings in the Task Builder also control which default Workflow Actions appear within the task. Workflows Actions – found by tapping the “...” icon on the top left of the mobile navigation bar – are used to call a separate page from within a Task.
Task Approval Screens (and closeout package): The appropriate Task Approval screens on the web and accompanying closeout package are then automatically generated based on the fields/data captured in the dynamic pages and the settings configured in the Task Builder wizard.
If you use the Task Builder, there is no need to configure a Task Type for the same task as it replaces Task Types as a means of defining mobile workflows.
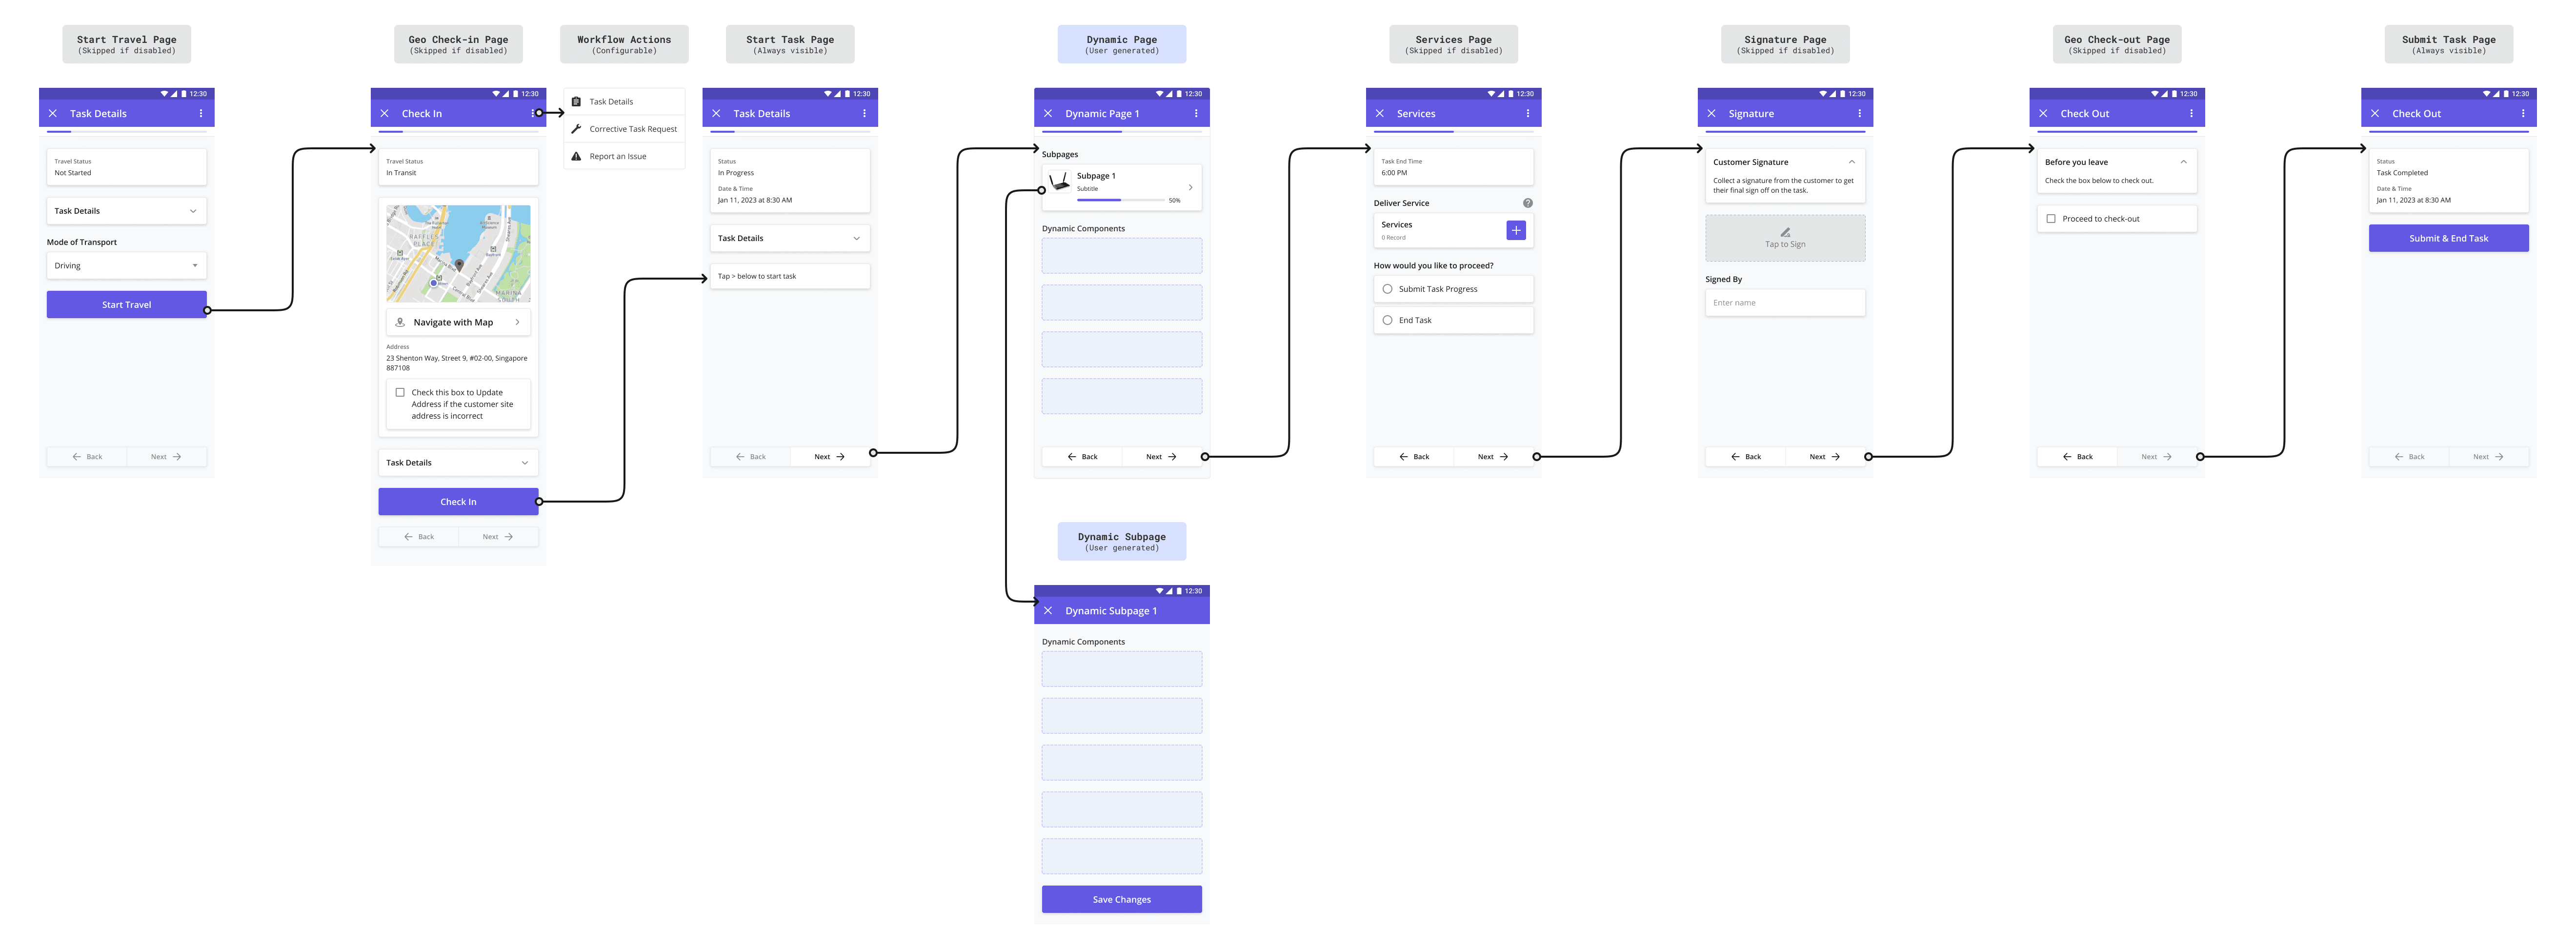
Mobile Workflow Template Diagram
The diagram below shows the pages and flow that the Task Builder is based on. We will refer back to this diagram and the associated page names in the pages that follow.
Resulting Task Approval Screens on the Web
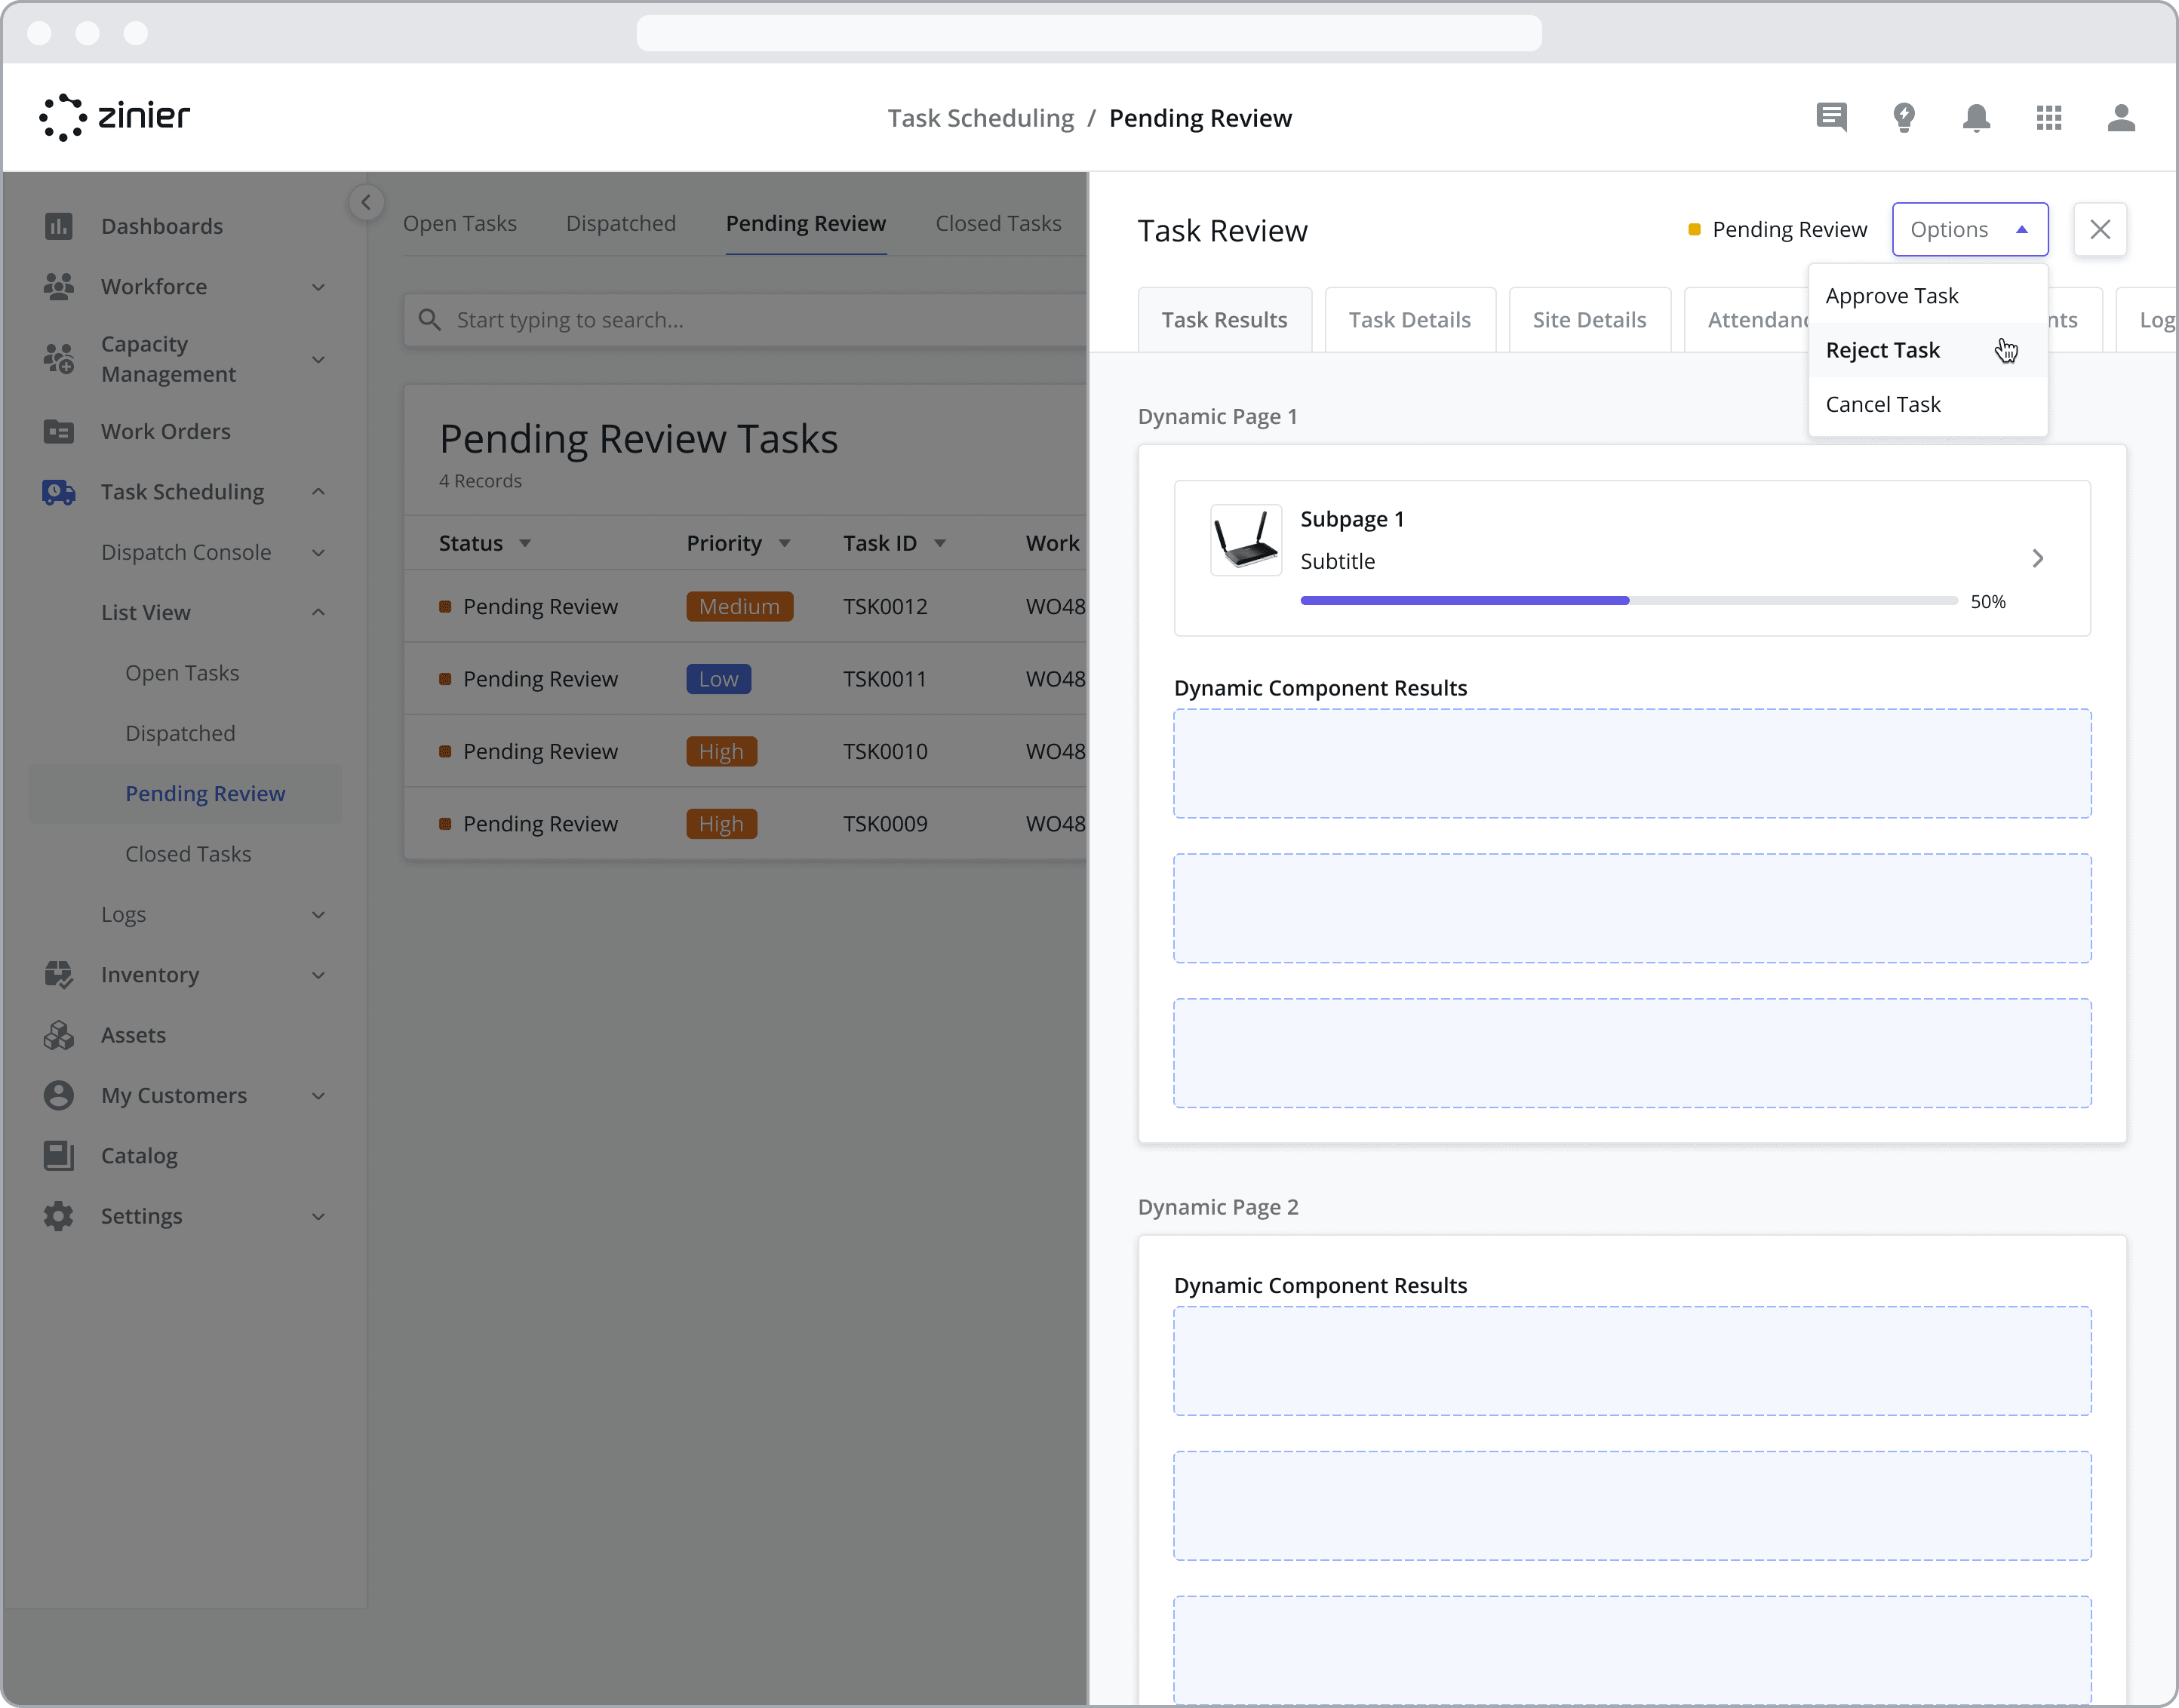
In addition to generating the mobile pages, the Task Builder also auto-generates the applicable Task Results sidepanel to facilitate task review and the closeout package PDF that the captured data is based on. The Task Results sidepanel is visible when a user reviews a completed task from the Task Scheduling > List View > Pending Review module.
Task Results Sidepanel
The image below highlights the relationship between the captured data from the dynamic pages and subpages built using the Task Builder and the Task Results sidepanel.
Note that clicking on the “Subpage” card component below (on the web) brings you to a nested sidepanel showing the data captured by the subpage.
Accessing the Task Builder
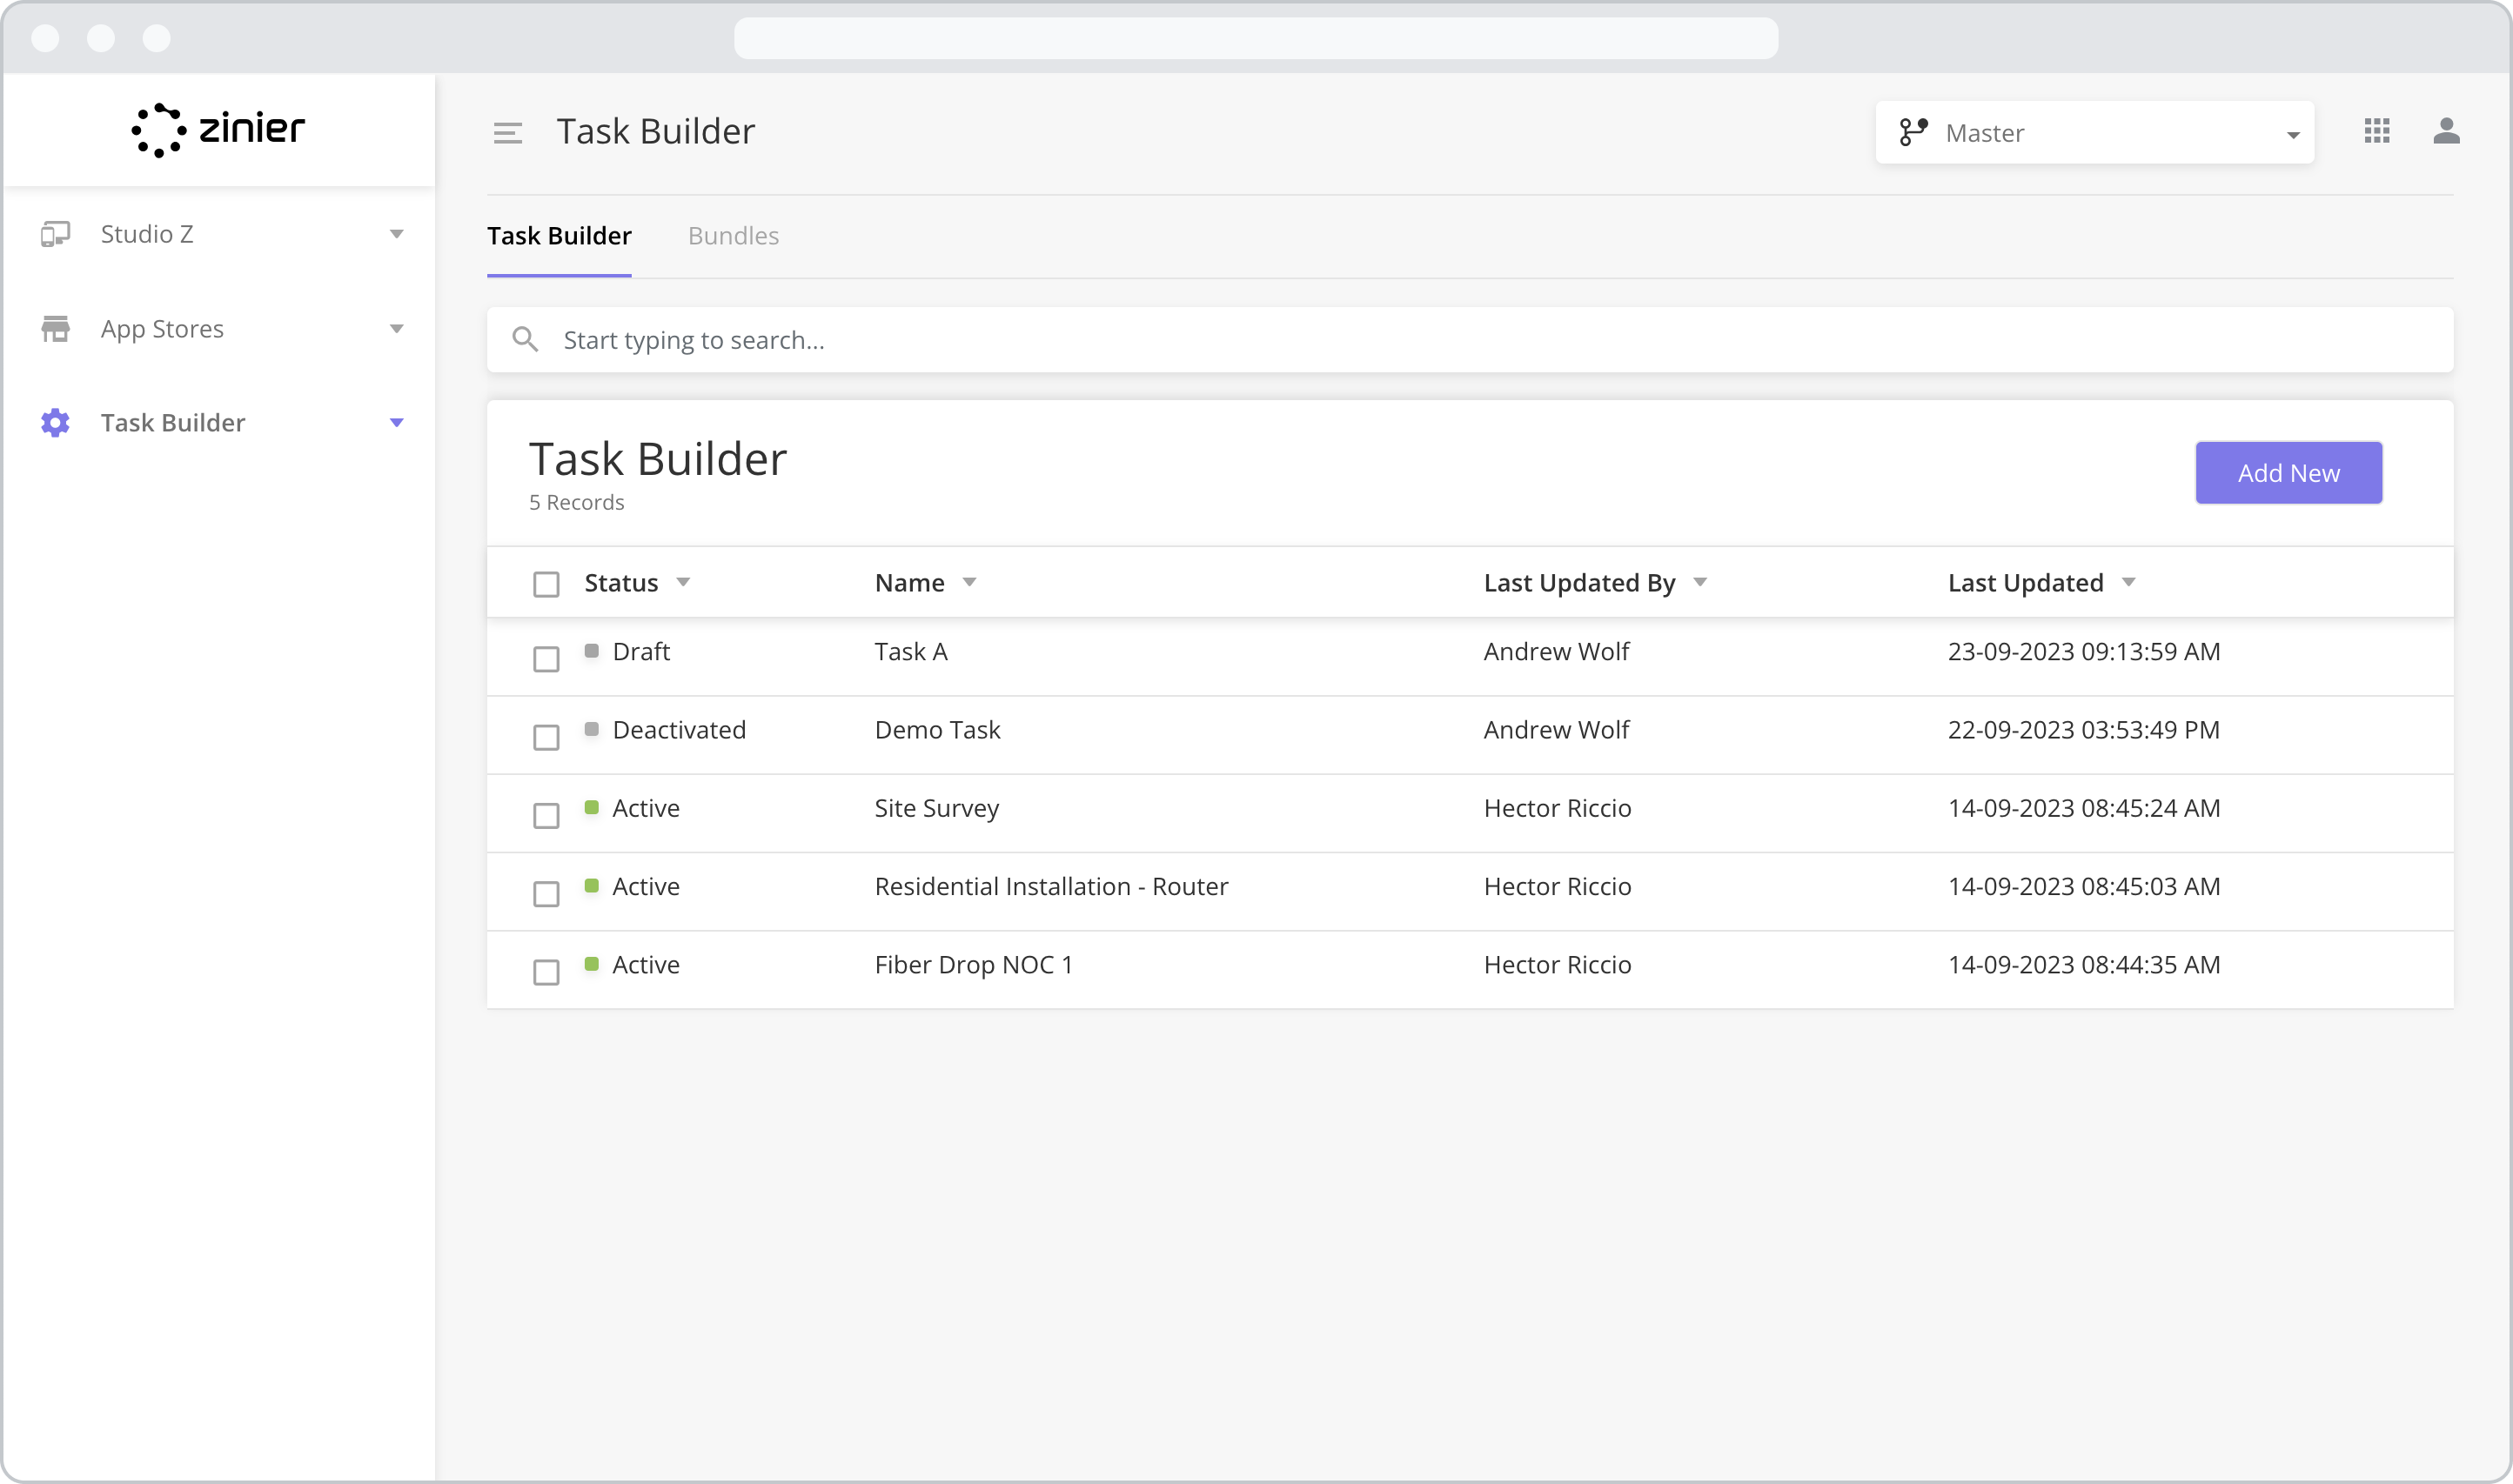
To create a new task, open the Studio Z app by clicking on the Zinier Apps icon on the top right of the screen. After opening Studio Z, go to the Task Builder module, and click the “Add New” button in the top right of the data grid to enter the Task Builder wizard. After entering the Task Builder wizard, you will need to complete the 4 step process outlined below to publish the task.
Autosaving and Task Status
It is important to note that the Task Builder wizard automatically saves your progress along the way so you don’t lose any unsaved work. Tasks can have one of two statuses:
Draft: As soon as you enter the wizard for the first time, the task will show a status of “Draft”. The task keeps this status during the initial building phase.
Active: The task will remain in “Draft” mode until you publish the task during the last step of the wizard. Publishing the task changes its status to “Active” and makes the task available across Zinier Productivity Suite, where it can be added to Work Orders, assigned to technicians, etc.
Deactivated NEW (23.9): “Deactivated” tasks are published tasks that are actively hidden from use in the Zinier Productivity Suite and can no longer be added to Work Orders, assigned to technicians, etc. To deactivate a published task, go to the Task Builder module, hover over the task type you wish to deactivate, and click on the “Deactivate” icon.
If you’d like to discard the changes you’ve made since entering the wizard, click the “X” button and select “Discard Changes”. This applies to both Draft tasks and Active (published) tasks, which can be modified at any time.
Duplicating a Task Type
NEW (23.9)
Users can also duplicate a task type in the Task Builder, instead of replicating it from scratch. This helps reduce the amount of setup work required to create a similar task. To duplicate an existing task, go to the Task Builder module, hover over the task type you wish to duplicate, and click on the “Duplicate” icon.
Deactivating a Task Type
NEW (23.9)
After a task has been published with a status = “Active”, users have the option to deactivate it in order to hide the task type from use in the Productivity Suite. If the Task Type is deactivated, it won’t be available for use when creating new Tasks within Work Orders and it’s status will change to “Deactivated”. To deactivate a published task, go to the Task Builder module, hover over the task type you wish to deactivate, and click on the “Deactivate” icon.
Creating a Task Bundle
NEW (23.9)
If you’d like to migrate one or more tasks built using the Task Builder from one org to another, you can create a Task Bundle. Task Bundles – once published – then appear in the App Stores > Task Builder Apps module and can be installed in other orgs in the environment. To create a Task Bundle, follow the steps below:
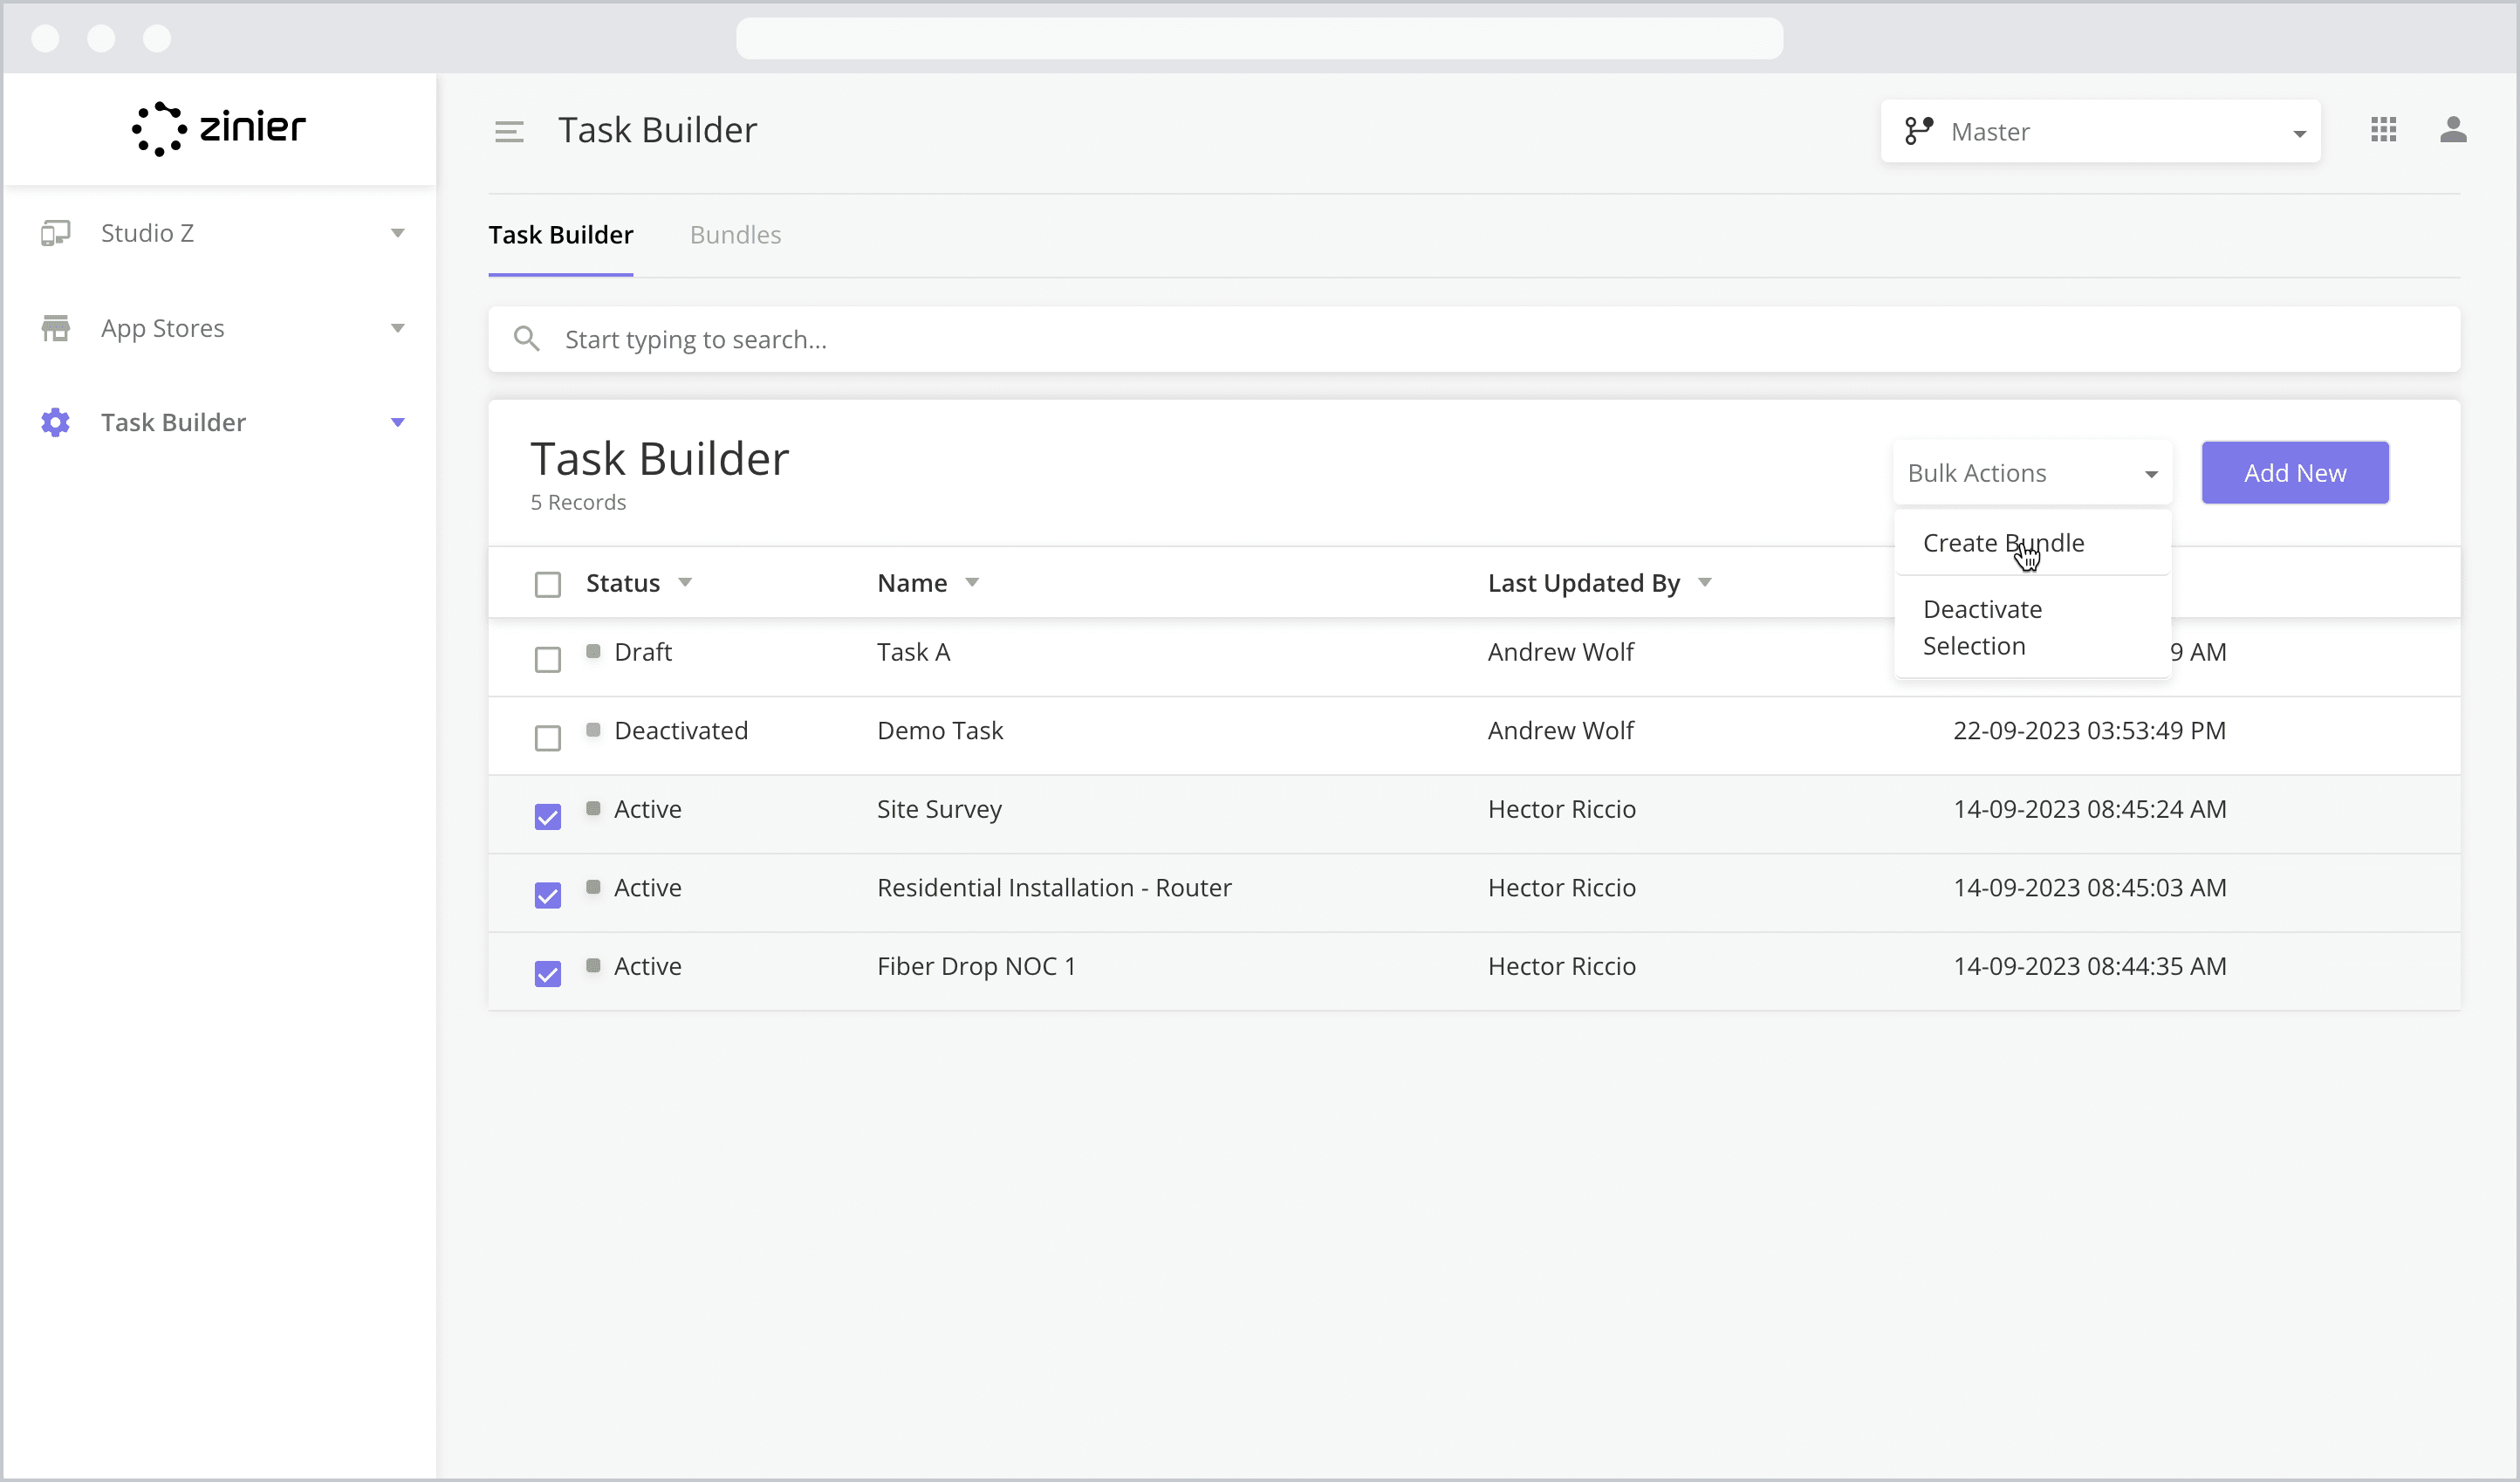
Navigate to the Task Builder module and select the Tasks you wish to bundle.
Only Active tasks can be bundled, so much sure your task is published before creating a bundle.
From the Bulk Action menu, select Create Bundle
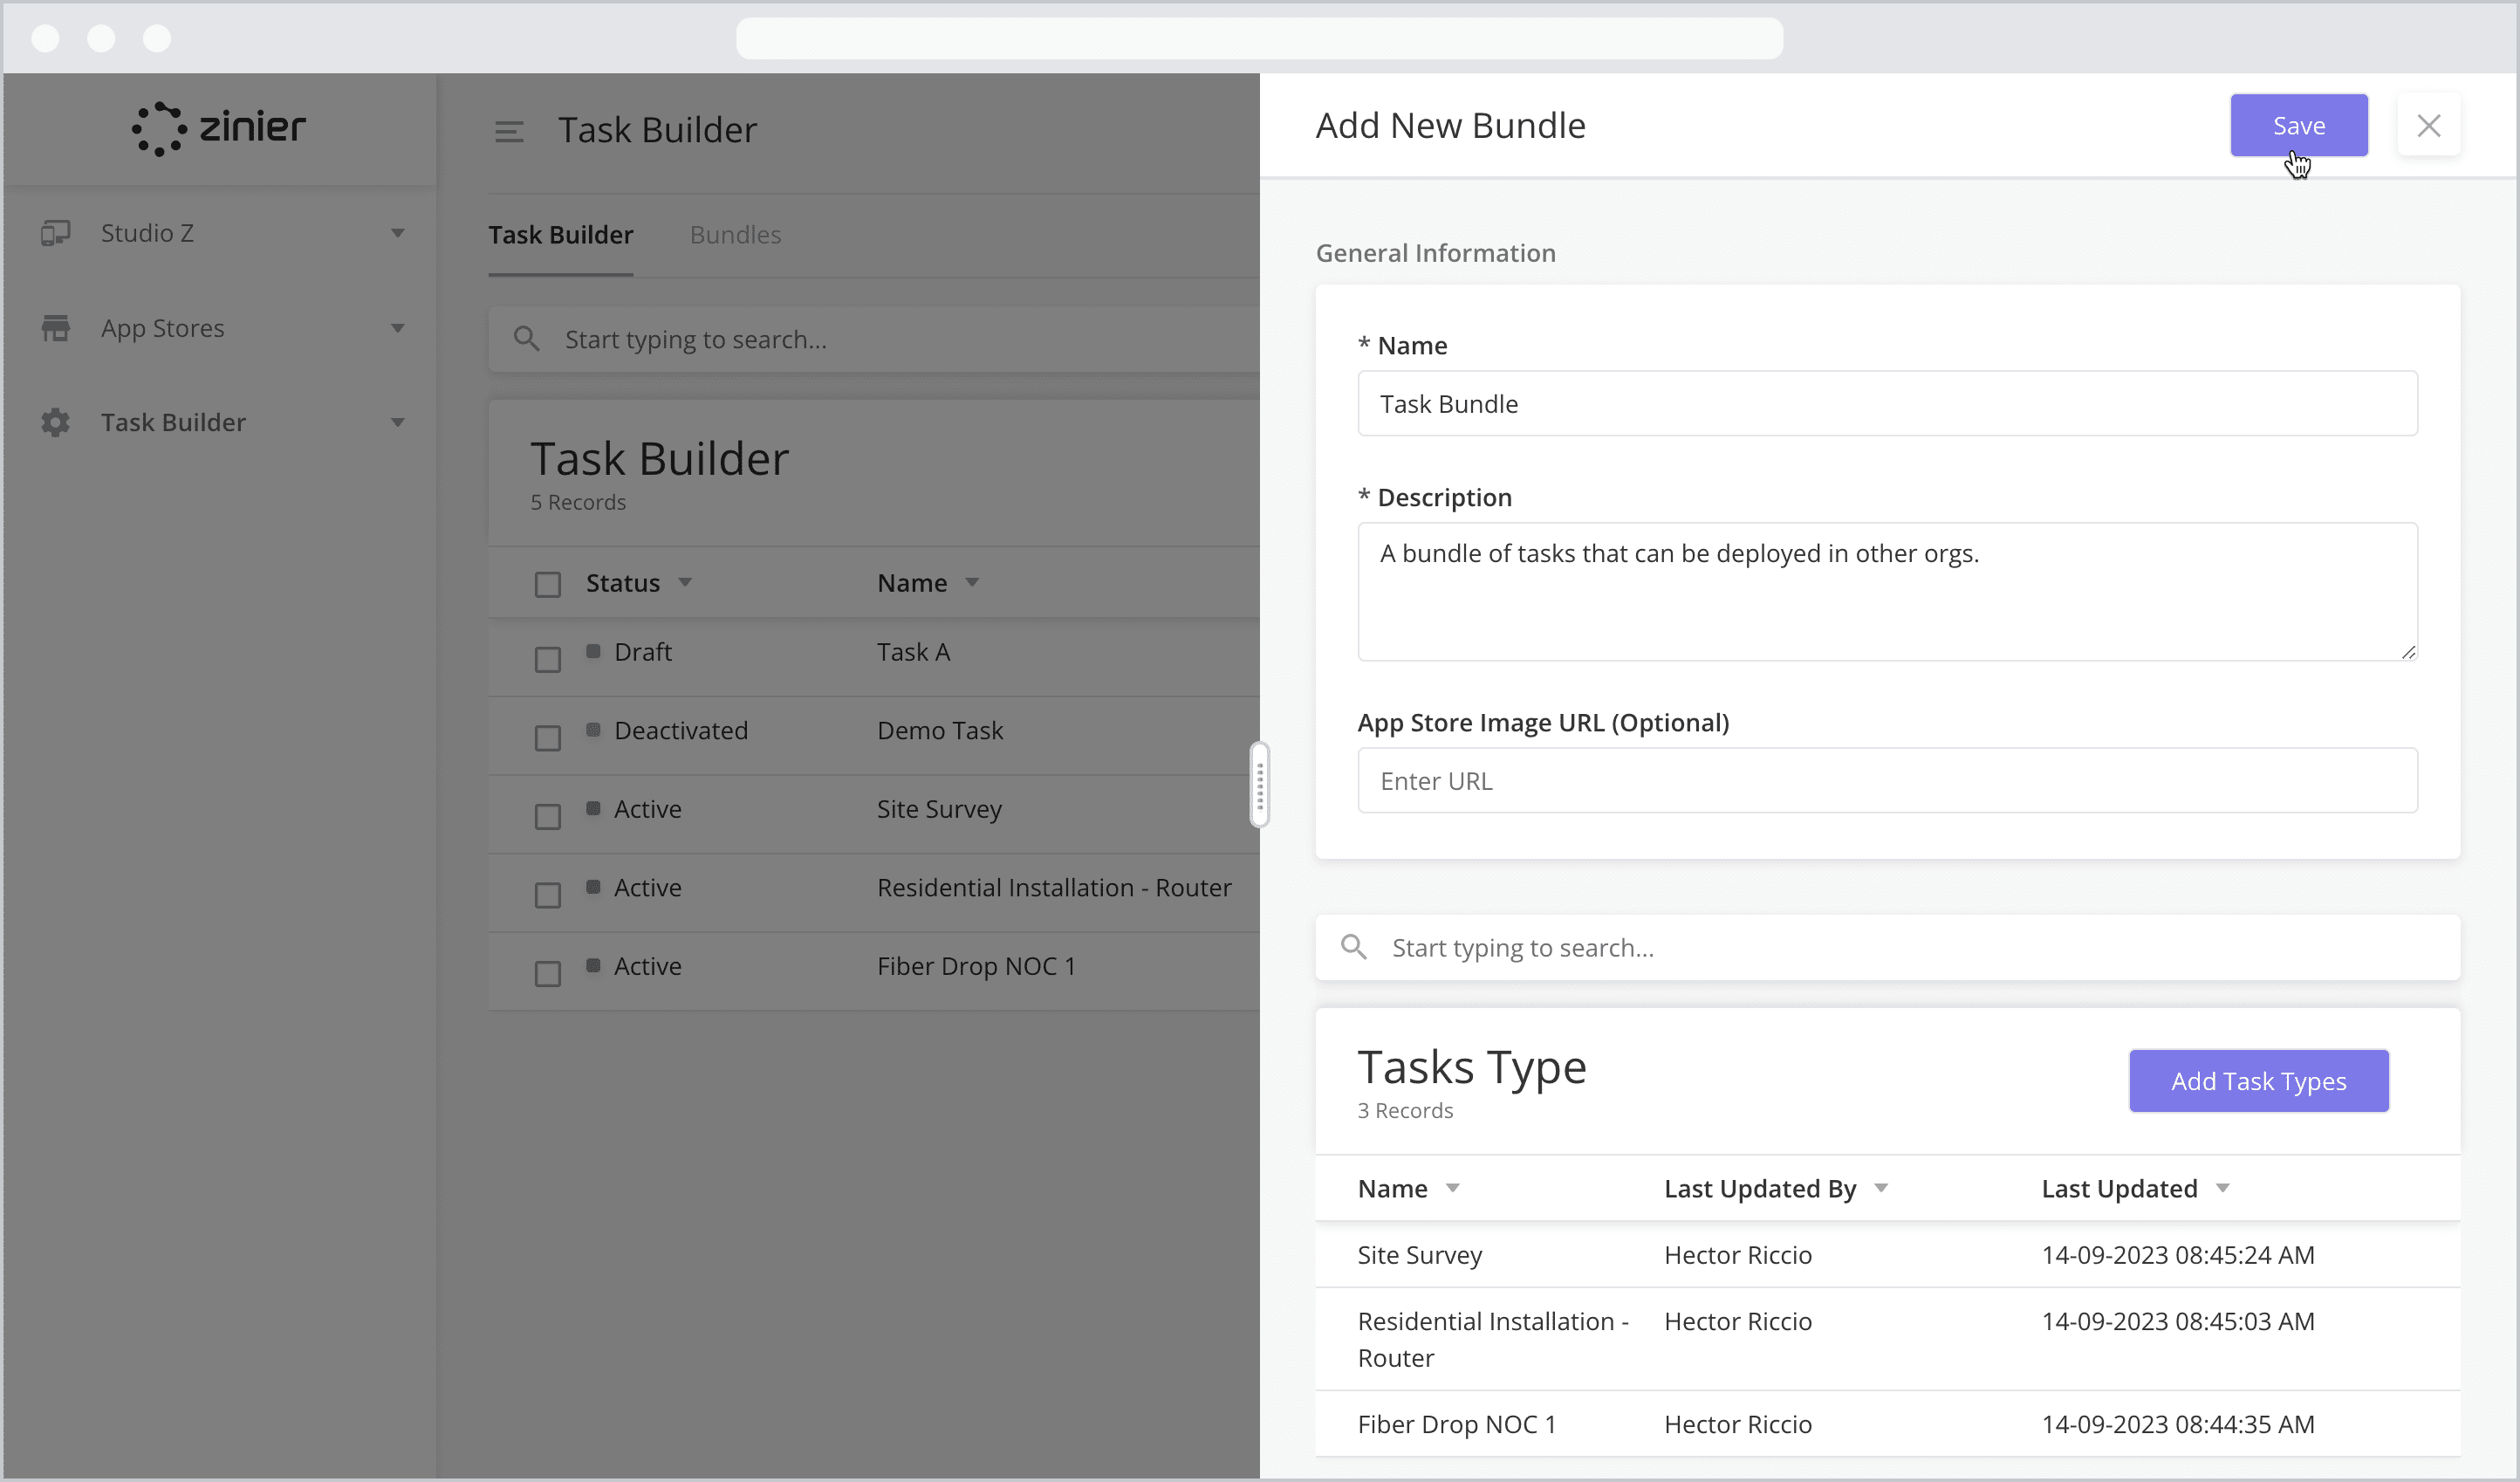
Give your bundle a Name and Description to help identify it in the App Store.
If you’d like to use a specific background image in the App Store, provide an App Store Image URL (Optional).
Click Save to create a “Draft” version of your Task Bundle.
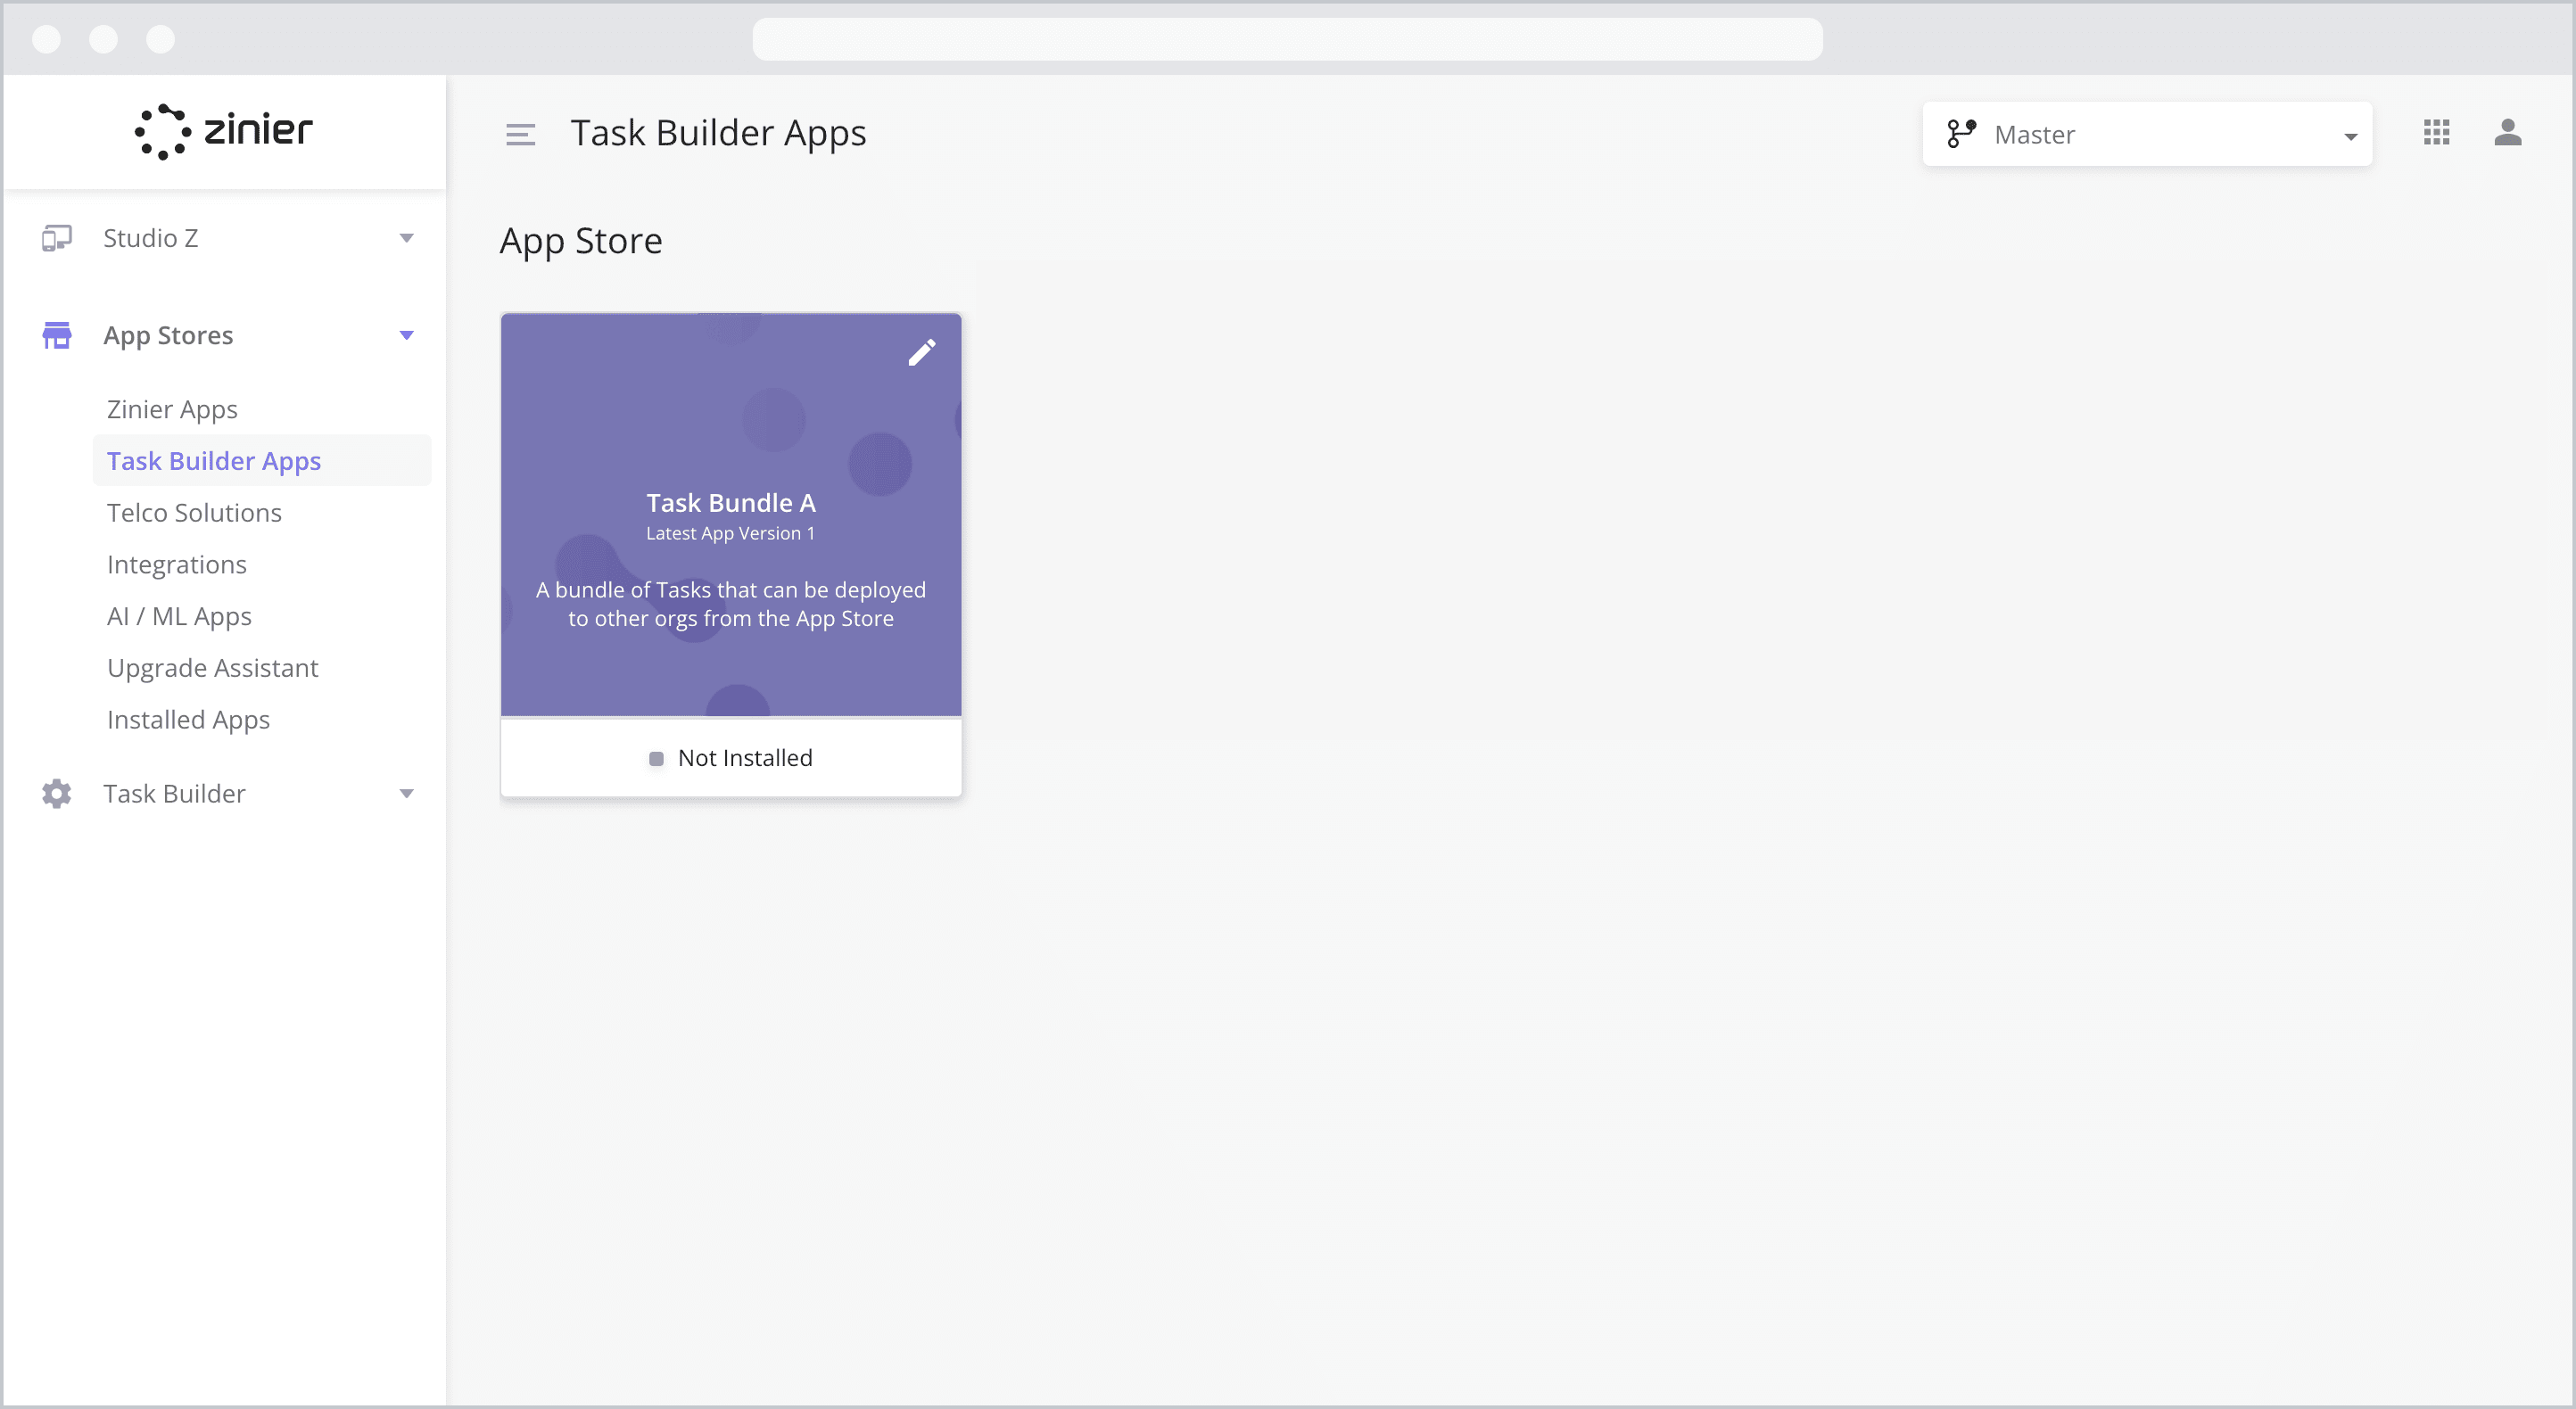
To publish your bundle in the App Store, navigate to the Task Builder > Bundles module and open the bundle you’ve just created.
Click the Publish button to complete the process.
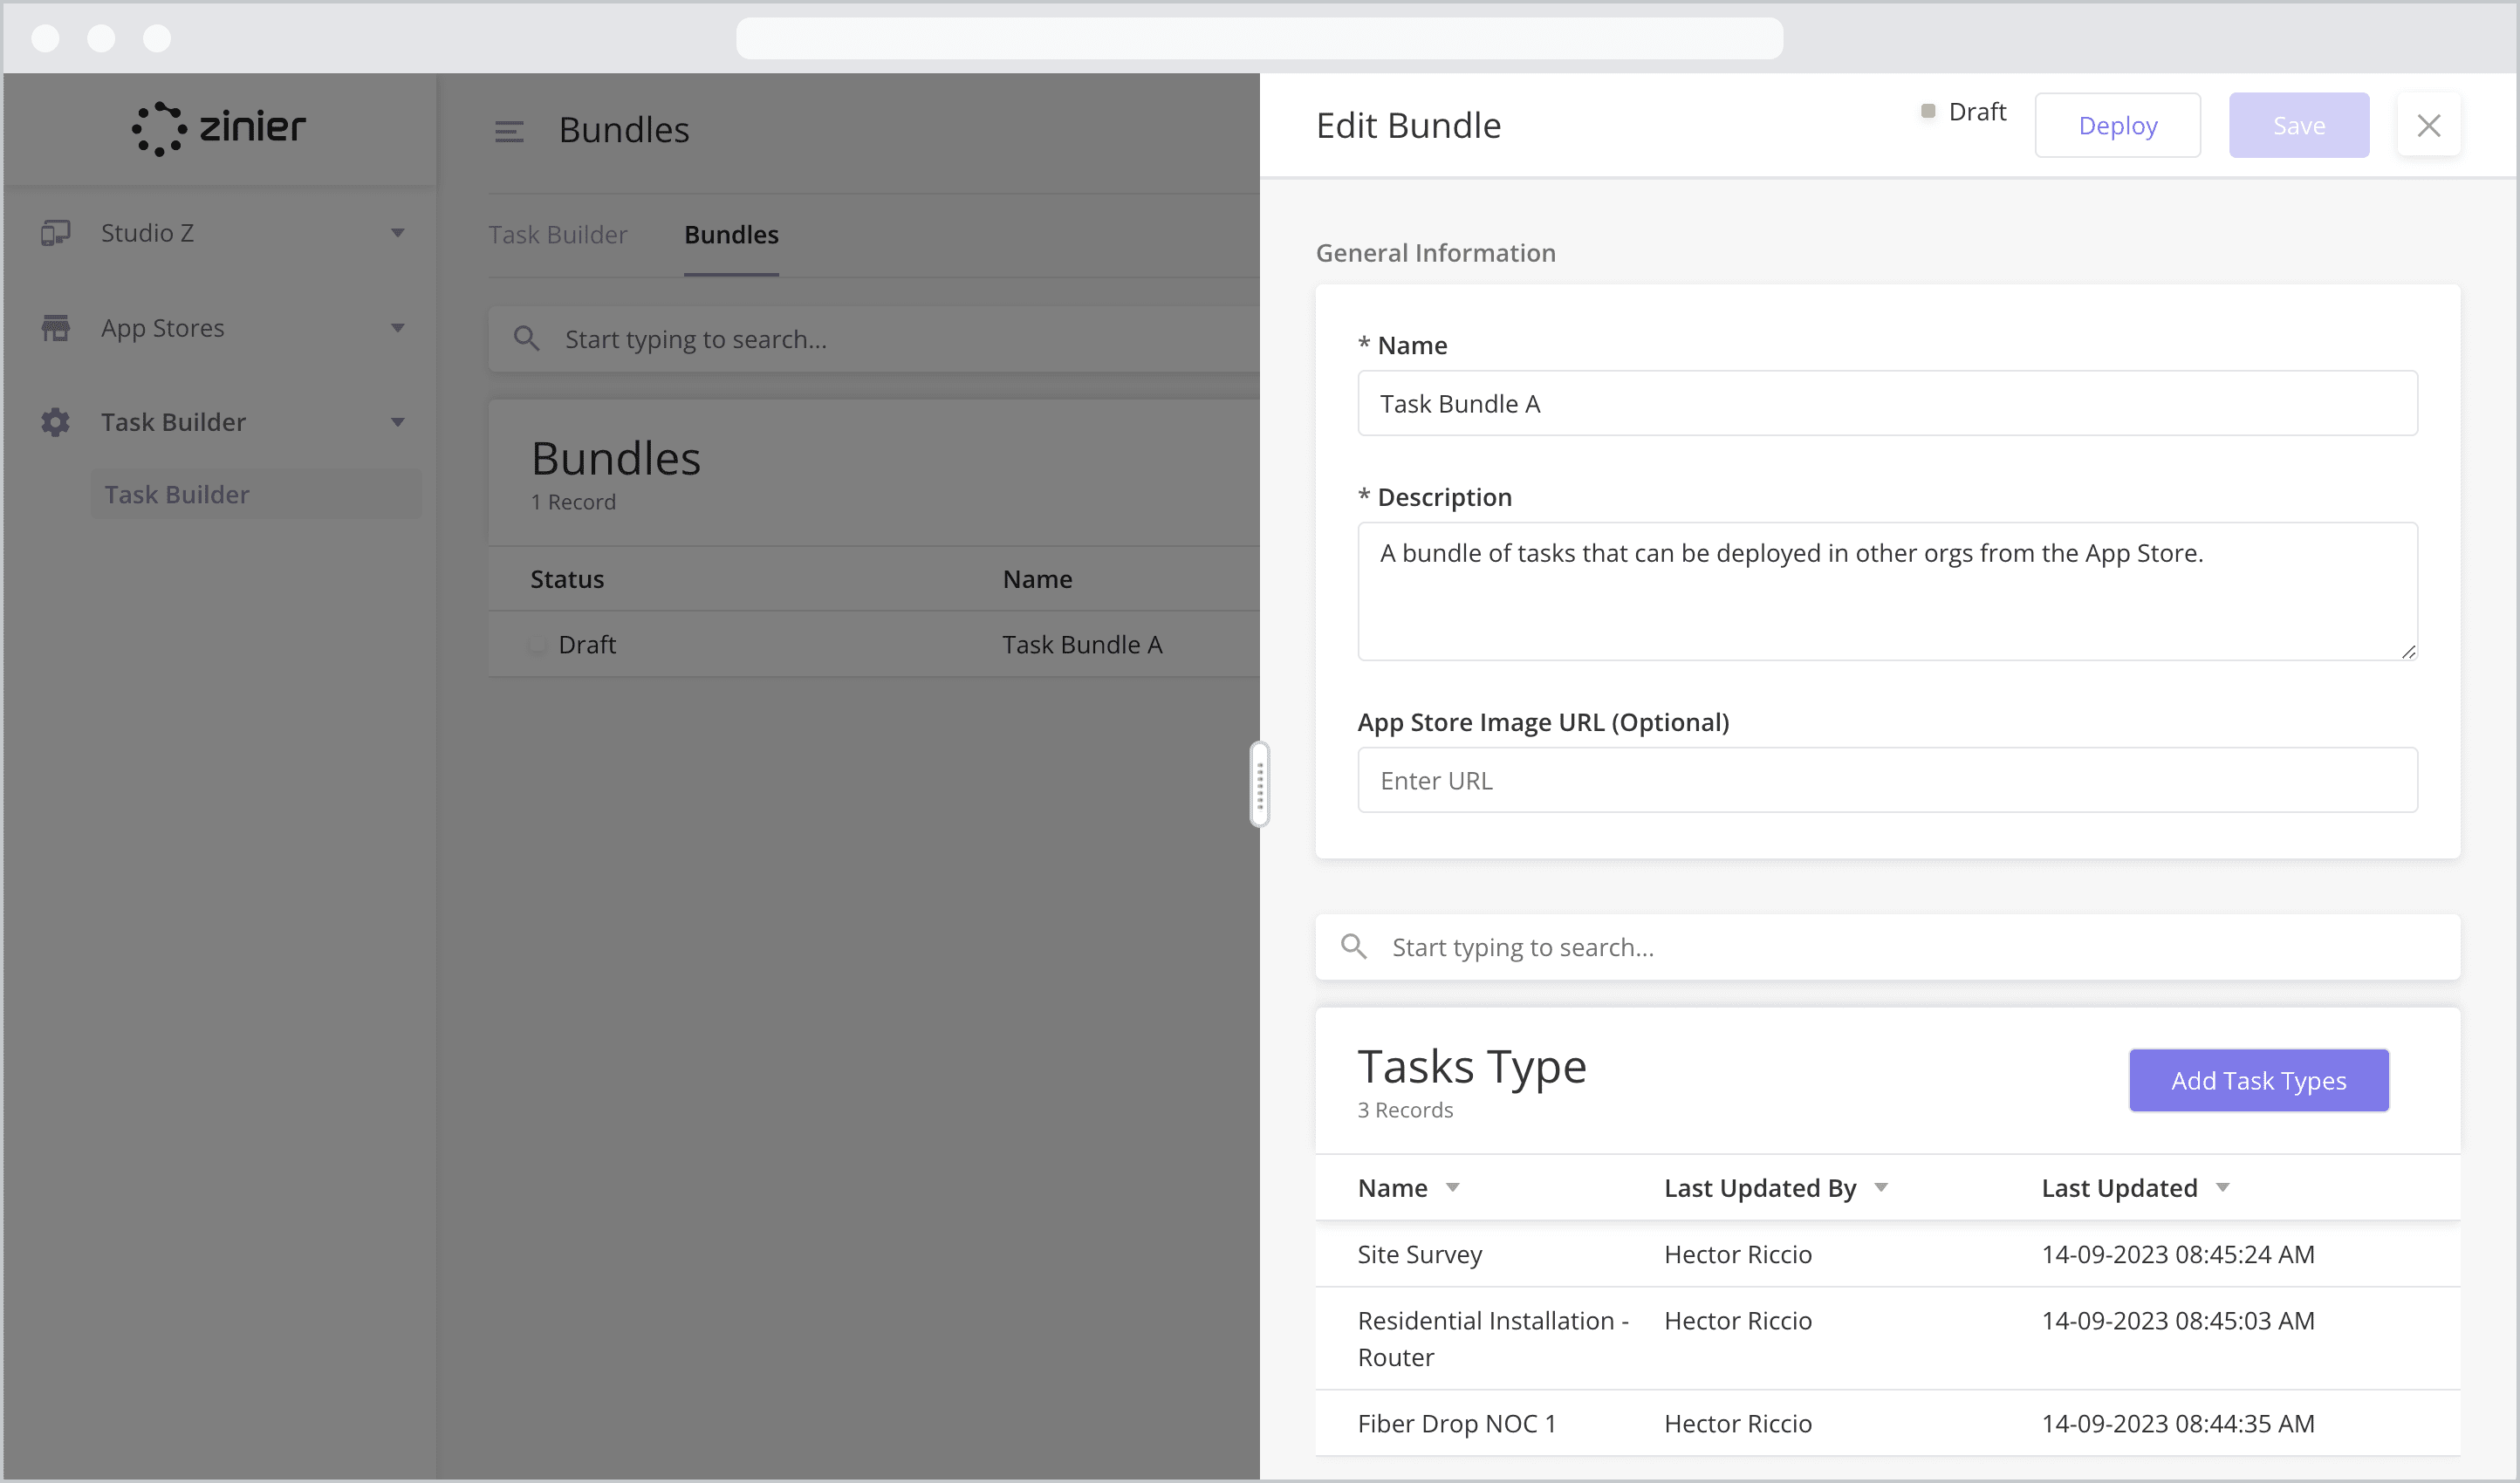
Your bundle is now available for installation in other orgs within the App Stores > Task Builder Apps module.