Step 1: Configuring the Task Settings
After entering the Task Builder wizard, the first step is to configure the Task Settings.

To configure the Task Settings, follow the steps below:
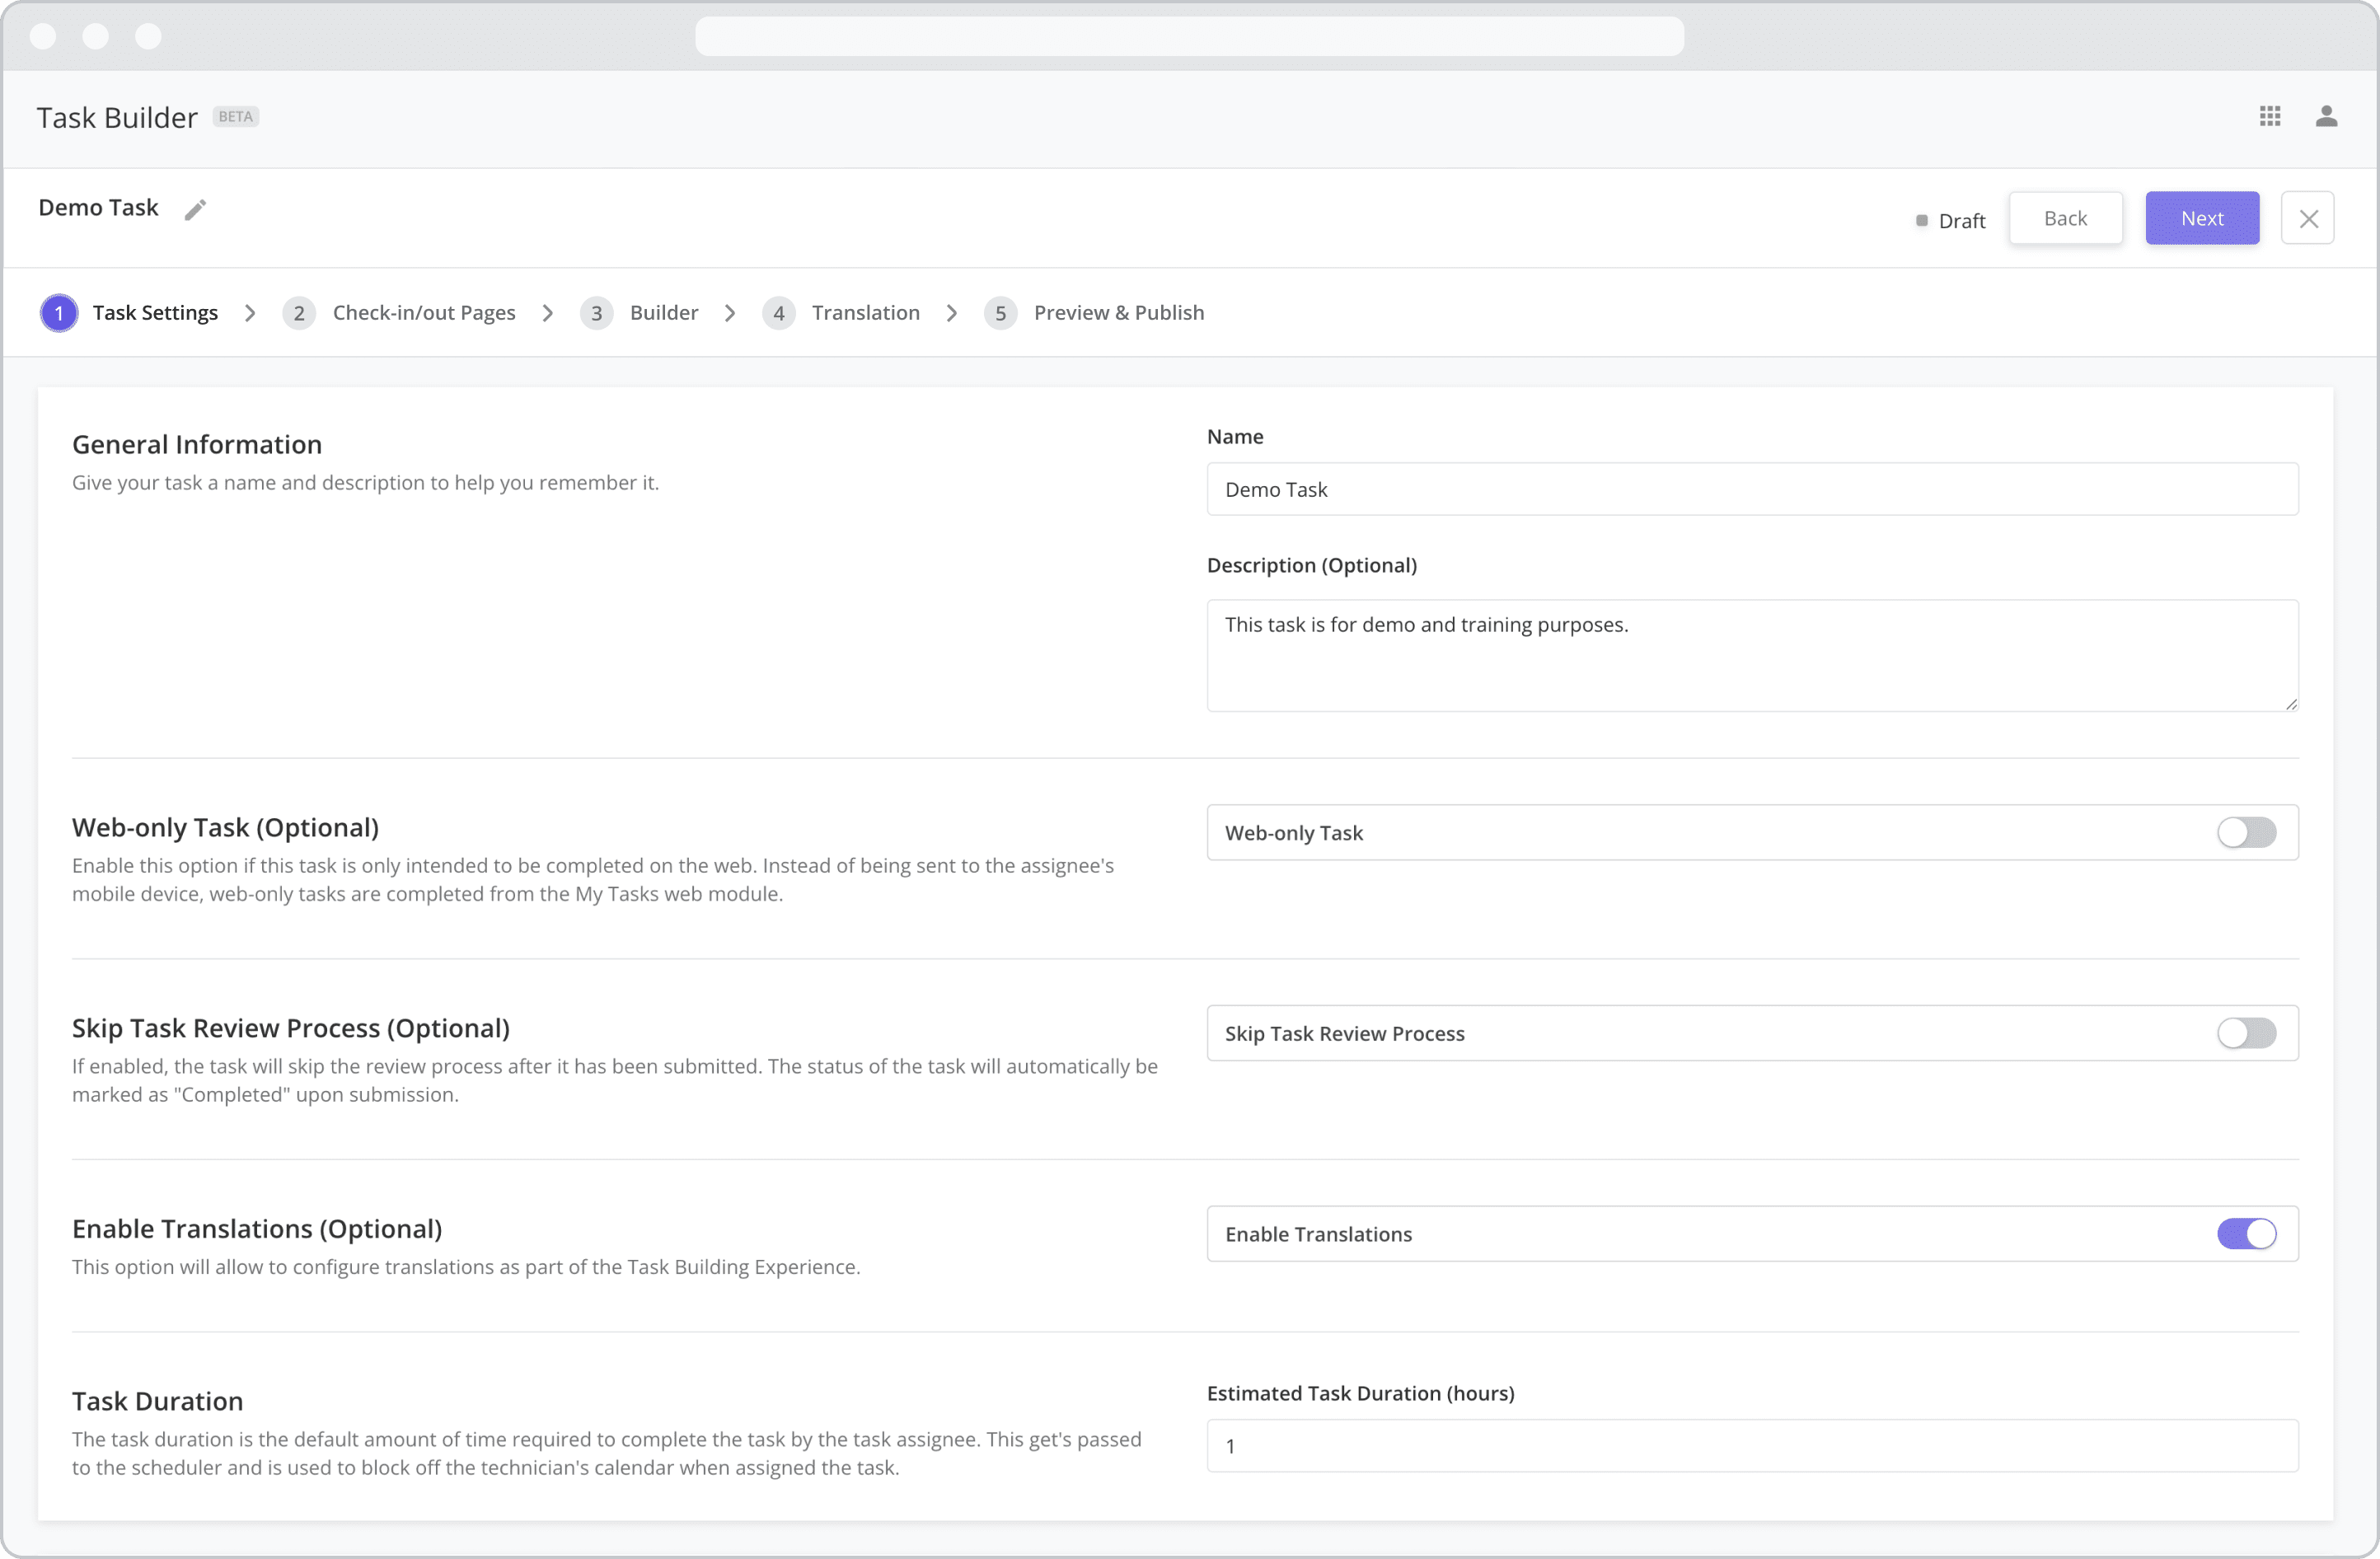
1. General Information
Name: The task name is used across the product and is what dispatchers will see when adding tasks to work orders or dispatching tasks.
Description: Enter a description to help you remember the purpose of the task.
2. Web-only Task (Optional) NEW (25.6)
Enable this option if this task is only intended to be completed on the web. Instead of being sent to the assignee's mobile device, web-only tasks are completed from the My Tasks web module. For more information on the difference between Web-only Tasks and normal tasks, refer to the Web Tasks vs. Mobile Taskssection.
In order for a technician to see Web-only Tasks, they must have access to the Web Application and the My Tasks module. For more information on adding and configuring Web Users, refer to the Inviting Users and Managing Groups section.
Web Tasks vs. Mobile Tasks: When a task has been configured as a “Web-only Task”, the “Check-in/out Pages” screen will be hidden from the builder. This is due to the fact that geo-location and other mobile settings are not applicable to Web Task use cases. Likewise, when a “Hybrid Task” is completed from the web, the “Beginning of Task” and “End of Task” screens will not be visible, and geo-location settings will not be applied. For more information, visit Web Tasks vs. Mobile Tasks.
3. Skip Task Review Process (Optional)
If enabled, the task will skip the review process after it has been submitted. The status of the task will automatically be marked as "Completed" upon submission. For more information on Task Review, refer to the List View | Approving-or-Rejecting-Completed-Tasks section.
4. Enable Translations (Optional)
This option will allow to configure translations as part of the Task Building Experience. For more information on Translations, refer to the Step 4: Translations section.
5. Task Duration
Estimated Task Duration (hours): The estimated duration is used in Task Scheduling to determine the block of time a task takes to complete. It is also seen by technicians when they browse their task list on the mobile app. For example, if a user is assigned a task at 9:00 am and the duration is 60 minutes, the task will then show 9:00 am - 10:00 am in their task list.
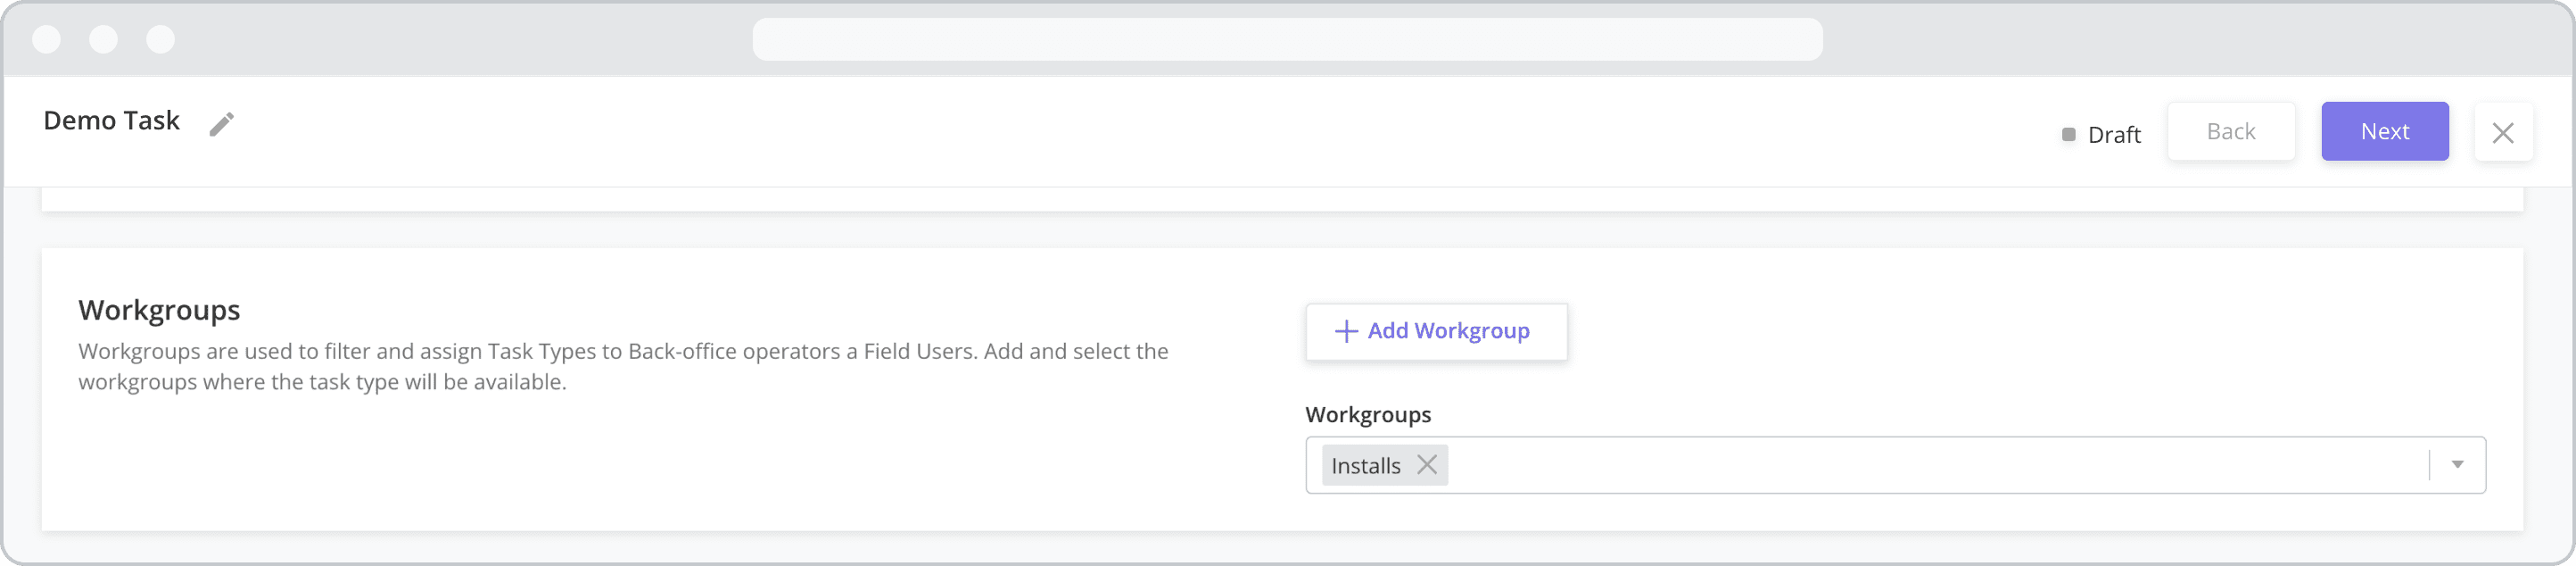
6. Workgroups NEW (25.6)
Work Groups are used in order to filter Tasks and Technicians so dispatchers can focus only on their area of responsibility. If your organization is using Work Groups, add and select the workgroups to which you wish to assign the task type.
Adding a New Work Group
In addition to selecting an existing Work Group, you can also create a new Work Group from the settings screen by following the steps below:
Click the + Add Workgroup button
Provide a Name and Description for the Work Group
Select the Technicians you wish to add to the Work Group
Click the Save button
Work Groups can also be created from the Workforce > Work Groups module. For more information on creating and configuring Work Groups, refer to the Work Groups page.
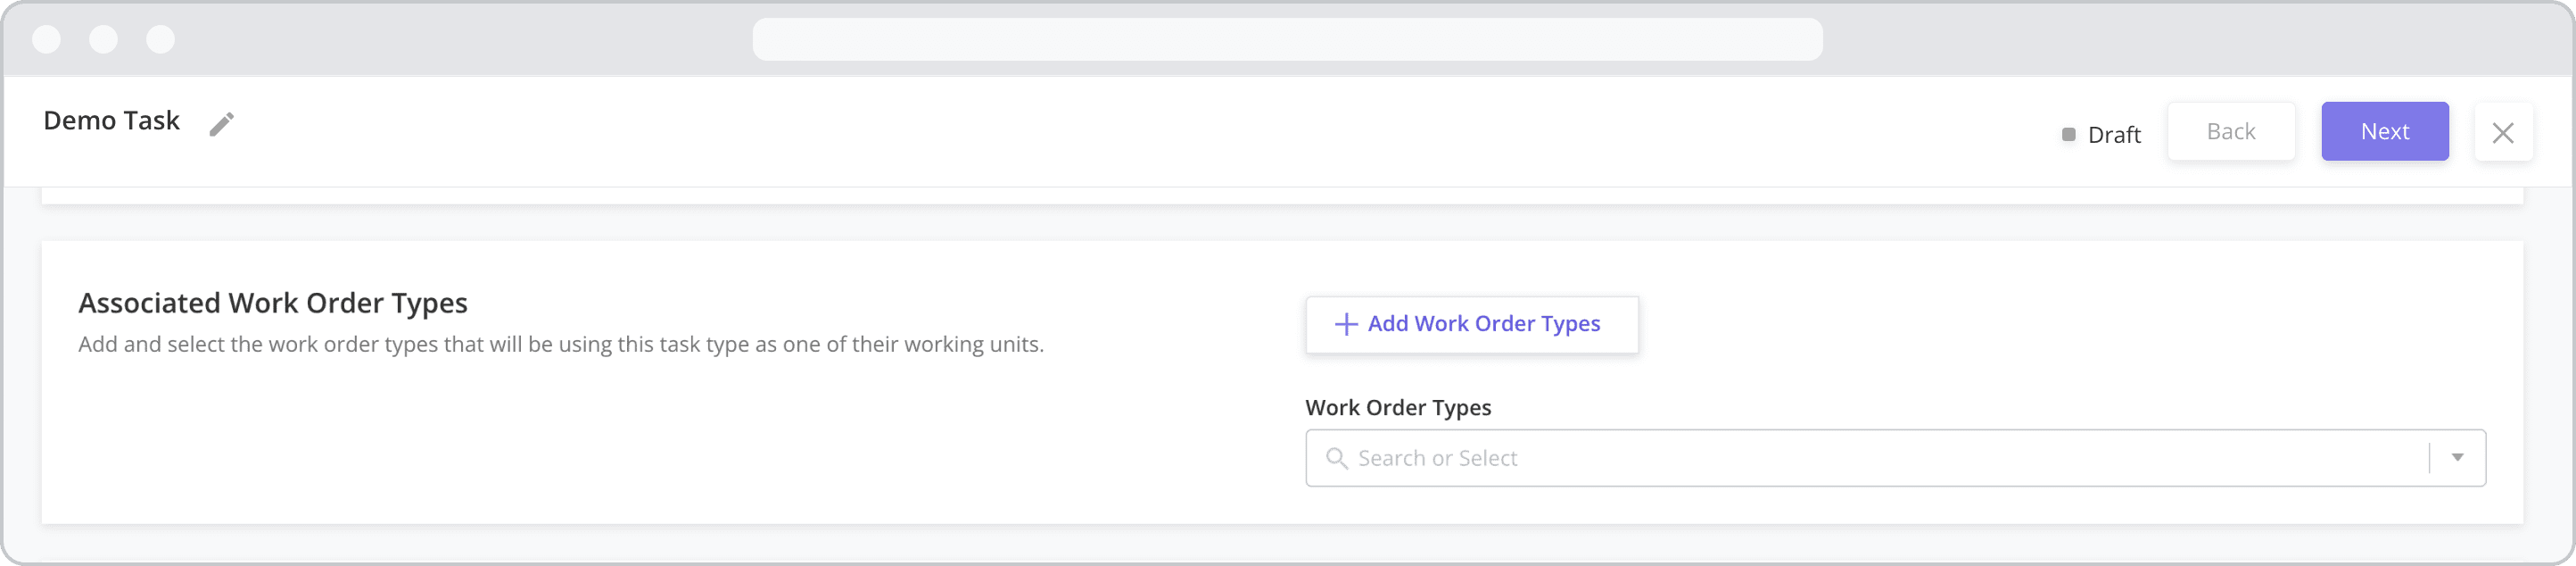
7. Associated Work Order Types NEW (25.6)
Work Order Types are used to define which Task Types can be added to a particular type of Work Order during Work Order creation, allowing org admins to group Task Types together under the umbrella of a Work Order Type. When creating a Work Order, only Task Types that have been tagged to the Work Order Type being created will be available for assignment as part of the Work Order.
Adding a New Work Order Type
In addition to selecting an existing Work Order Type, you can also create a new Work Order Type from the settings screen by following the steps below:
Click the + Add Work Order Types button
Provide a Name and Description for the Work Order Type
Click the Save button
Work Order Types can also be created from the Settings > Work Order Settings > Work Order Types module. For more information on creating and configuring Work Order Types, refer to the Configuring Work Order Types page.
8. Task Approval Settings
Rejection Reason List: If the task does not get approved, the user approving the task selects from a pre-defined list of rejection reasons. Select the List Option to use if the task does not get approved.
Cancellation Reasons List: If the task is canceled, the user canceling the task will select from the list of cancellation reasons. Select the List Option to use if the task is canceled.
List Options must first be added from the Settings > General Settings > List Options module before they can be assigned here. For more information on adding and configuring List Options, refer to the List Options section.
9. Skills Required (Optional)
Skill and Skill Level: Skills and Skill Levels are used by the Tech Recommendation / Auto Scheduler when matching a technician to a task. If this task requires certain skills, add them here and technicians that do not have the requisite skill/skill level will not be auto-assigned to the task.
Skills must first be created from the Settings > Workforce Settings > Skills module. For more information on creating and configuring Skills, refer to the Skills page.
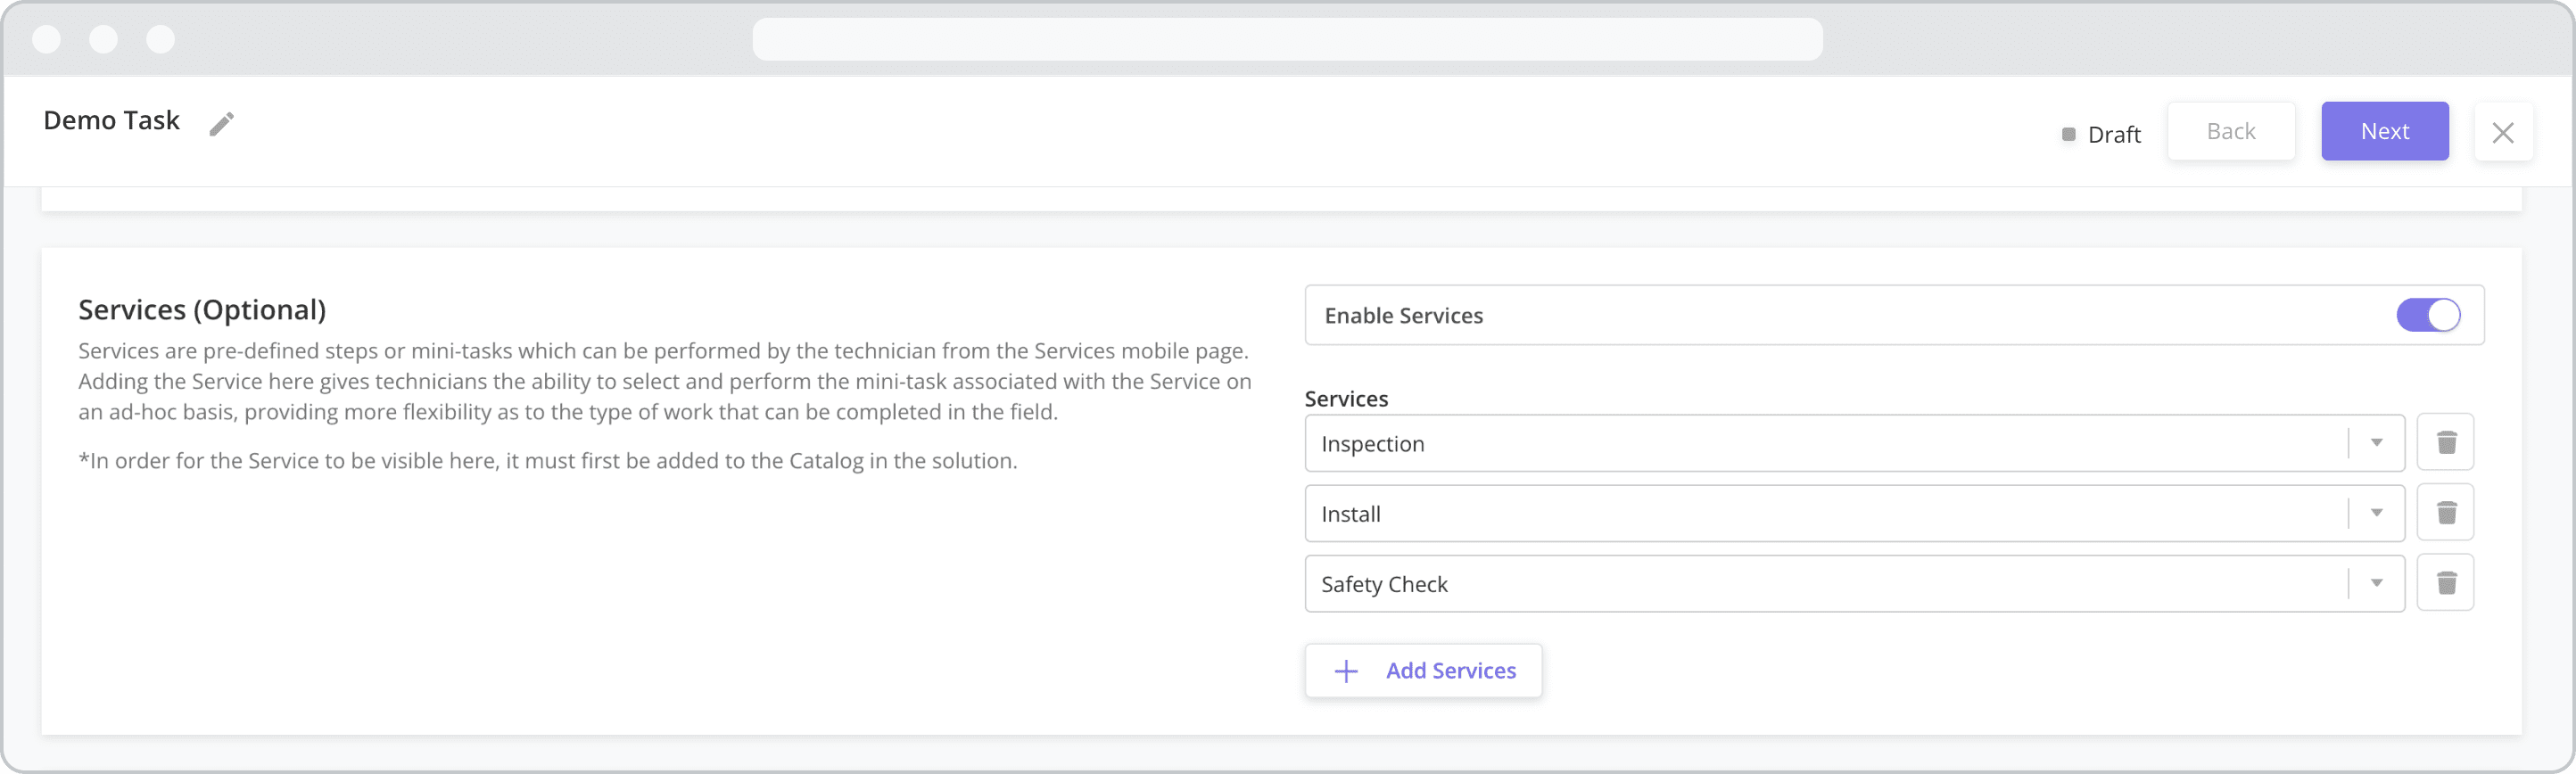
10. Services (Optional)
Services are pre-defined steps or mini-tasks which can be selected by the technician as needed. Adding the Service here provides the technician with the ability to select and perform the mini-task associated with the Service on an ad-hoc basis, providing more flexibility as to the type of work that can be performed in the field.
Enable Services: Enabling Services will make the “Services Page” in the mobile template visible. If left disabled, the page will not be visible to mobile users. Refer to the Mobile Workflow Template Diagram section for more information.
Services: Once Services are enabled, click the “+ Add Services” button to add Services to the task.
Services must first be created from the Catalog > Services module and configured as part of the Mobile Workflow in Studio Z. For more information on creating and configuring Services, refer to the Services page. For more information on adjusting Services for a Task when creating a Work Order, see the Work Orders page.
11. Materials (Optional) NEW (25.6)
Materials refer to consumable items in the inventory that may or may not use a serial number. Enabling Materials capturing here provides the technician with the ability to report the consumables and quantity that were used during the execution of the task. Refer to the Parts, Assets, Materials and Services Catalogs section for more information.

After completing Step 1, continue to Step 2: Configuring the Check-in / Check-out Pages