Work Orders
Work Orders capture all the information needed for a field service technician to complete fieldwork for a customer. Work Orders can contain any number of tasks which are then sent to the Scheduling & Dispatch module for deployment. In addition to being the vehicle for deploying tasks to the field, Work Orders also allow you to track the use of parts, Consumables, and Resources needed to complete those tasks. Once the Work Order is complete, the information it contains can then be used to create an invoice for the customer through the Billing & Invoicing module.
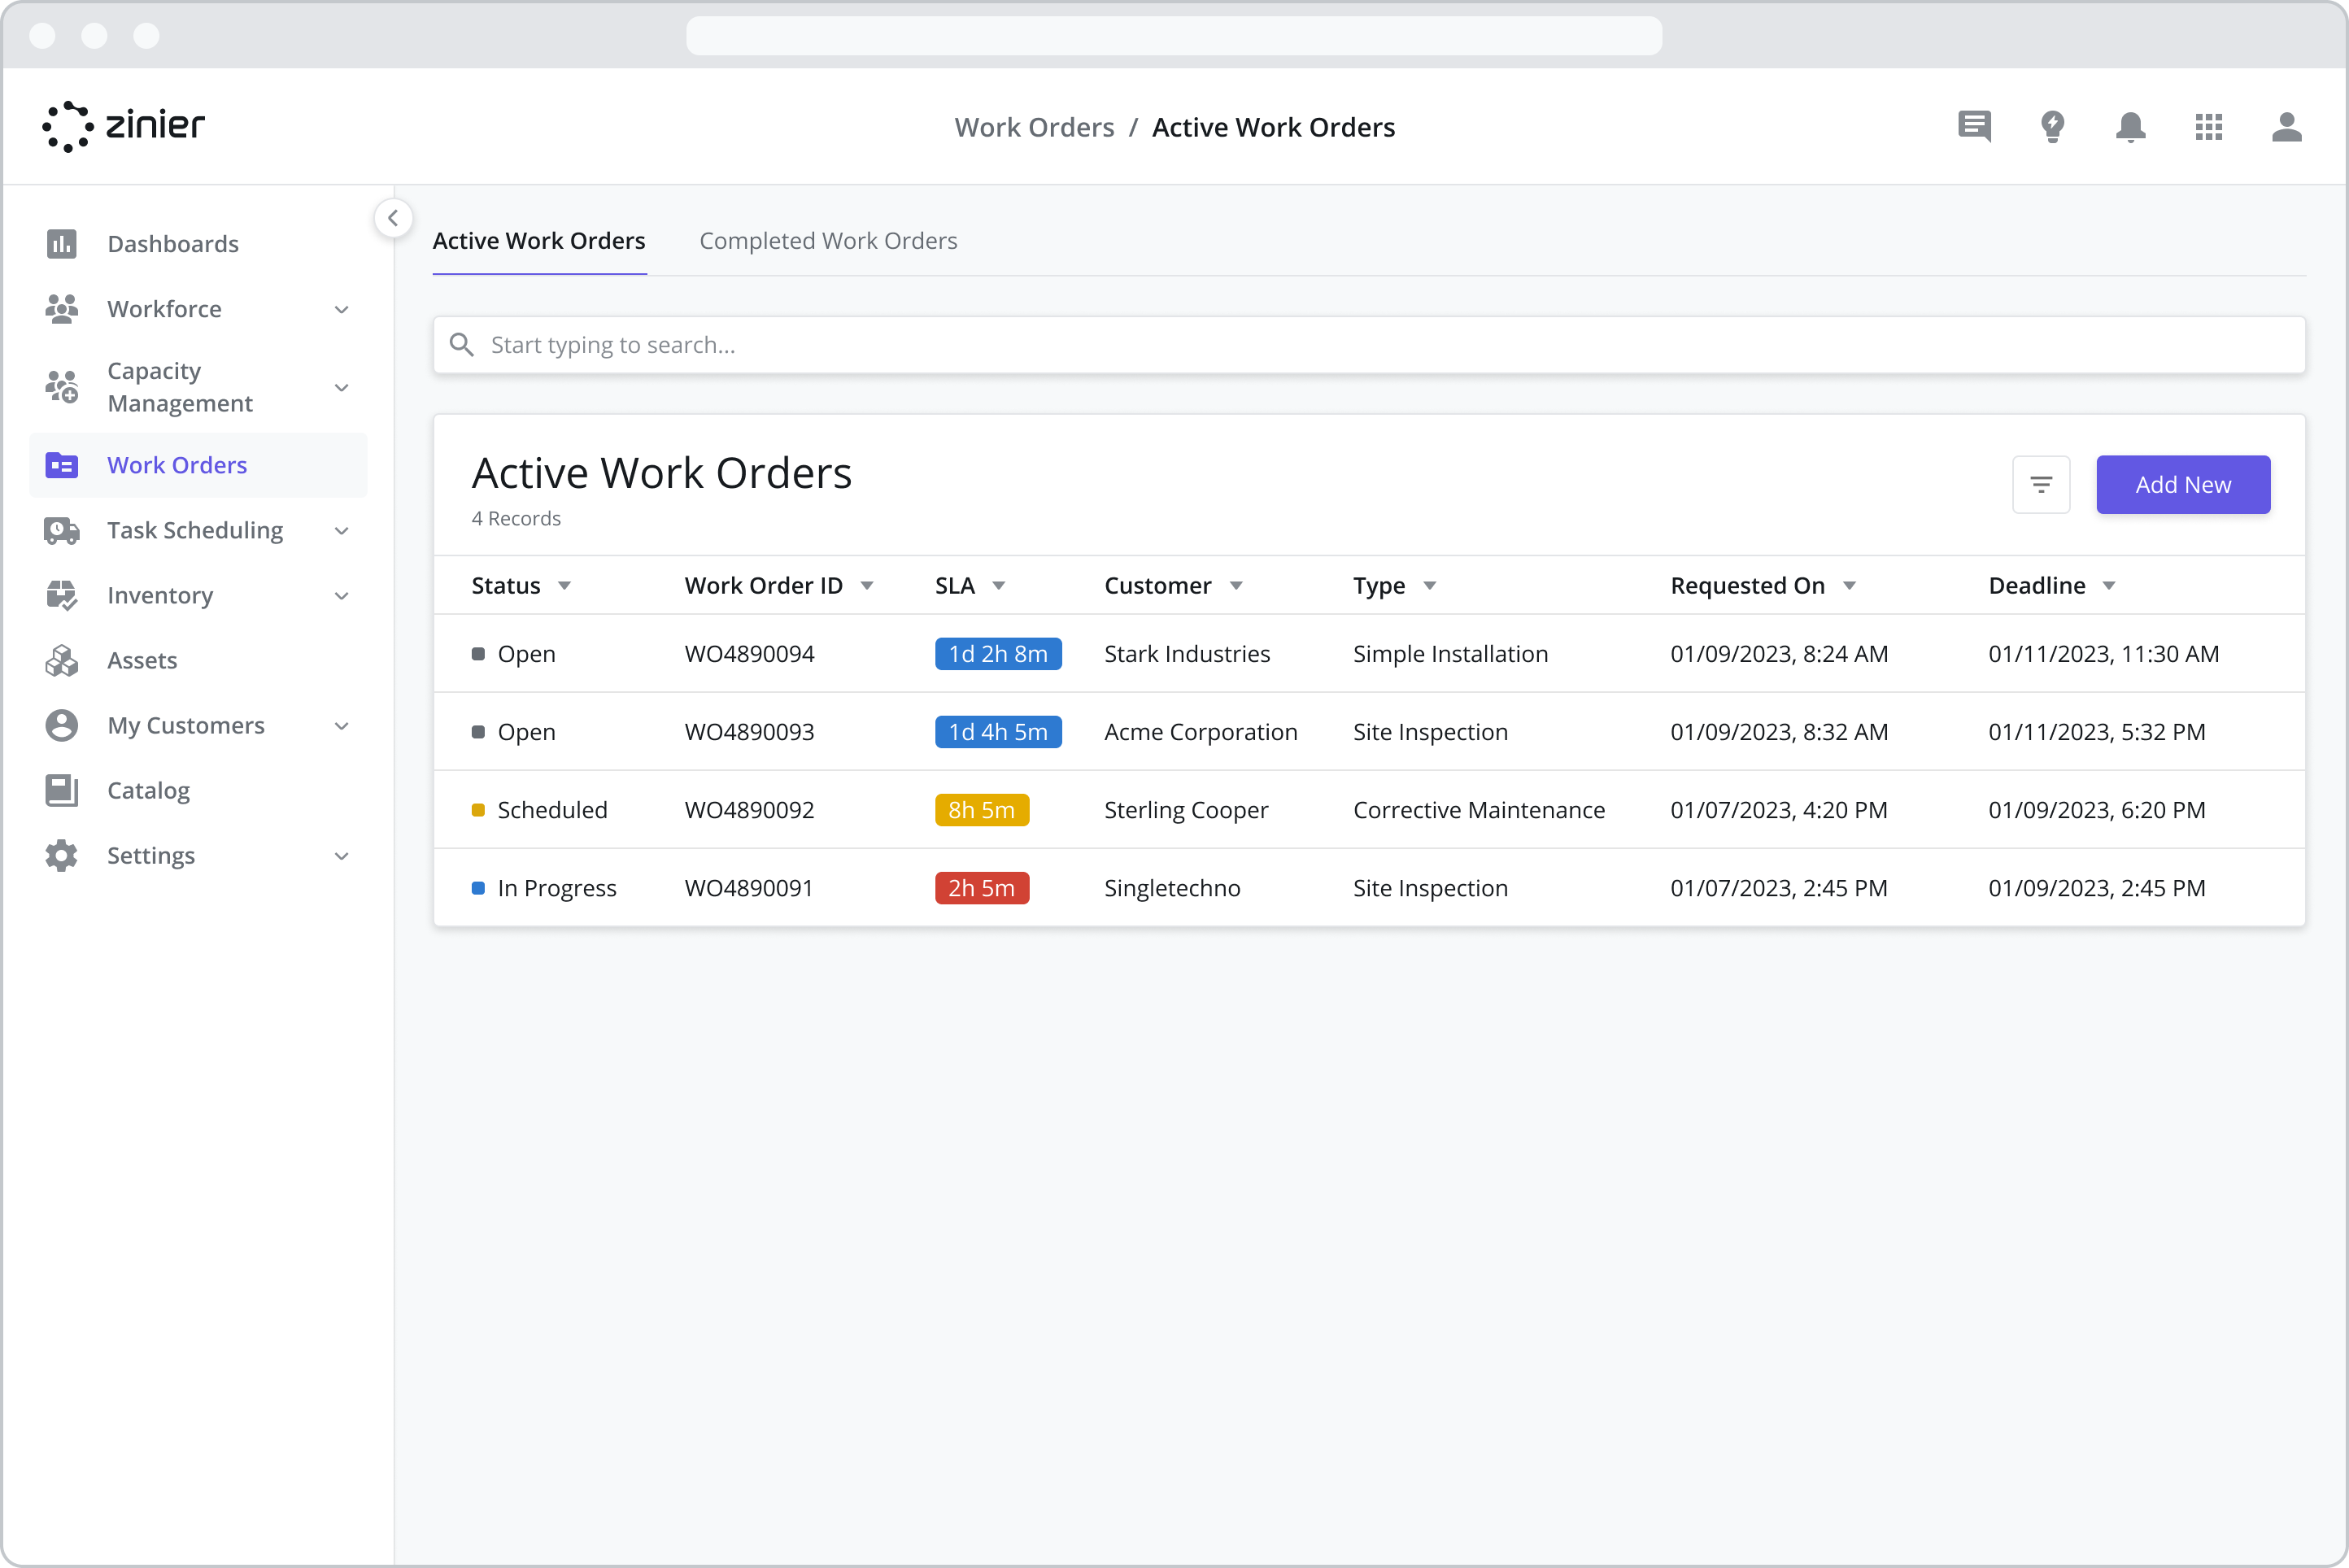
View Work Orders by Status
View the status of Active and Completed Work Orders. Work Orders can have one of the following statuses:
Open: Work Order is saved and tasks can be added. In Open status, the Work Order can be edited and/or canceled.
Scheduled: At least one task in the Work Order has been published and is in one of these statuses: Scheduled, In Progress, Pending Review, Reopened. In this state, the work order can be edited or canceled.
Completed: When all tasks within the Work Order are completed, the Work Order automatically transitions to Completed status. Completed Work Orders may contain one or more tasks that have been canceled, but at least one was completed.
Canceled: This status indicates the Work Order was canceled by a web user. All tasks which were not previously completed are also canceled by default when the parent work order is canceled. Canceled Work Orders and Tasks cannot be reopened.
Create and Manage Work Orders
https://vimeo.com/820038638/241a326a3f?share=copy
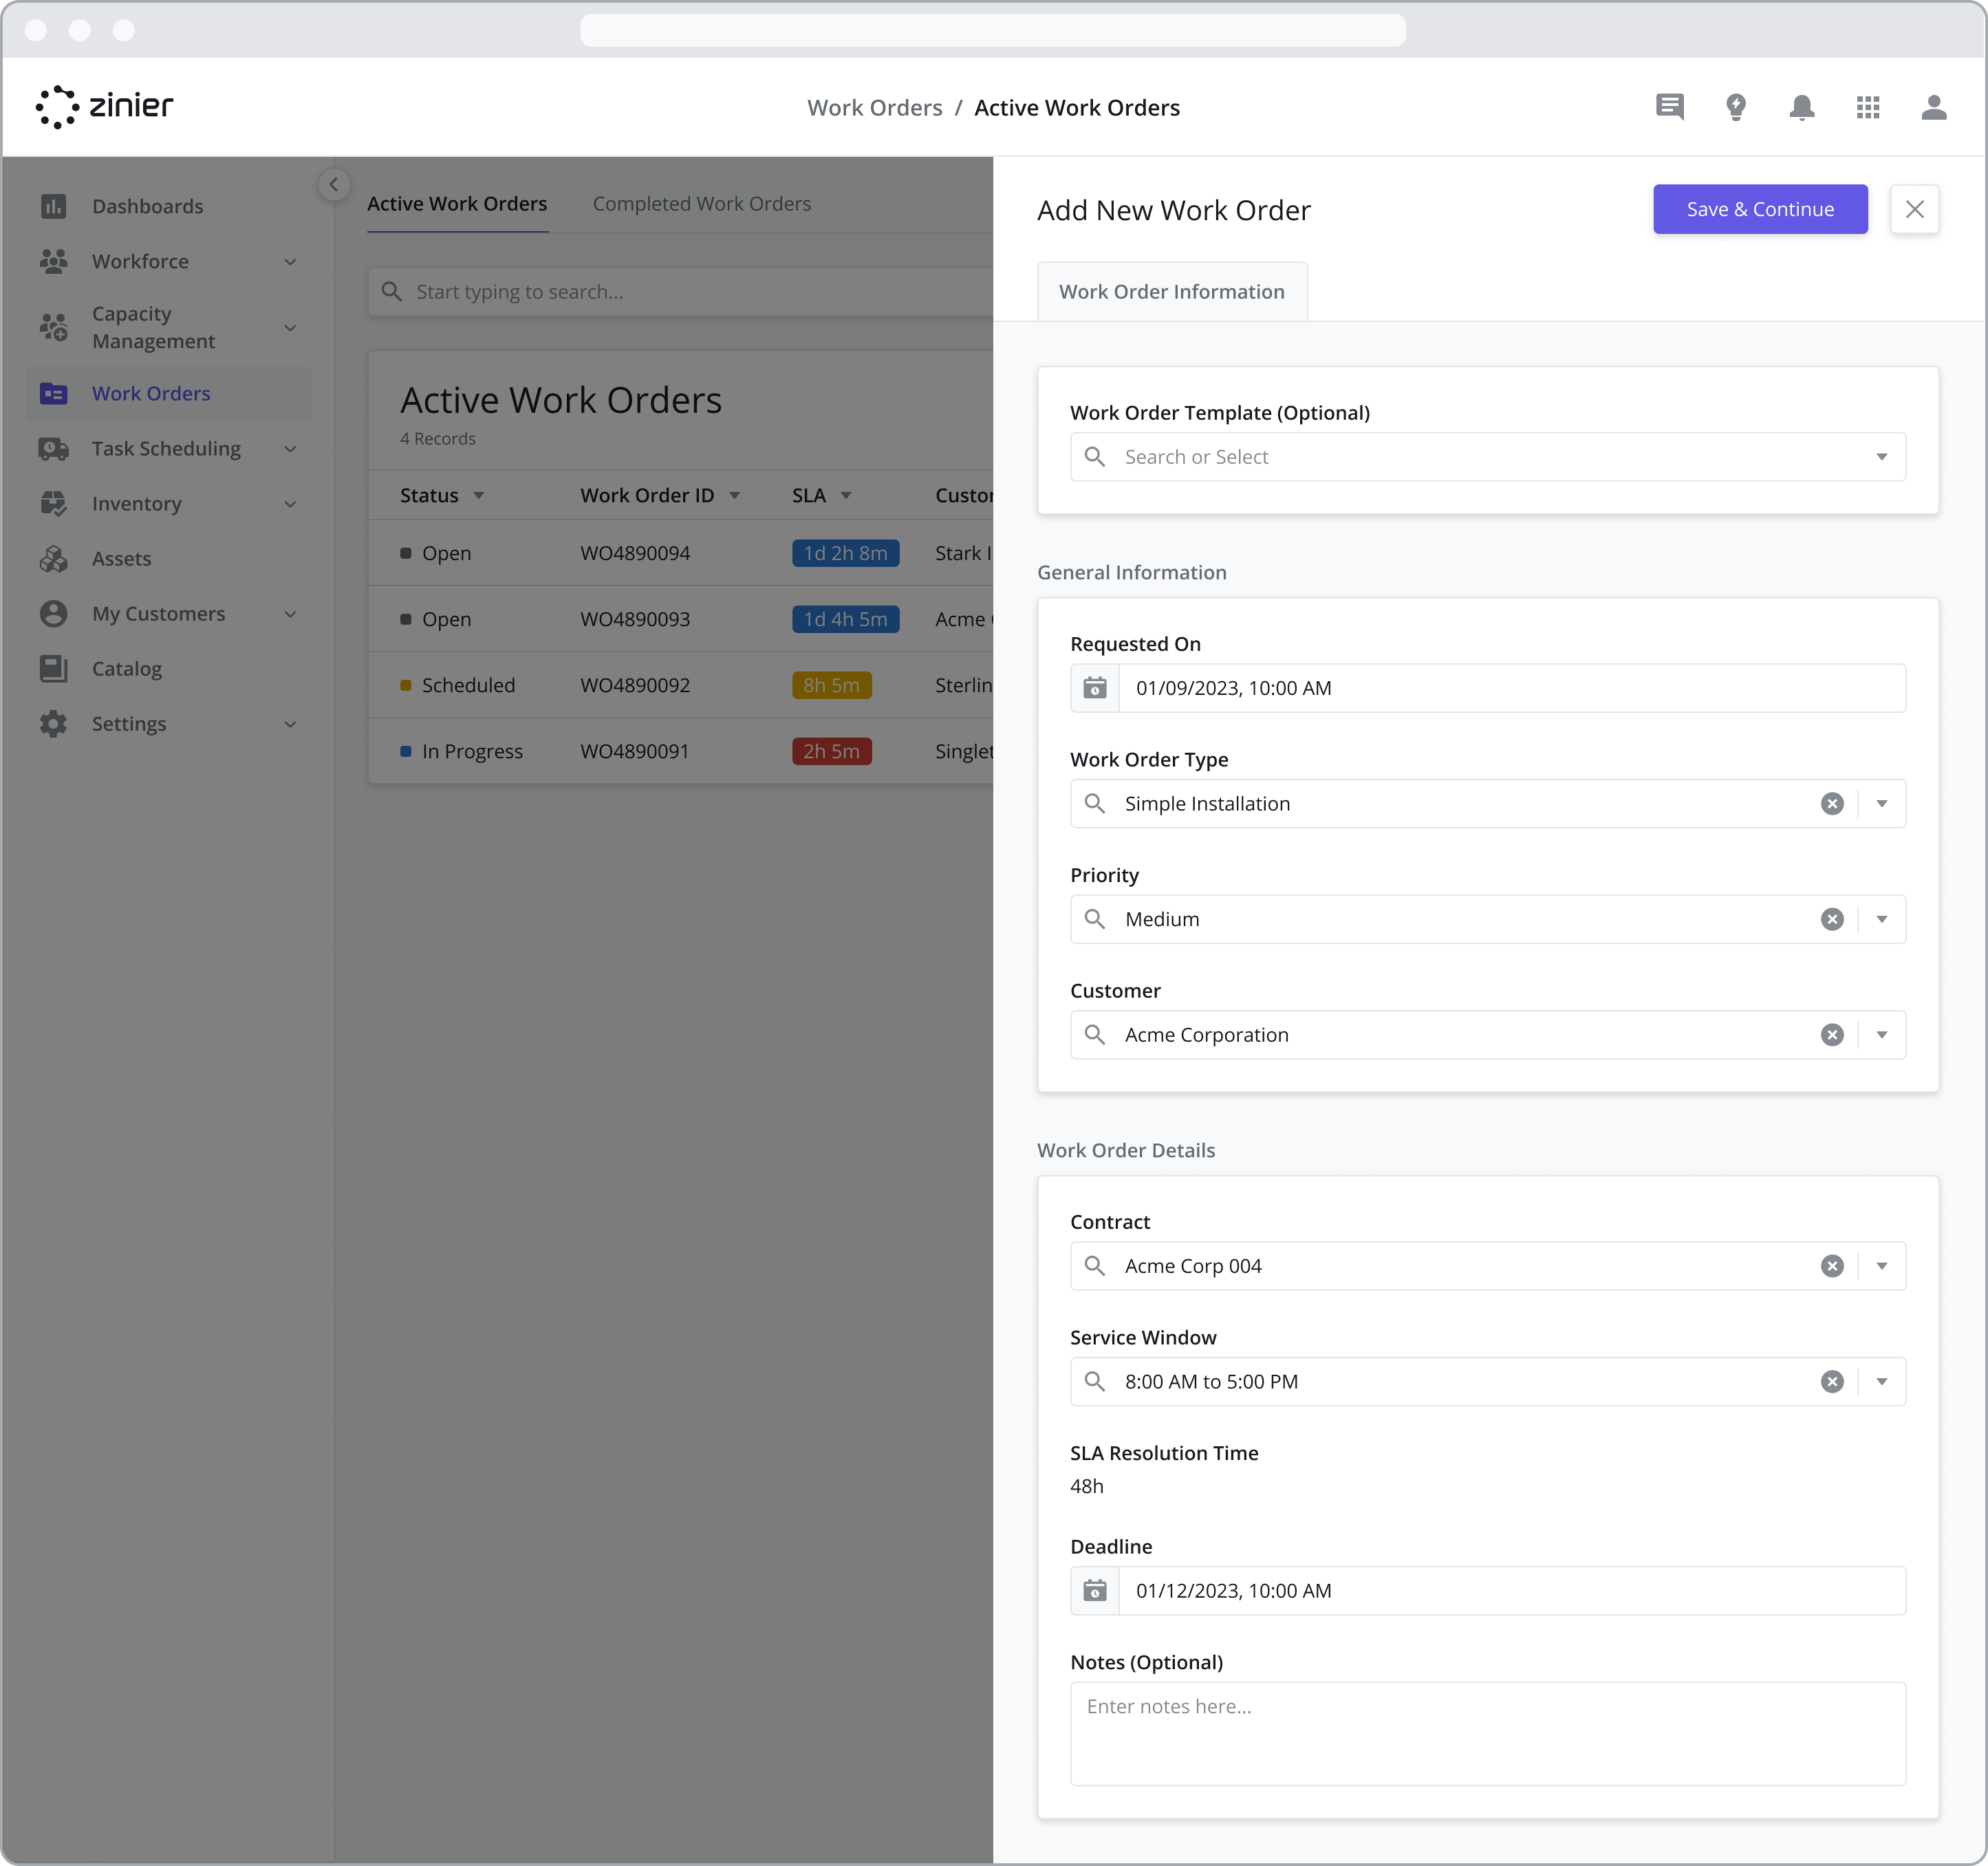
To add a new Work Order, go to the Work Orders > Active Work Orders module, click the “Add New” button in the top right of the data grid, and enter the information shown in the sidepanel.
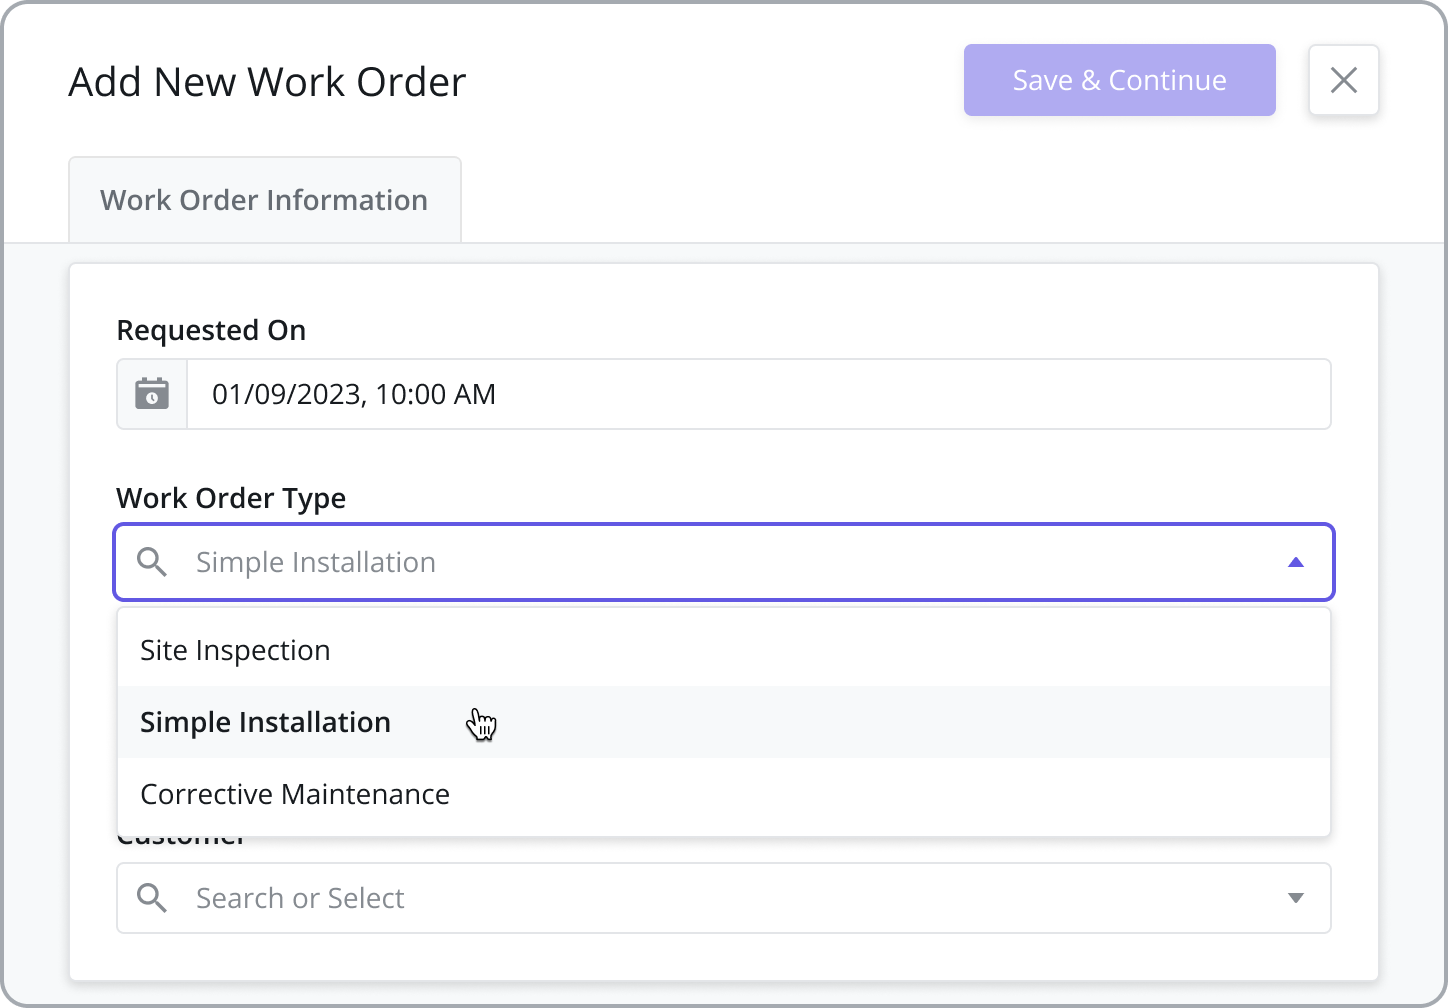
Assign a Work Order Type
Assign a Work Order Type. Work Order Types are used to configure settings such as which List Option to use when canceling a Work Order and defining which Task Types can be added to a Work Order.
Work Order Types must first be added from the Settings > Work Order Settings > Work Order Types module before they can be assigned to the Work Order. For more information on adding and configuring Work Order Types, refer to the Work Order Types page.
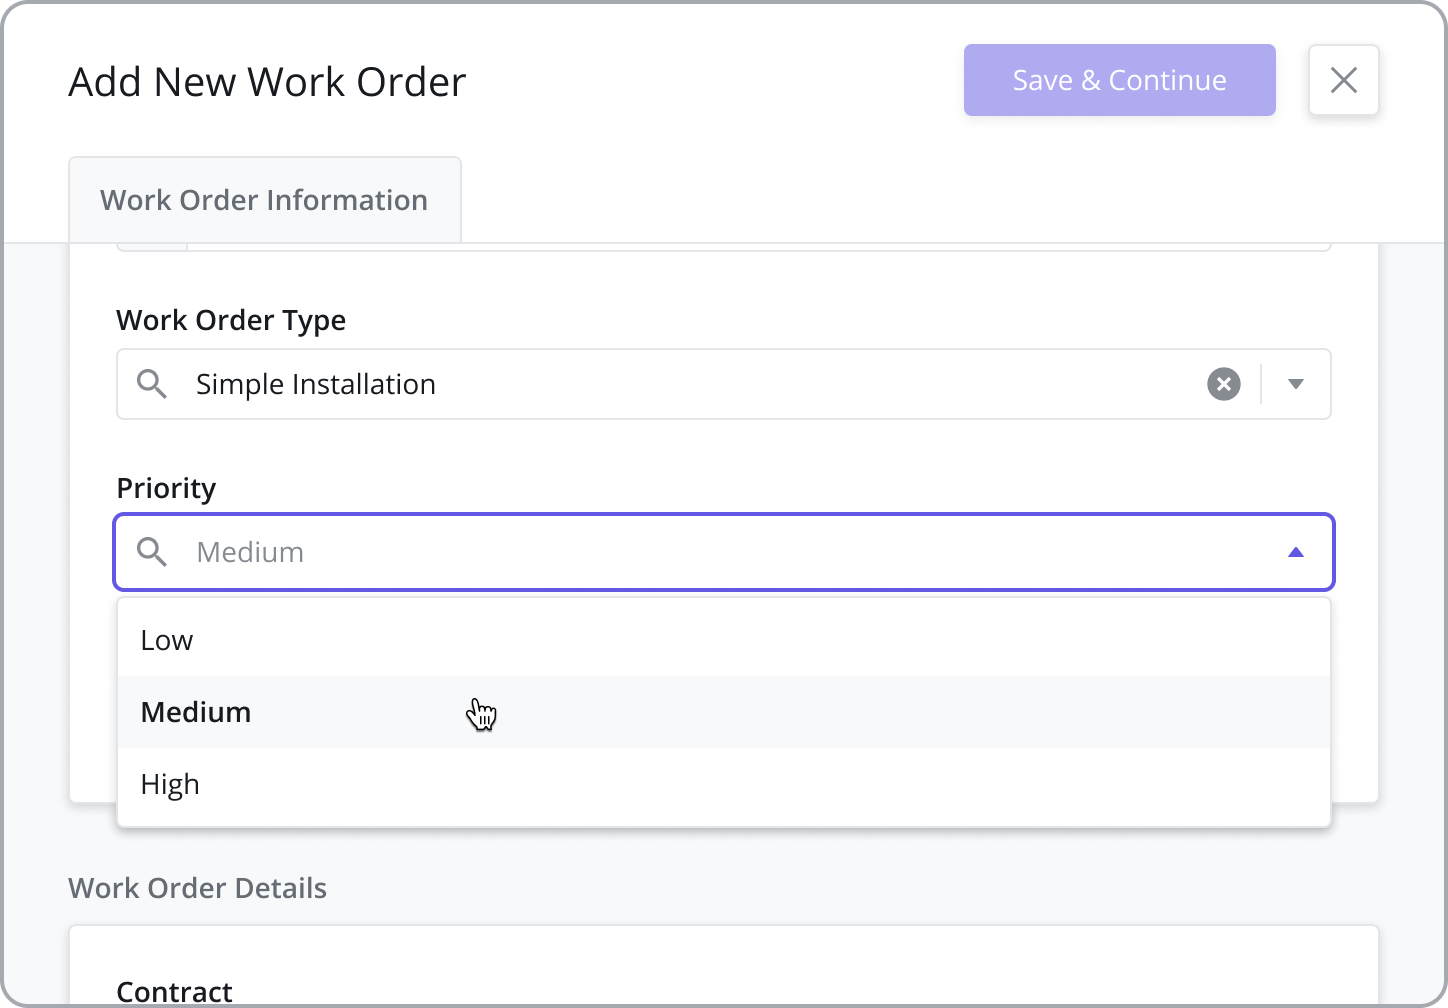
Assign a Priority
SLA, Priority, and Deadlines: The Priority you select for a Work Order has a direct relationship to the SLA you choose for that Work Order, so it is important to be mindful of how this relationship works. SLAs use the concept of Priority Time Frames which tie a particular SLA Resolution Time to the particular Priority you set when creating a Work Order. When you select a Priority for the Work Order, it will take the SLA Resolution Time and use that to calculate the default Deadline for the Work Order and Tasks added to the Work Order.
Priorities are added by the Solutions Admin. FSE comes with the following Default priorities:
Low, Medium, and High
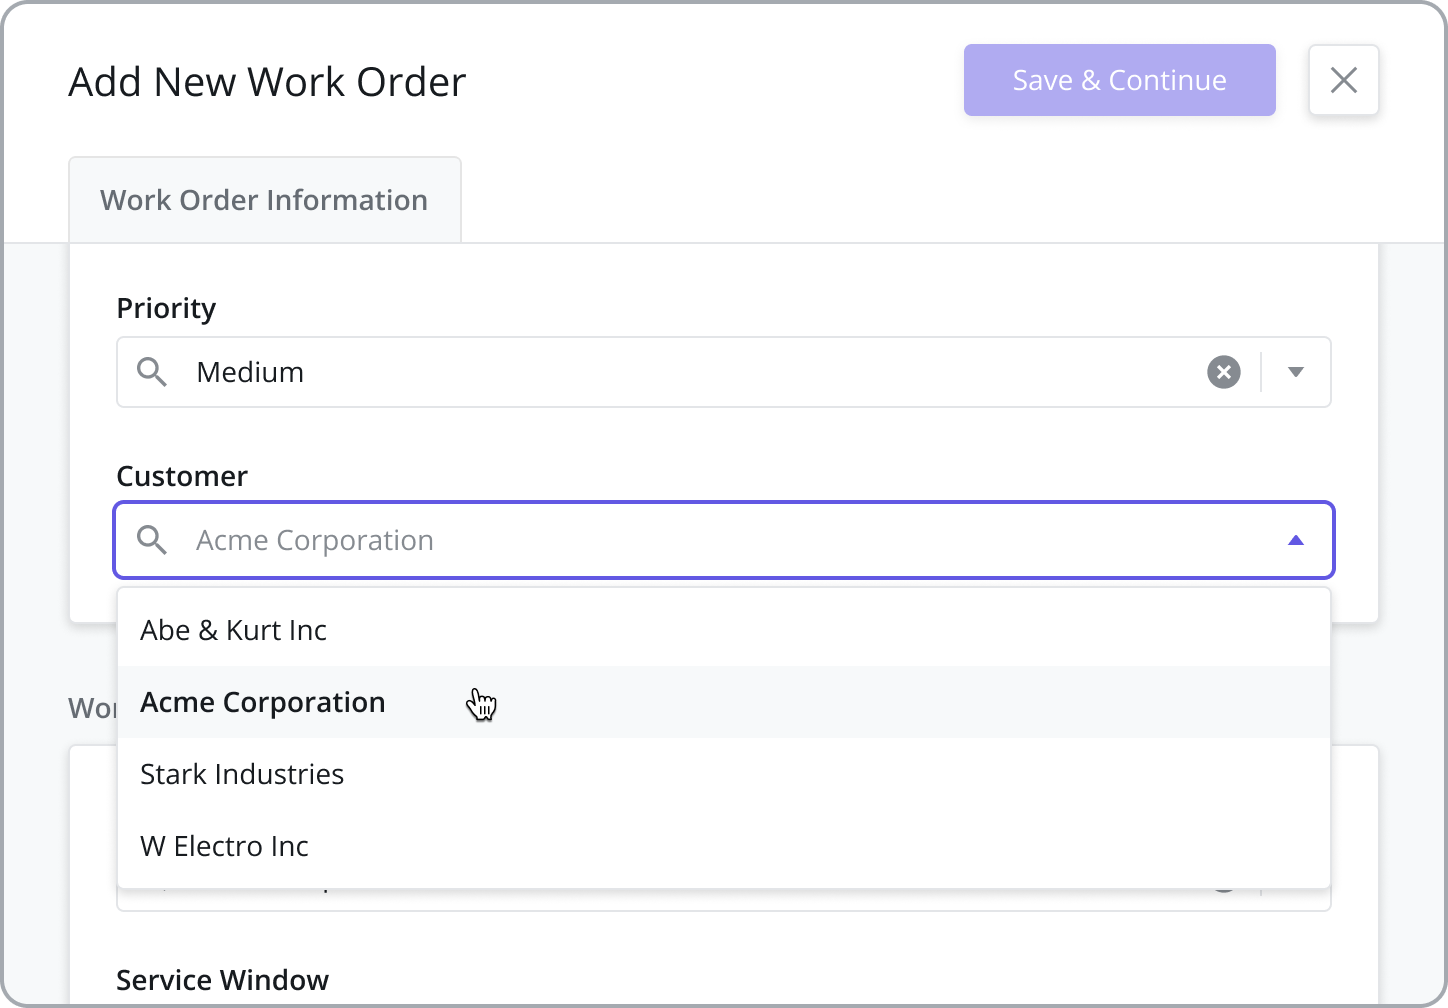
Assign a Customer
Assign a Customer to a Work Order. The customer determines which Contracts can be added to a WO and which Customer Sites a task added to the Work Order can be assigned to.
Customers must first be added from the My Customer > Customers module before they can be assigned to a Work Order. For more information on adding and configuring Customers, refer to the Customers page.
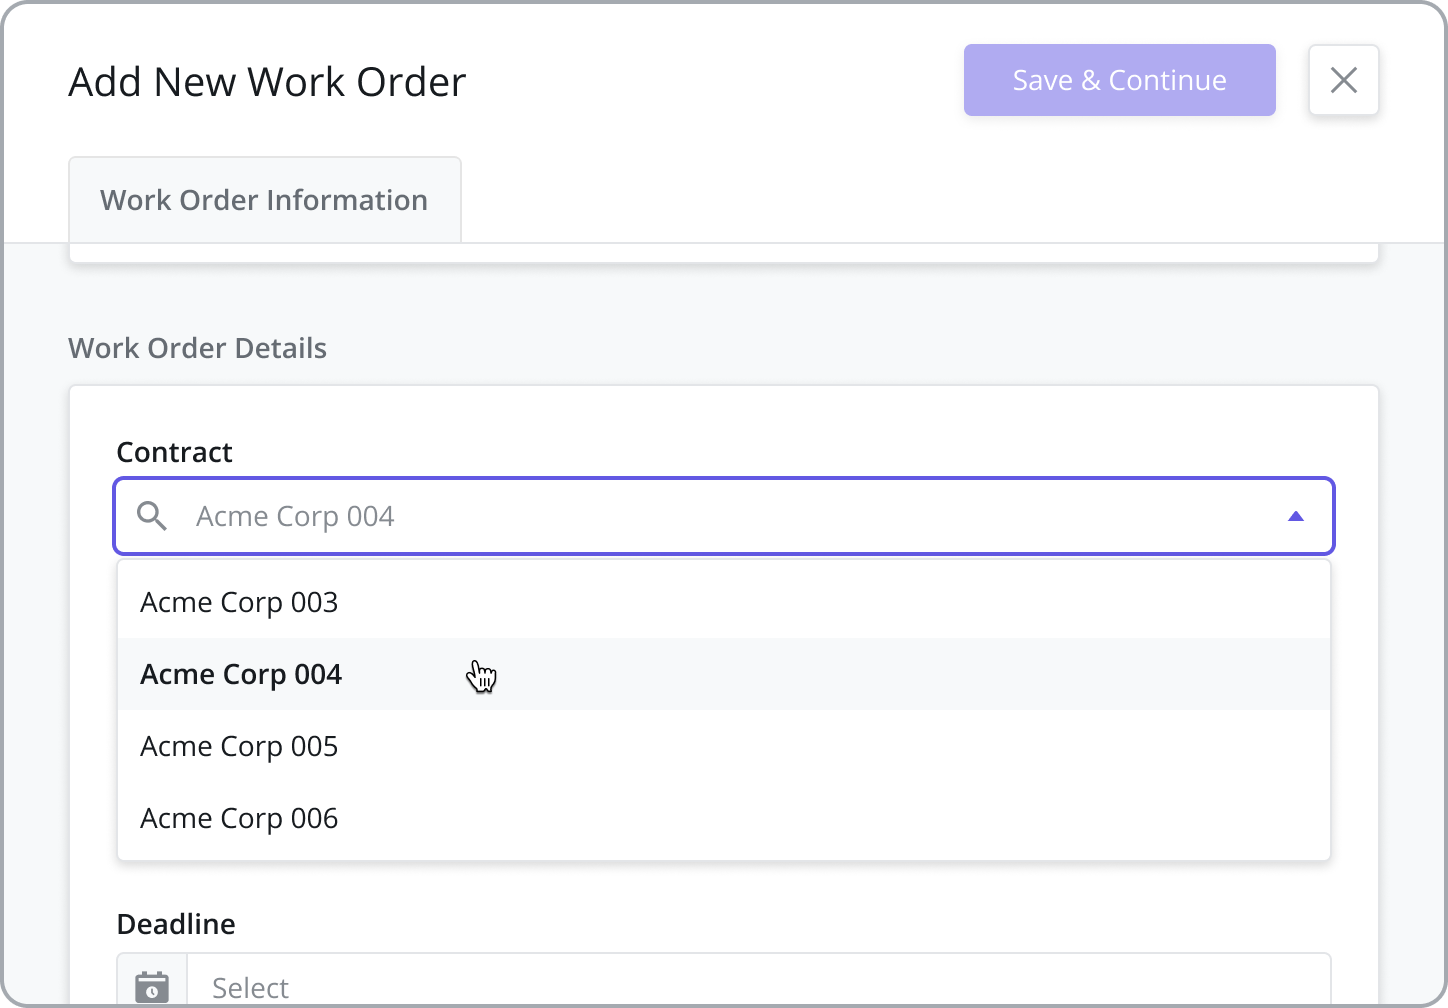
Assign a Contract
Select the contract which is tied to the Work Order. This list is populated based on the Customer (a Customer may have more than 1 Contract) and determines the SLA and Service Window used in the Work Order.
Contracts must first be added from the My Customer > Contracts module before they can be assigned to a Work Order. For more information on adding and configuring Contracts, refer to the Contracts page.
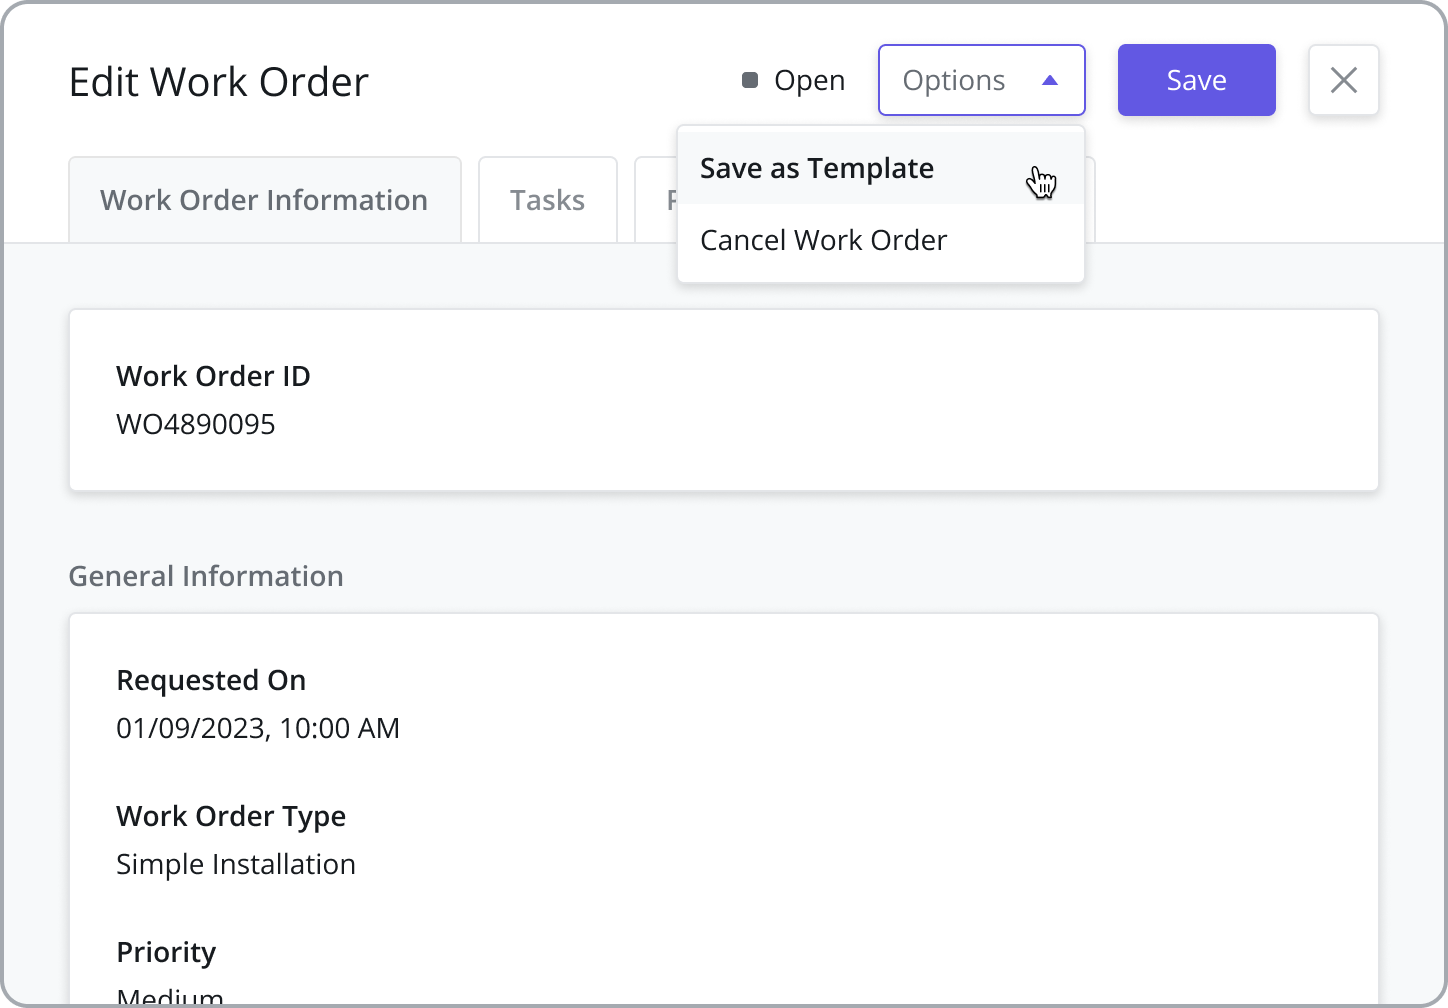
Save as a Work Order Templates
Save a Work Order as a Work Order Template. Work Order Templates make it faster and easier to create Work Orders by pre-populating the fields with frequently used configurations.
Adding Tasks to Work Orders
To add a Task to a Work Order, click on the Tasks tab, click the “Add New” button in the top right of the data grid, and enter the information shown in the sidepanel.
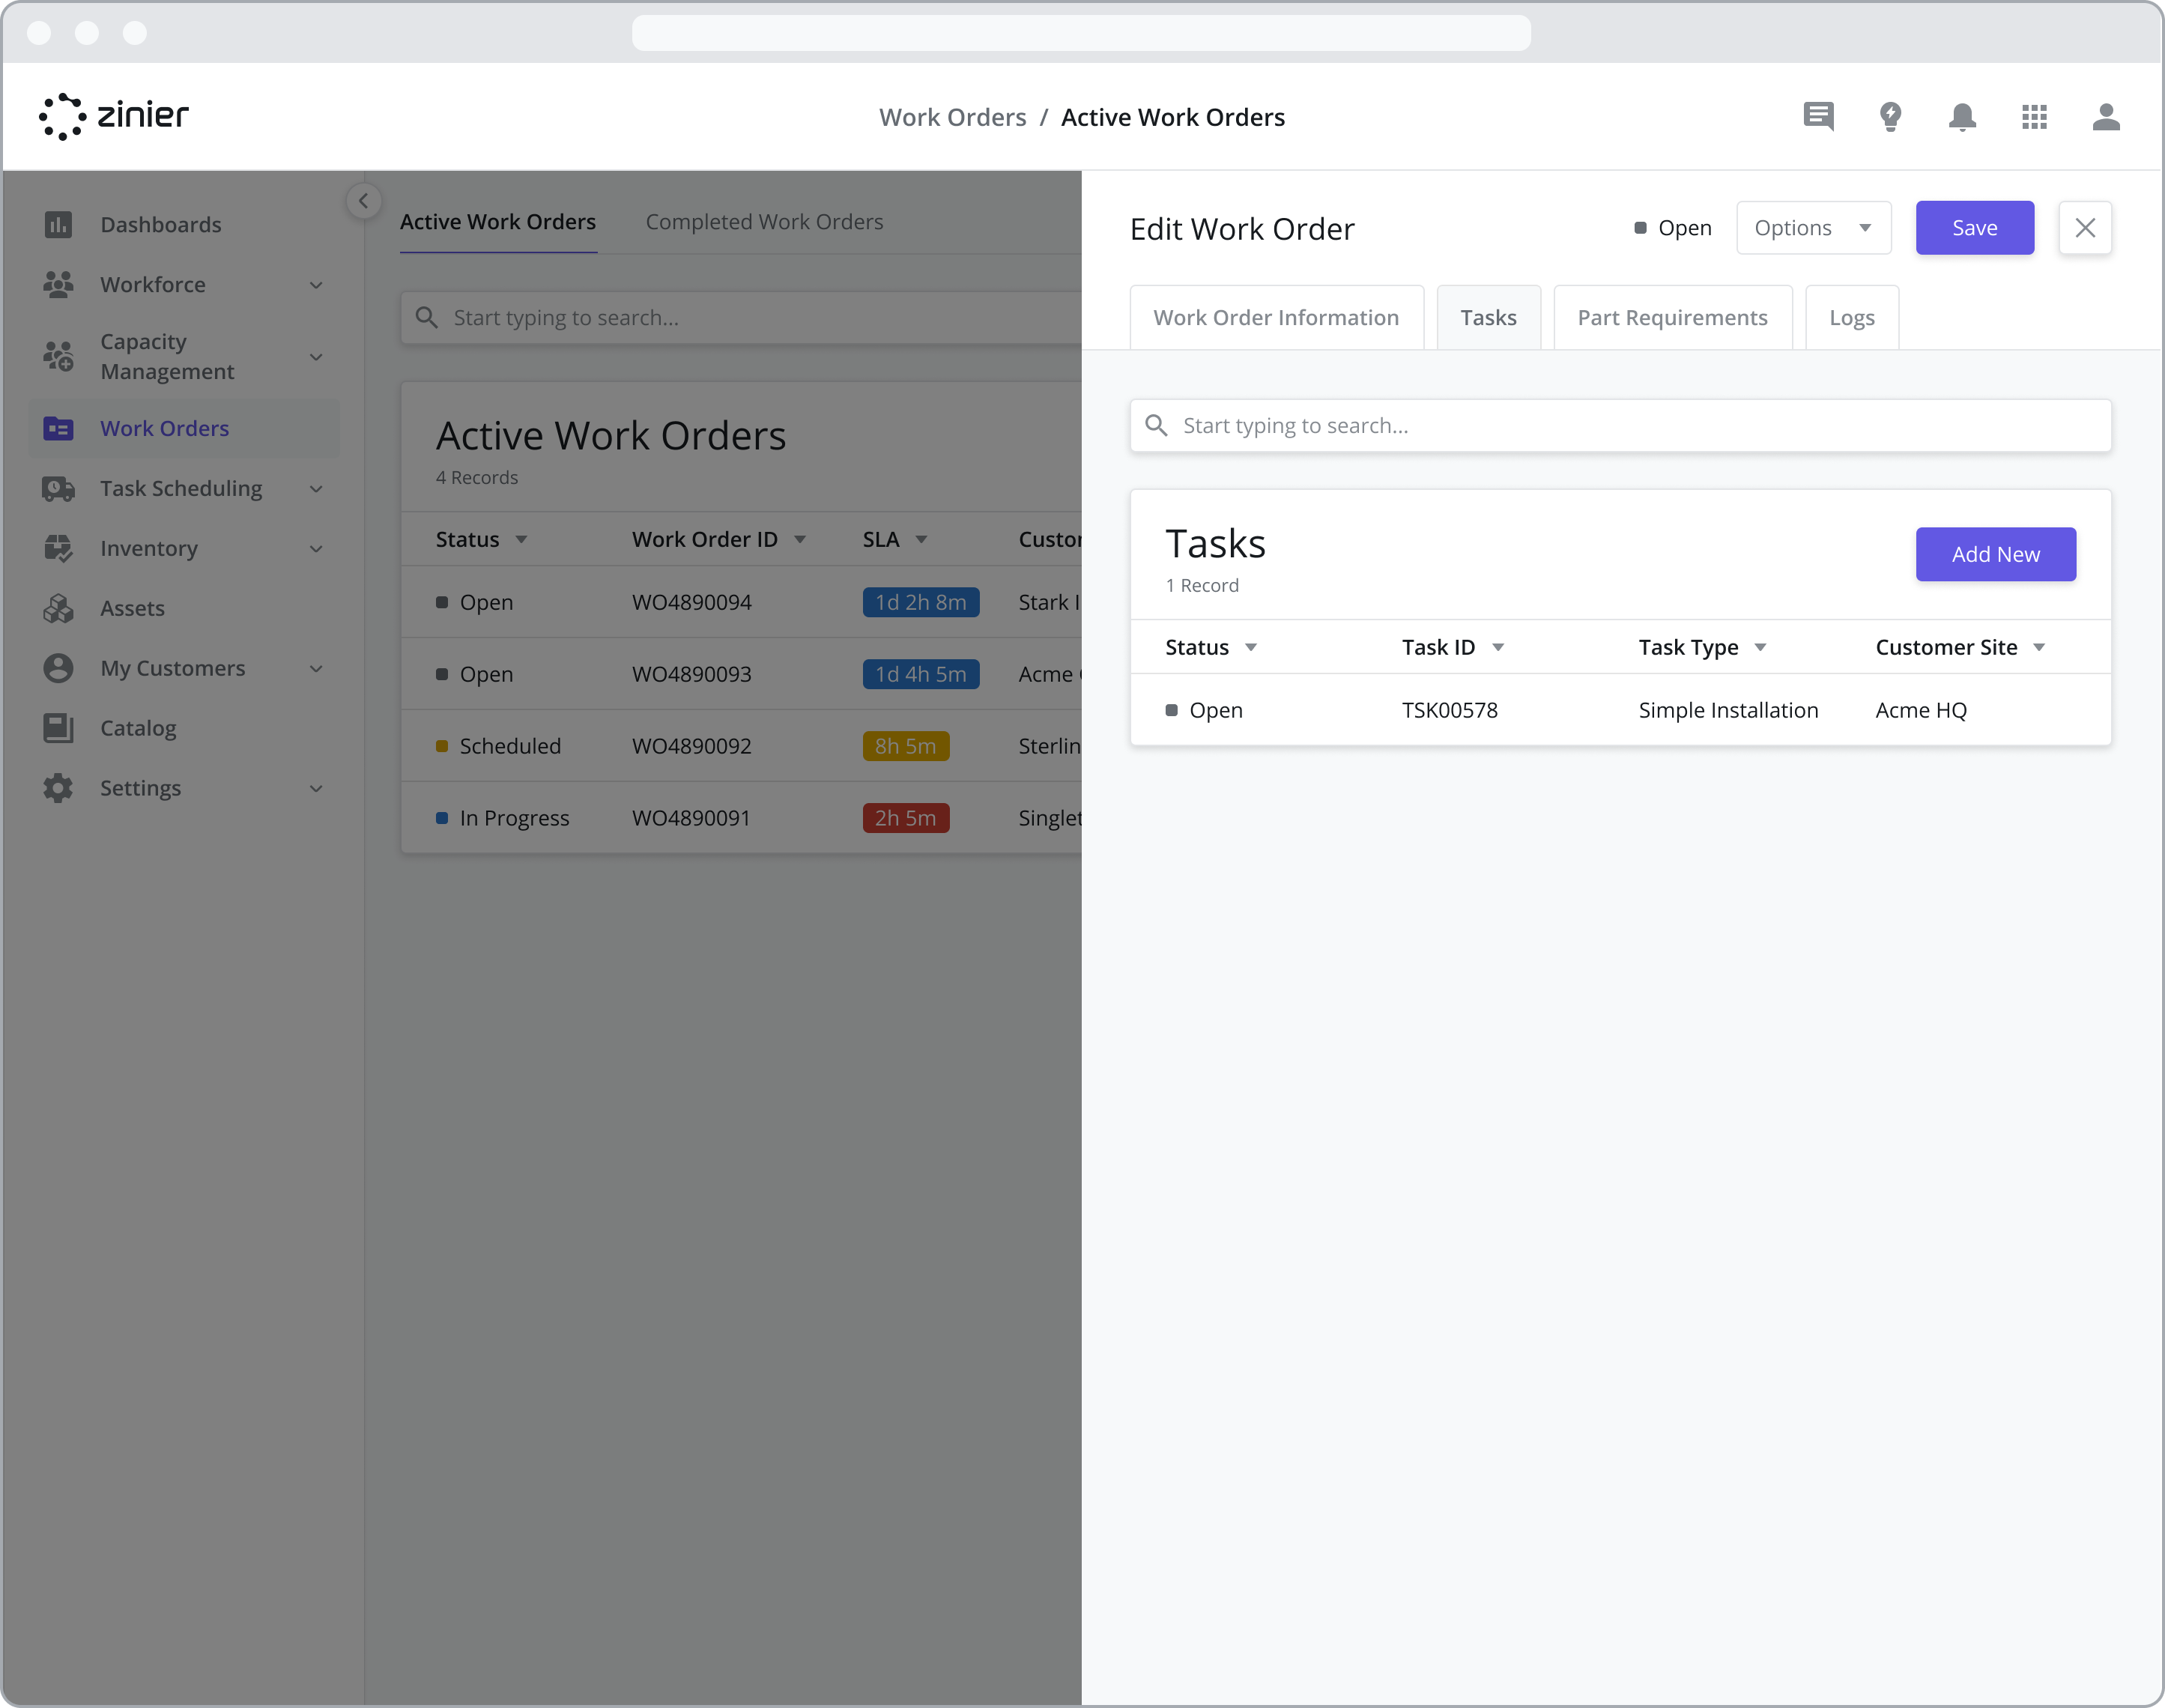
After entering the Task details, click “Publish”, which makes the task available for Scheduling & Dispatch.

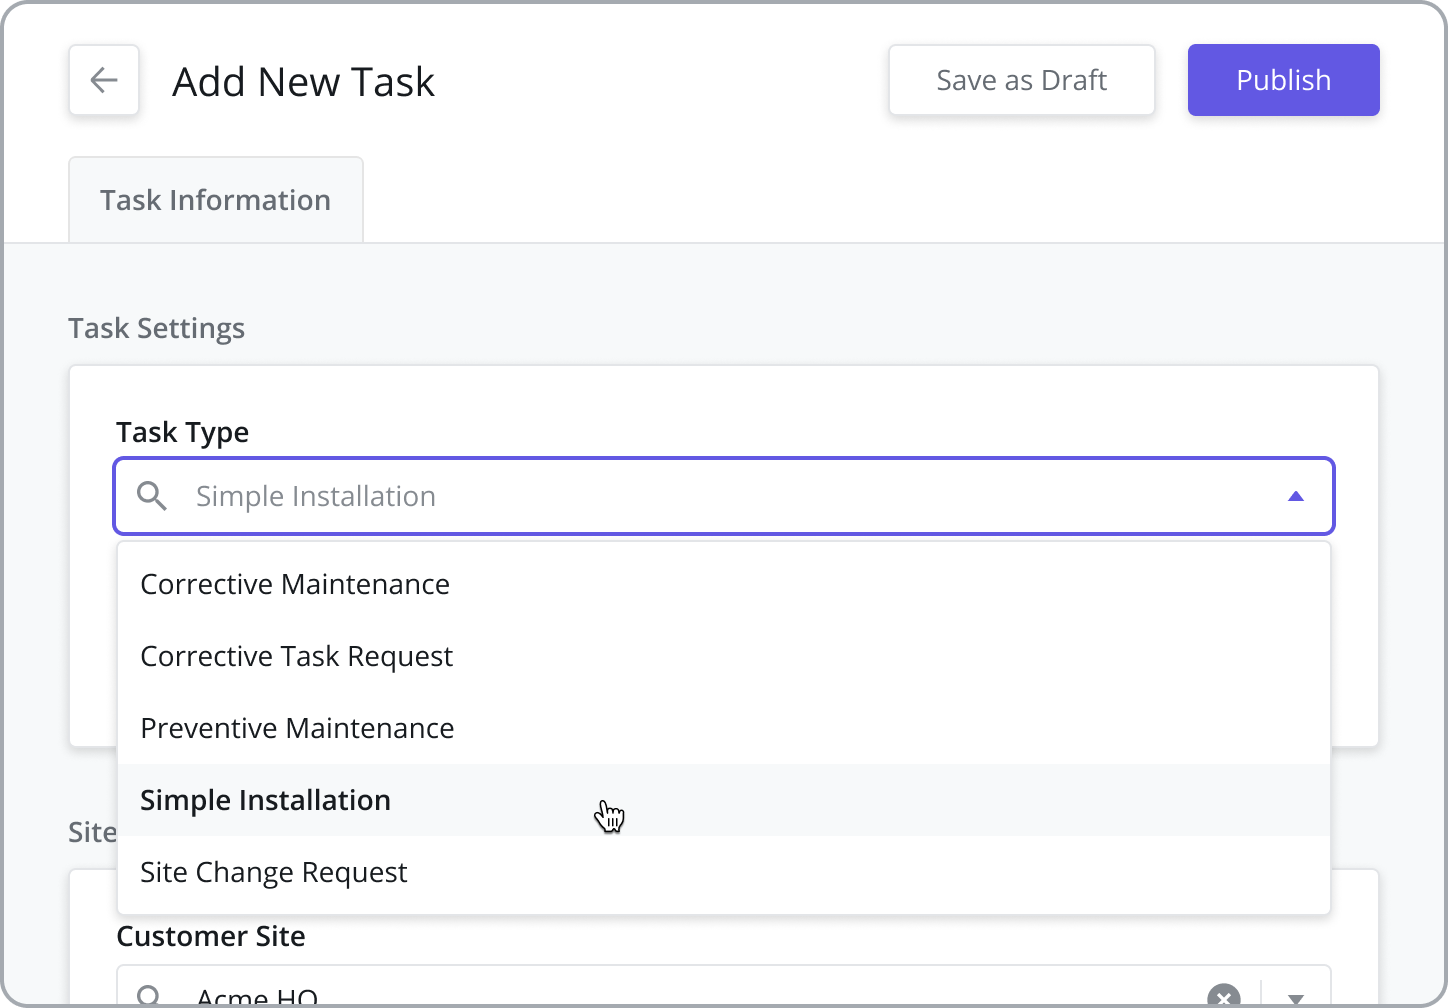
Assign a Task Type
All tasks added to a Work Order must have a Task Type. Task Types define the configuration of a task, including the Mobile Workflow, the results model and results sidepanel, the default estimated duration, the Skills and Skill Levels required, and the task approval settings.
Task Types must first be added from the Settings > Work Order Settings > Task Types module before they can be assigned to a Task in a Work Order. For more information on adding and configuring Task Types, refer to the Task Types page.
Pre-configured Tasks Types
FSE comes with several pre-configured Task Types associated with the Standard Mobile Workflows that come out of the box: Corrective Maintenance, Corrective Task Request, Preventive Maintenance, Simple Installation, and Site Change Request. For more information on the different Task Types, see the section on Standard Mobile Workflows.
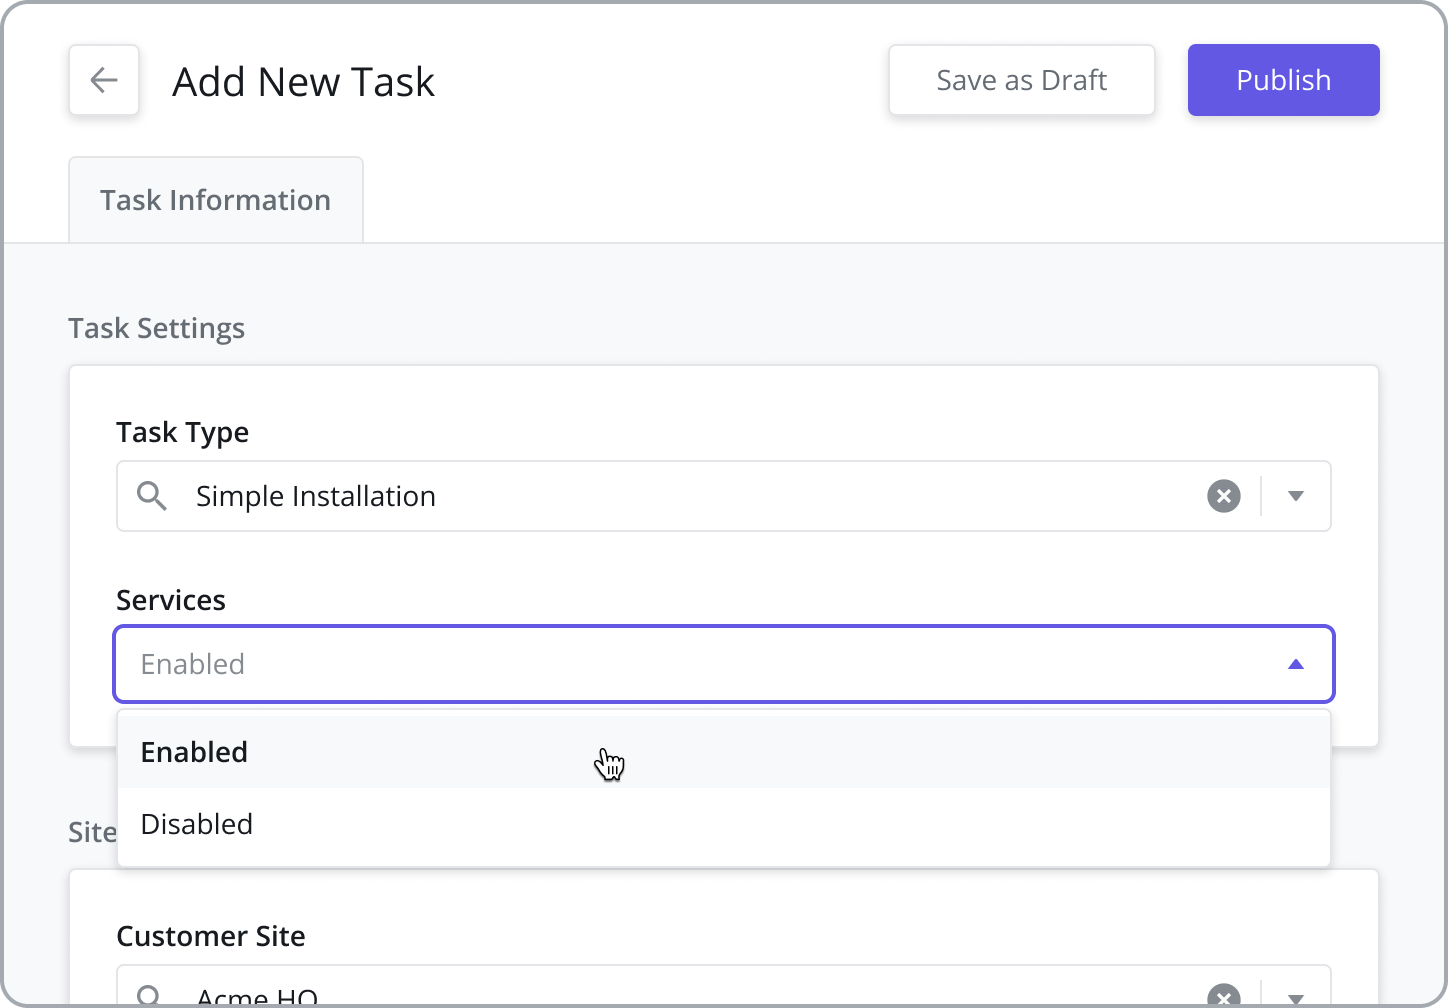
Assign Services to a Task (Optional)
When adding a Task to a Work Order, users have the option of enabling Services for the Task by selecting “Enabled” from the Services dropdown menu. Doing so will turn on the Services tab which shows a pre-defined list of Services available for use in the Task.
To adjust the Services available to a Technician performing the Task, click on the Services tab and select none, one, multiple, or all of the default Services. Any Services added to the task are then visible to the assigned Technician in their mobile workflow when performing the task.
NOTE: Adding a Service to a Task does not mean the technician is required to perform the Service. It simply makes the Service available for use within the task.
Services must first be created and then added for each Task Type from the Settings > Work Order Settings > Task Types module. For more information on adding Services to a Task Type, refer to the Task Types page. For more information on creating and configuring Services, refer to the Services page. Note that Services must also be configured as part of the Mobile Workflow in Studio Z.
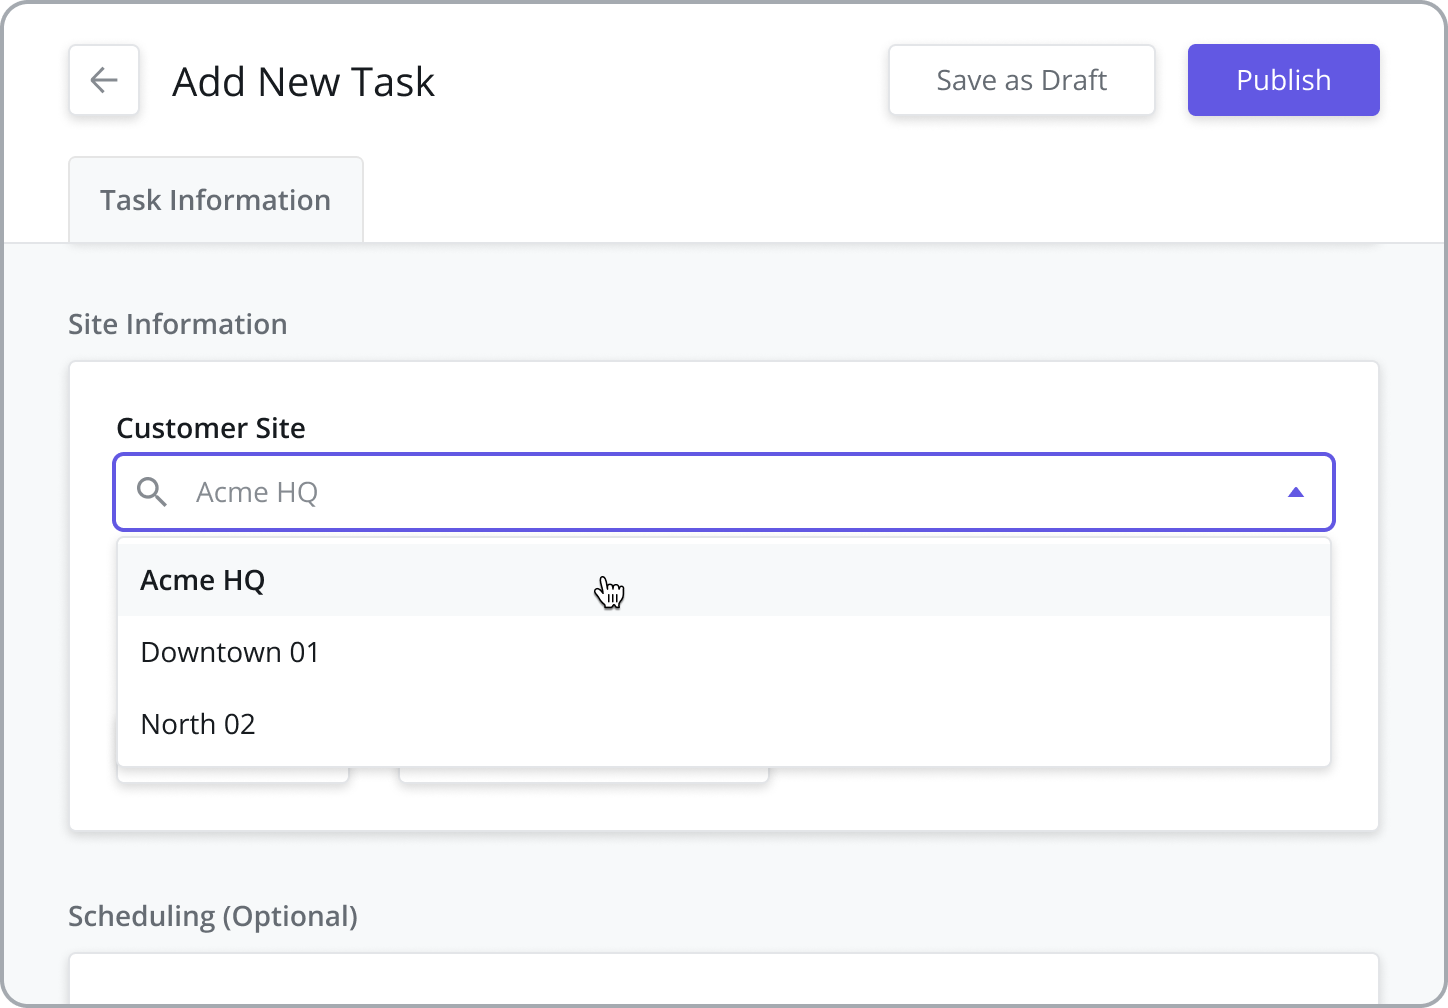
Assign to a Customer Site
The Customer Site table is auto-populated with sites associated with the Customer you select for the Work Order. This is an important field as if the Mobile Workflow requires a Geo-Checkin, it will use the GPS coordinates (Lat/Long) of this site as the check-in location.
Customer Sites must first be added from the Customers > Customer Sites module before they can be assigned to the Task. For more information on adding and configuring Customer Sites, refer to the Customer Sites page.
Scheduling Options: Exact Time, Appointment Windows, Multiday Tasks
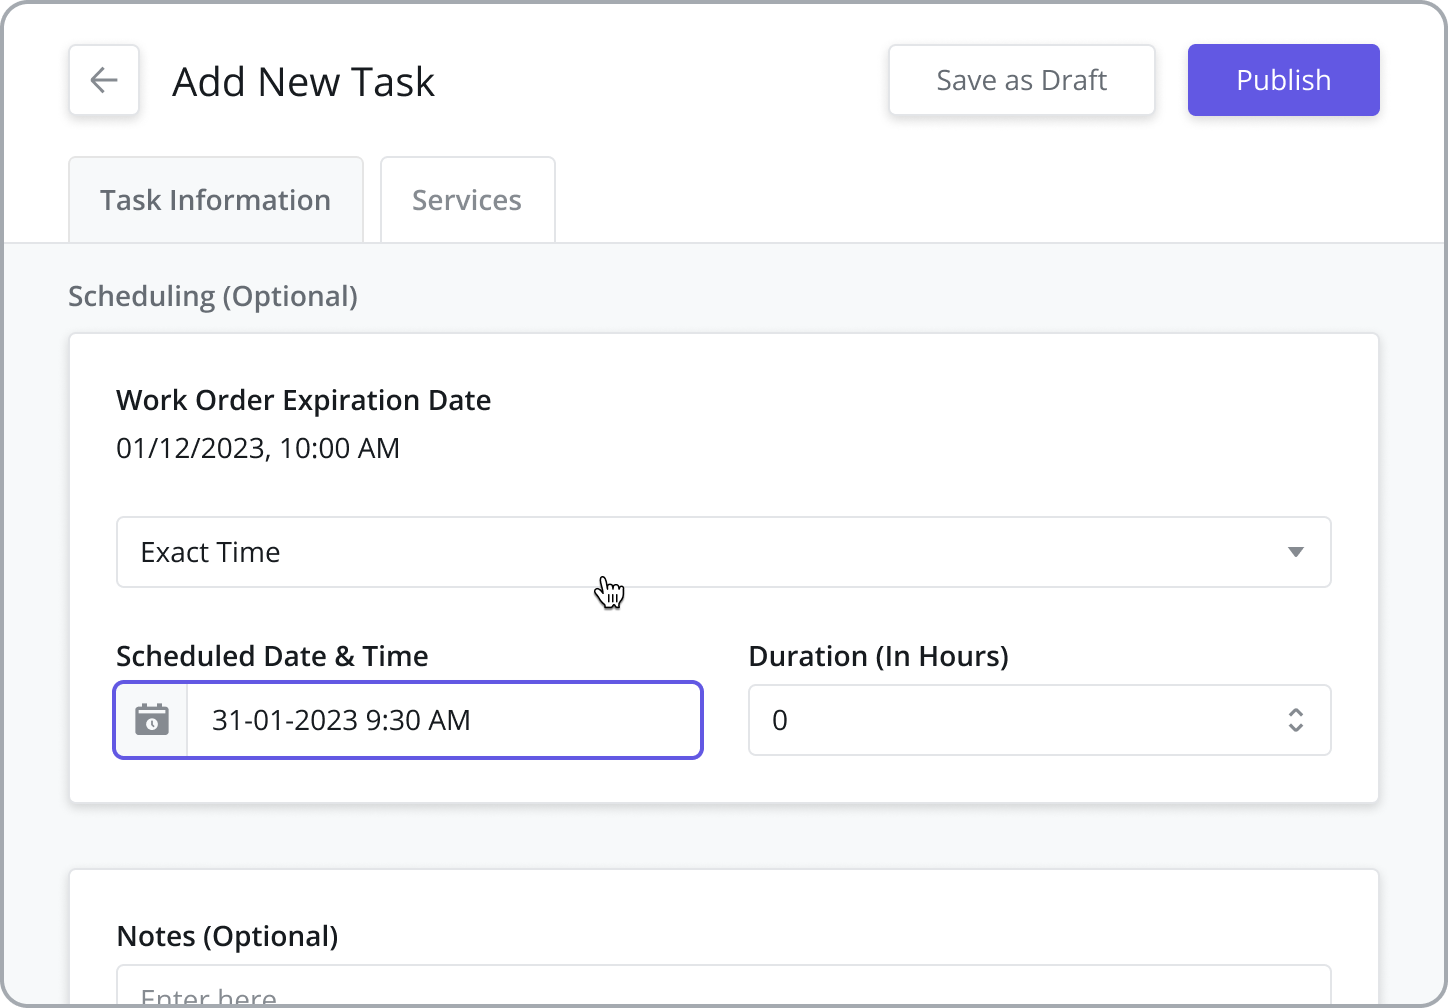
When creating Tasks, users have the option of providing certain scheduling details (Dates and Times) which get passed to the Dispatcher for reference during Scheduling & Dispatch. Select from the following Scheduling Options in the dropdown menu within the Scheduling (Optional) section:
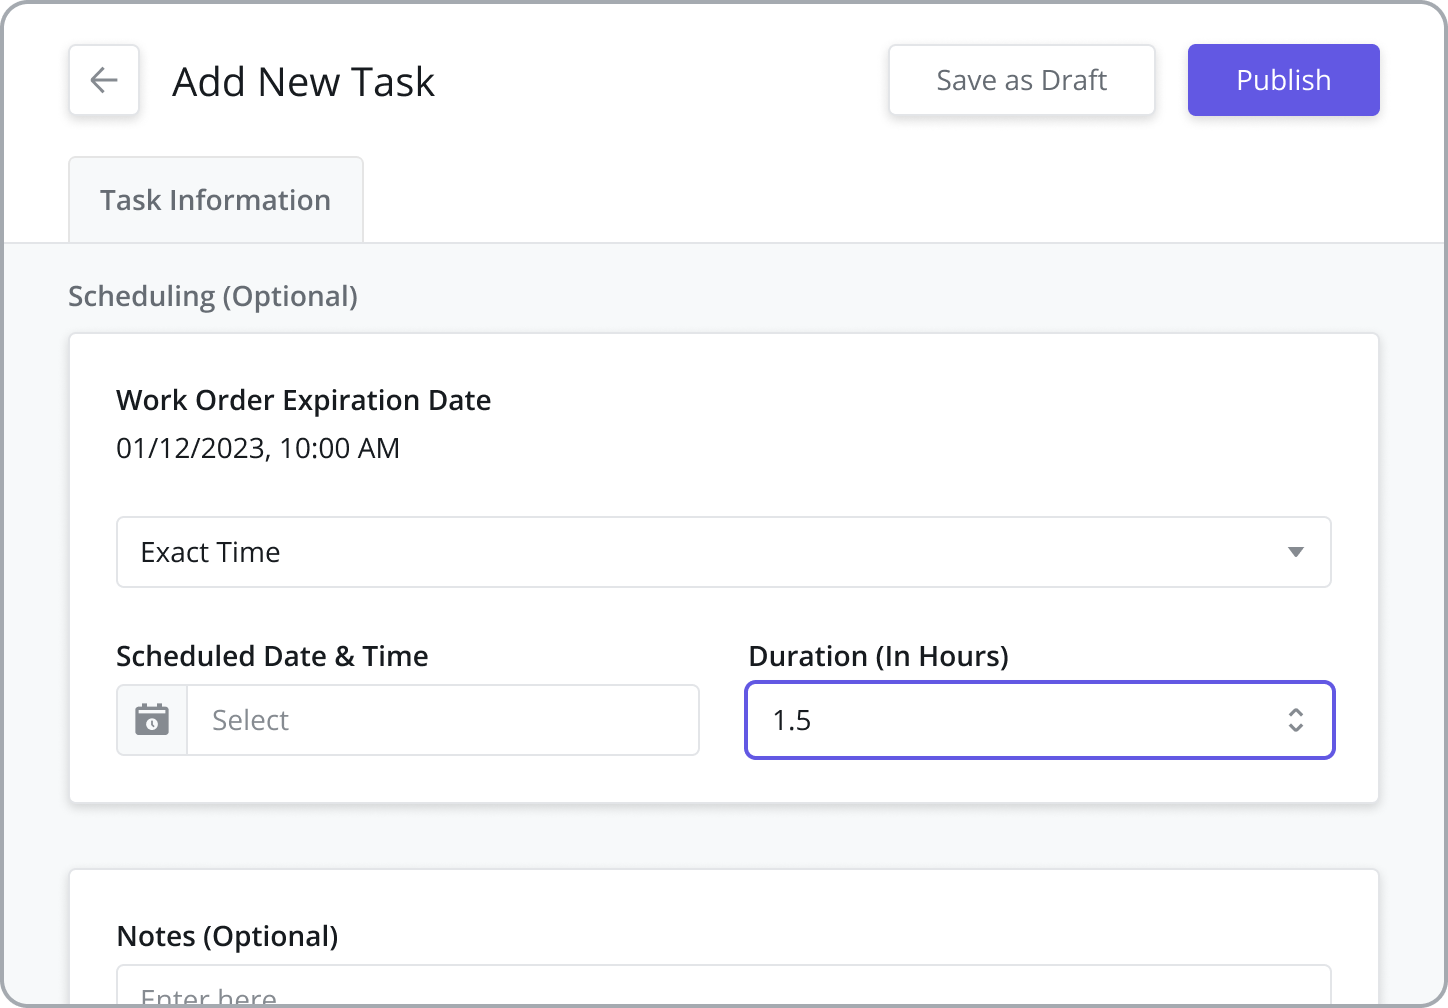
Exact Time: Select this option if you know the exact date and time when the task needs to be scheduled.
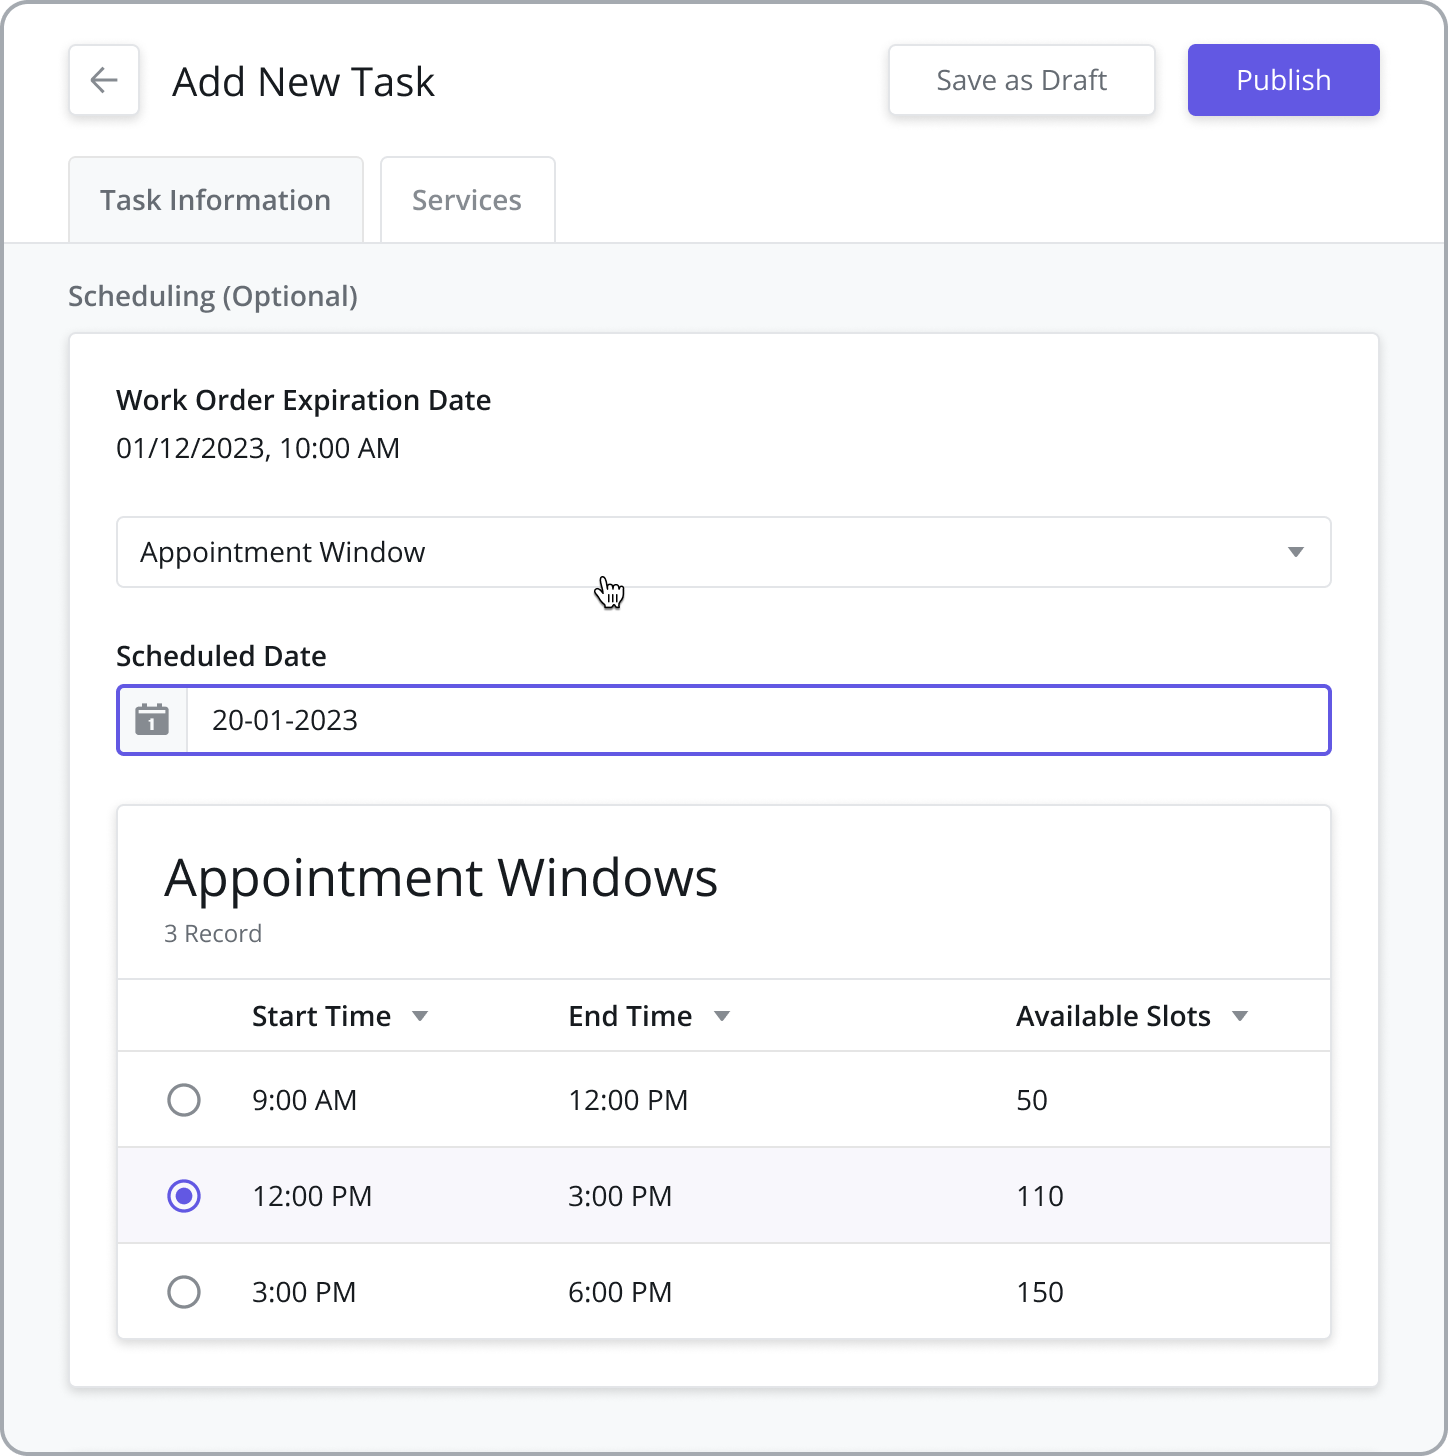
Appointment Windows: In appointment-based scheduling scenarios, customers may request for the task to be completed within a specific time frame associated with an Appointment Window. To honor such requests, you can pre-define the appointment date for the task, select a specific Appointment Window and pass this information to the Dispatcher for reference during Scheduling & Dispatch. To pre-schedule the task using Appointment Windows, select “Appointment Window” from the dropdown, enter a “Scheduled Date”, and select the desired Appointment Window for the task.
Appointment Windows must first be added from the Settings > Work Order Settings > Appointment Windows module before they can be assigned to the Task. For more information on adding and configuring Appointment Windows, refer to the Appointment Windows page.
Multiday Task: Select this option to create a task that spans more than 1 day. After selecting this option, provide a Schedule Start Date & Time and Schedule End Date & Time.
NOTES: Scheduling Automation (Auto Scheduling and Technician Recommendation) is not supported when scheduling Multiday Tasks.

Provide an Estimated Duration (Exact Time tasks only)
The estimated duration is used in Task Scheduling to determine the block of time a task takes to complete. The default value comes from the Task Type but can be overridden when added to a Work Order. It is also seen by technicians when they browse their task list on the mobile app. For example, if a user is assigned a task at 9:00 am and the duration is 60 minutes, the task will then show 9:00 am - 10:00 am in their task list.
Send Notes to Dispatcher
When adding a Task, users can add an optional Note to the task which will be visible to the person dispatching the Task. This is useful for sending specific details or comments about the task, site, or customer to aid the dispatcher in performing their duties.

Assigning Assets to a Task
Preventive and corrective maintenance usually happens on an installed Asset. When adding Tasks to a Work order, users have the option to add one or more Assets to the task so technicians know which items to service and to maintain better records of the services provided.
To associate a task with an asset in a work order, to the following:
After publishing a task in the work order, go to the Tasks tab, hover over the published task in the data grid and click the Edit icon
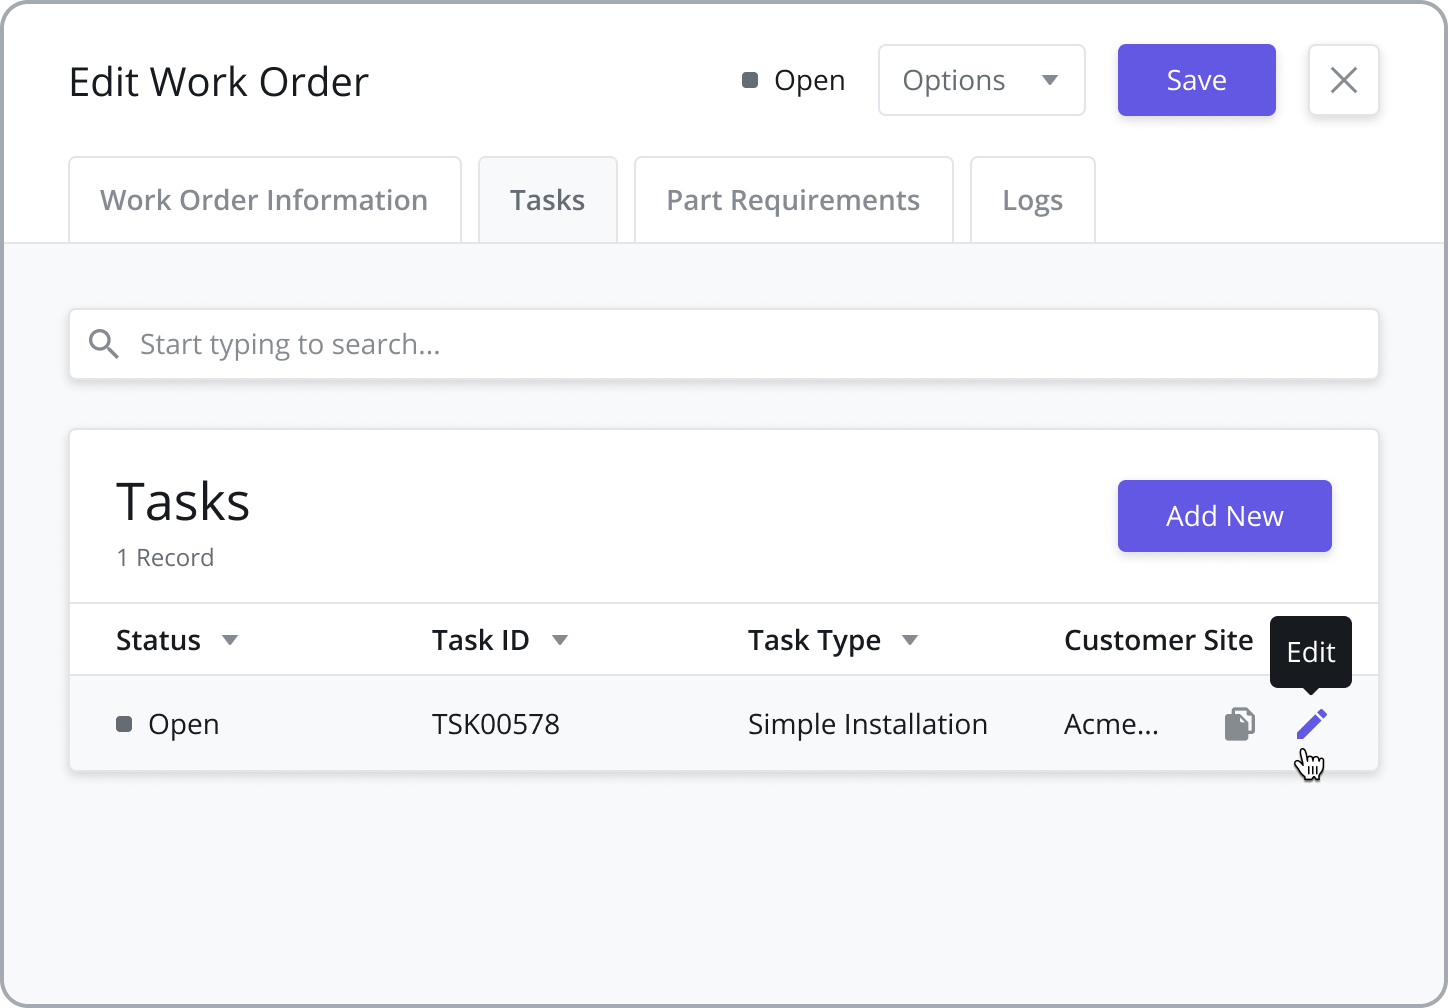
Go to the Assets tab within the task and click the Add New button.
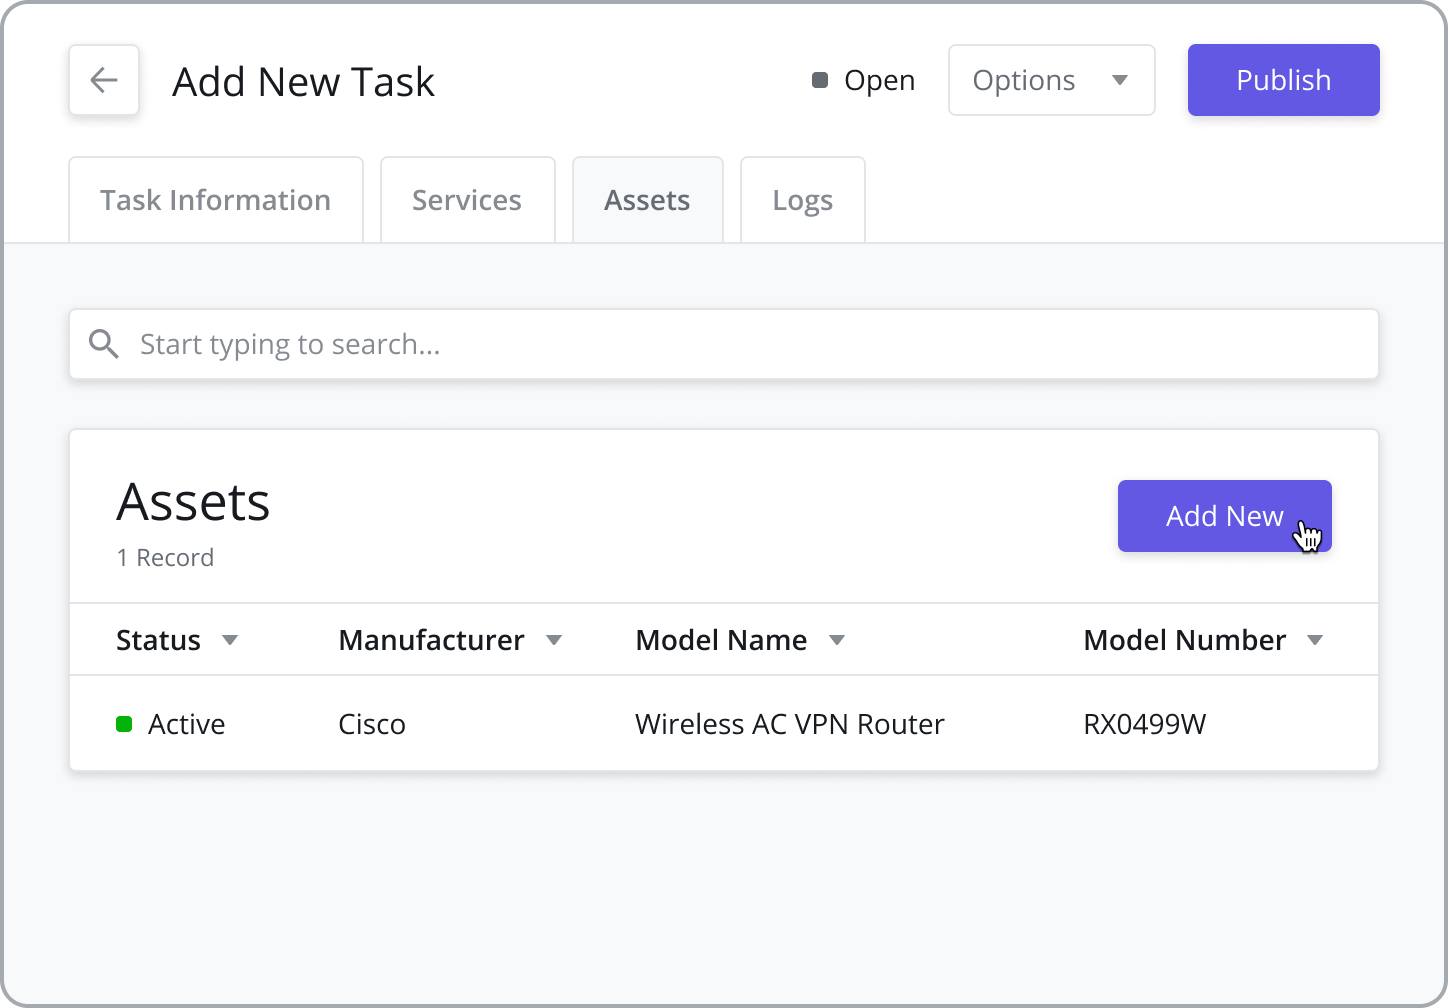
Select the Asset from the data grid and click the Save button
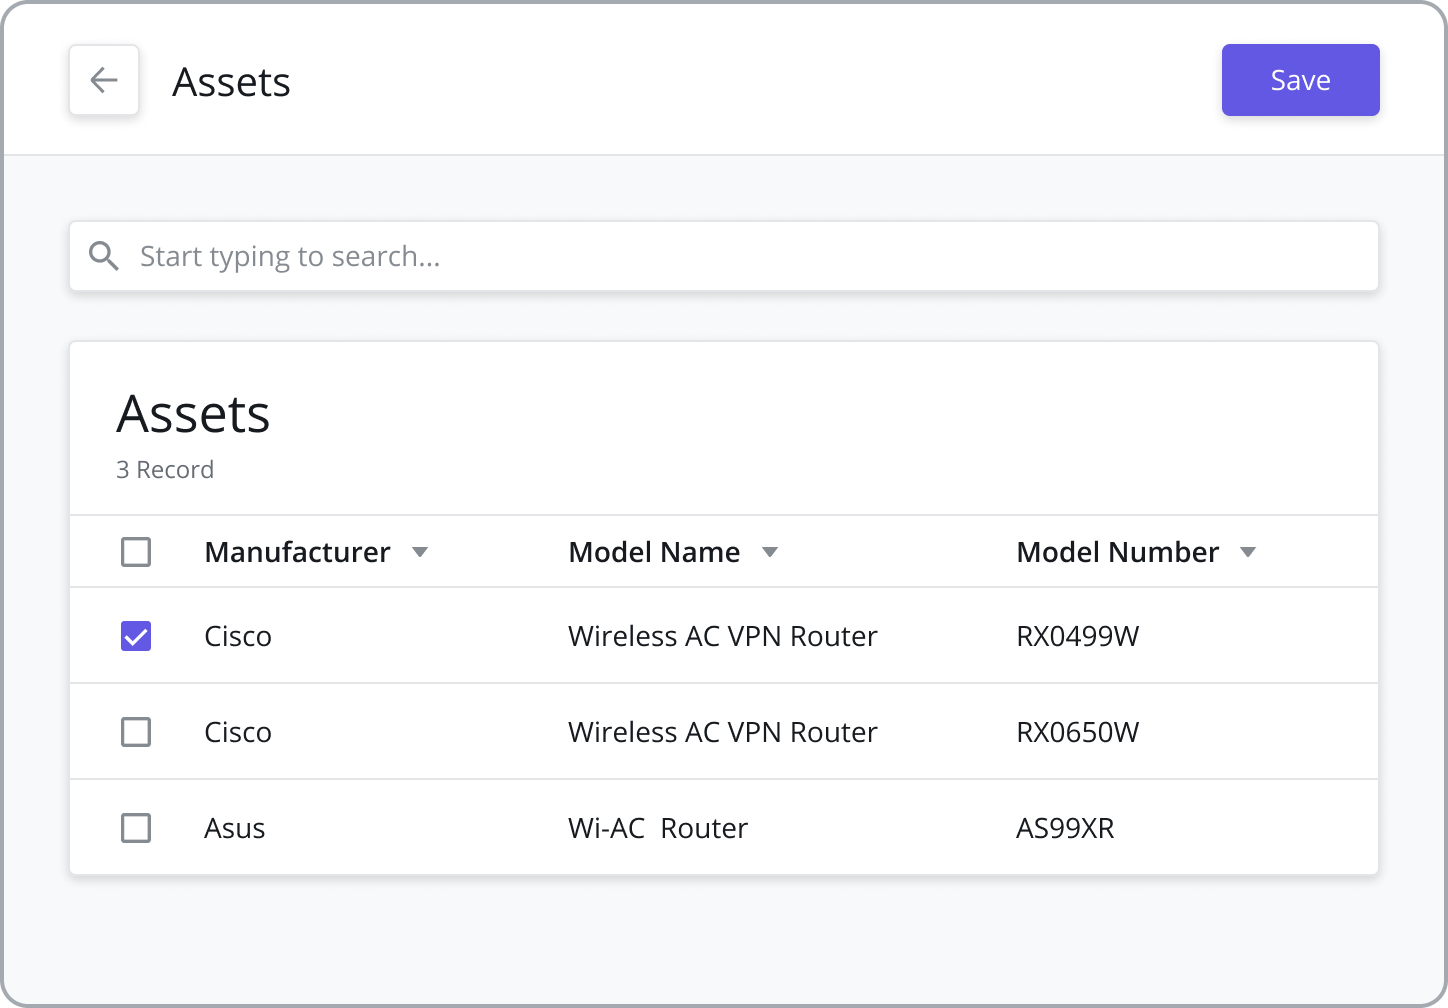
You can only associate assets that have already been added to the Customer Site where the task is being performed. See the Customer Sites page for more information on adding Assets to a Customer Site. For more information on adding and configuring Assets, refer to the Assets page.
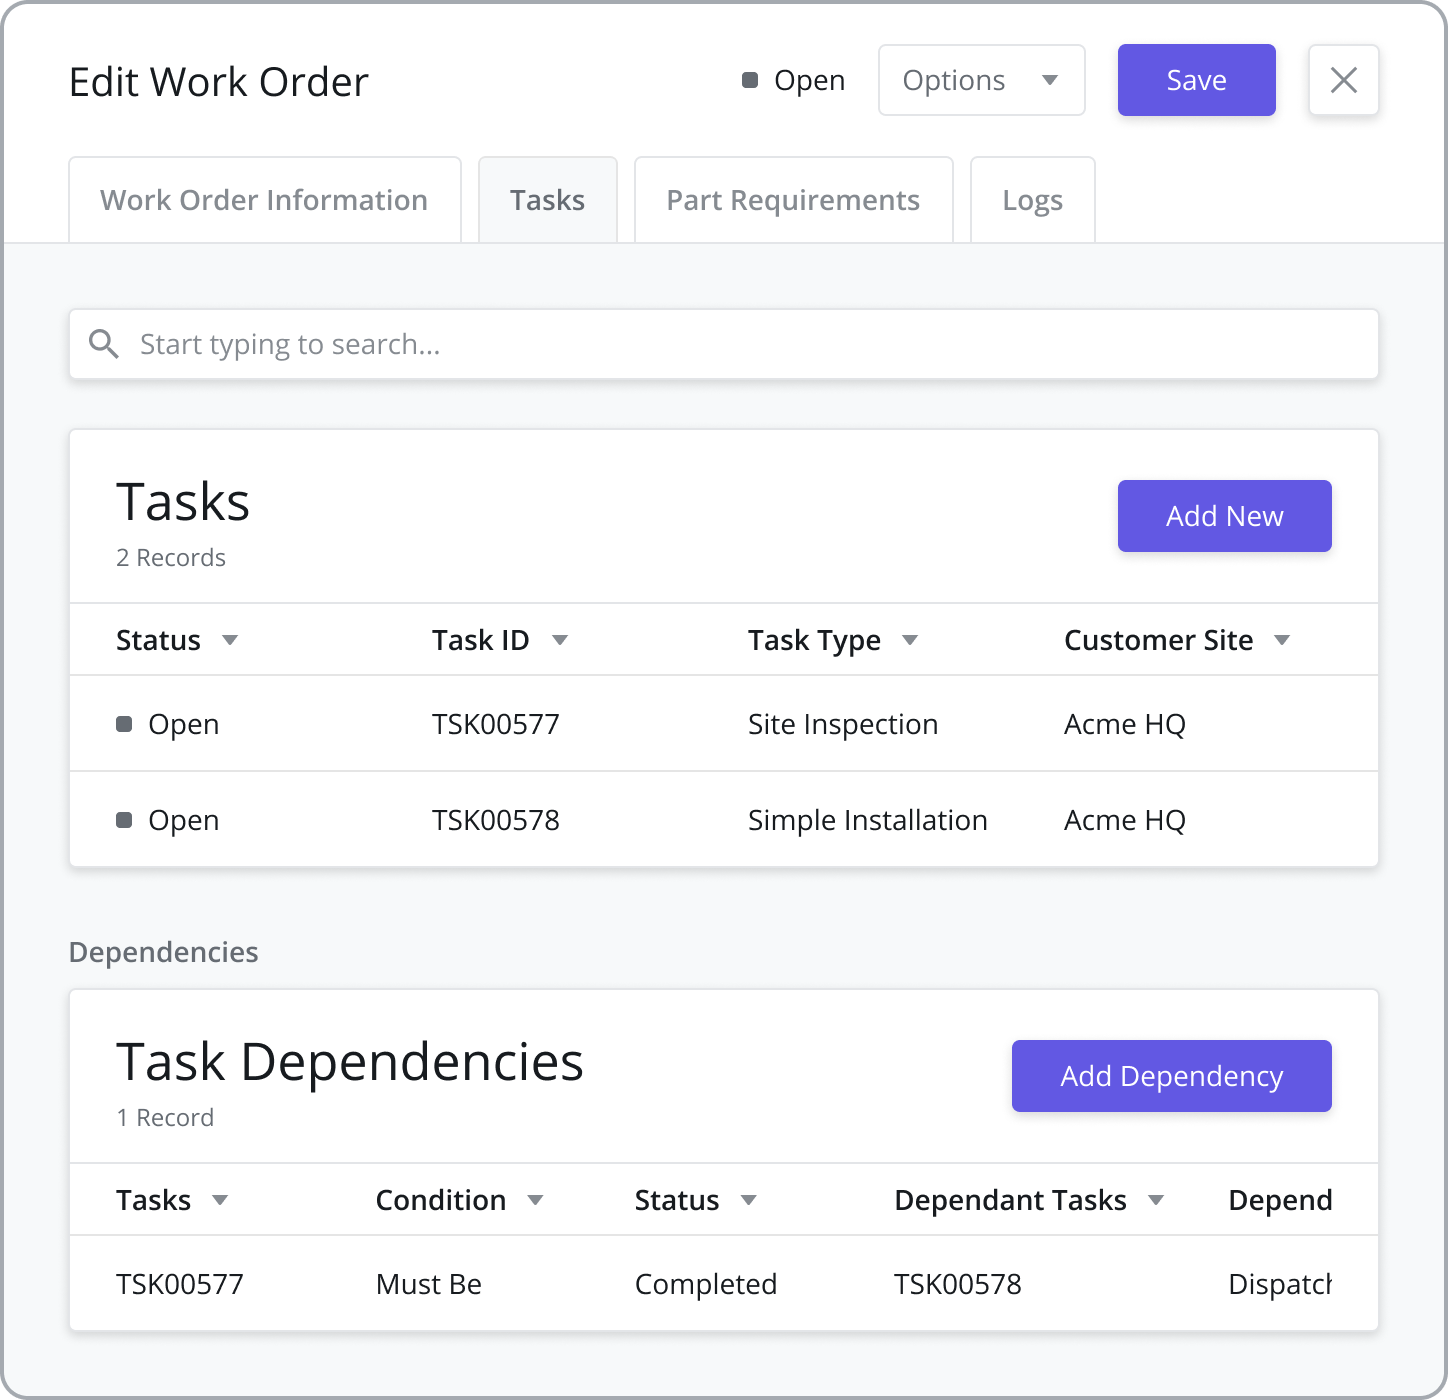
Creating Task Dependencies
https://vimeo.com/820046431/842615279c?share=copy
If a Work Contains 2 or more Tasks, you have the option to configure the order in which tasks need to be performed. Task dependencies are created based on task status changes and any number of dependencies can be configured.
To create a Task Dependency, do the following:
From the Tasks tab, click the Add Task Dependency button on the Task Dependencies data grid that becomes visible once 2 or more tasks are added to the Work Order.
From the “Task” dropdown menu, select the task(s) you want to base your dependency on. If you have 3 or more tasks, multiple tasks can be selected here.
Next, from the “Must be” dropdown menu, select the status that the task(s) must reach to trigger the dependencies on the subsequent task(s) selected below.
From the “In order for these tasks” dropdown menu, select the task(s) you want to impact based on the status changes of the prior task(s).
From the “To be” dropdown menu, select the status of the task(s) you want to be impacted by the trigger event of the prior tasks.
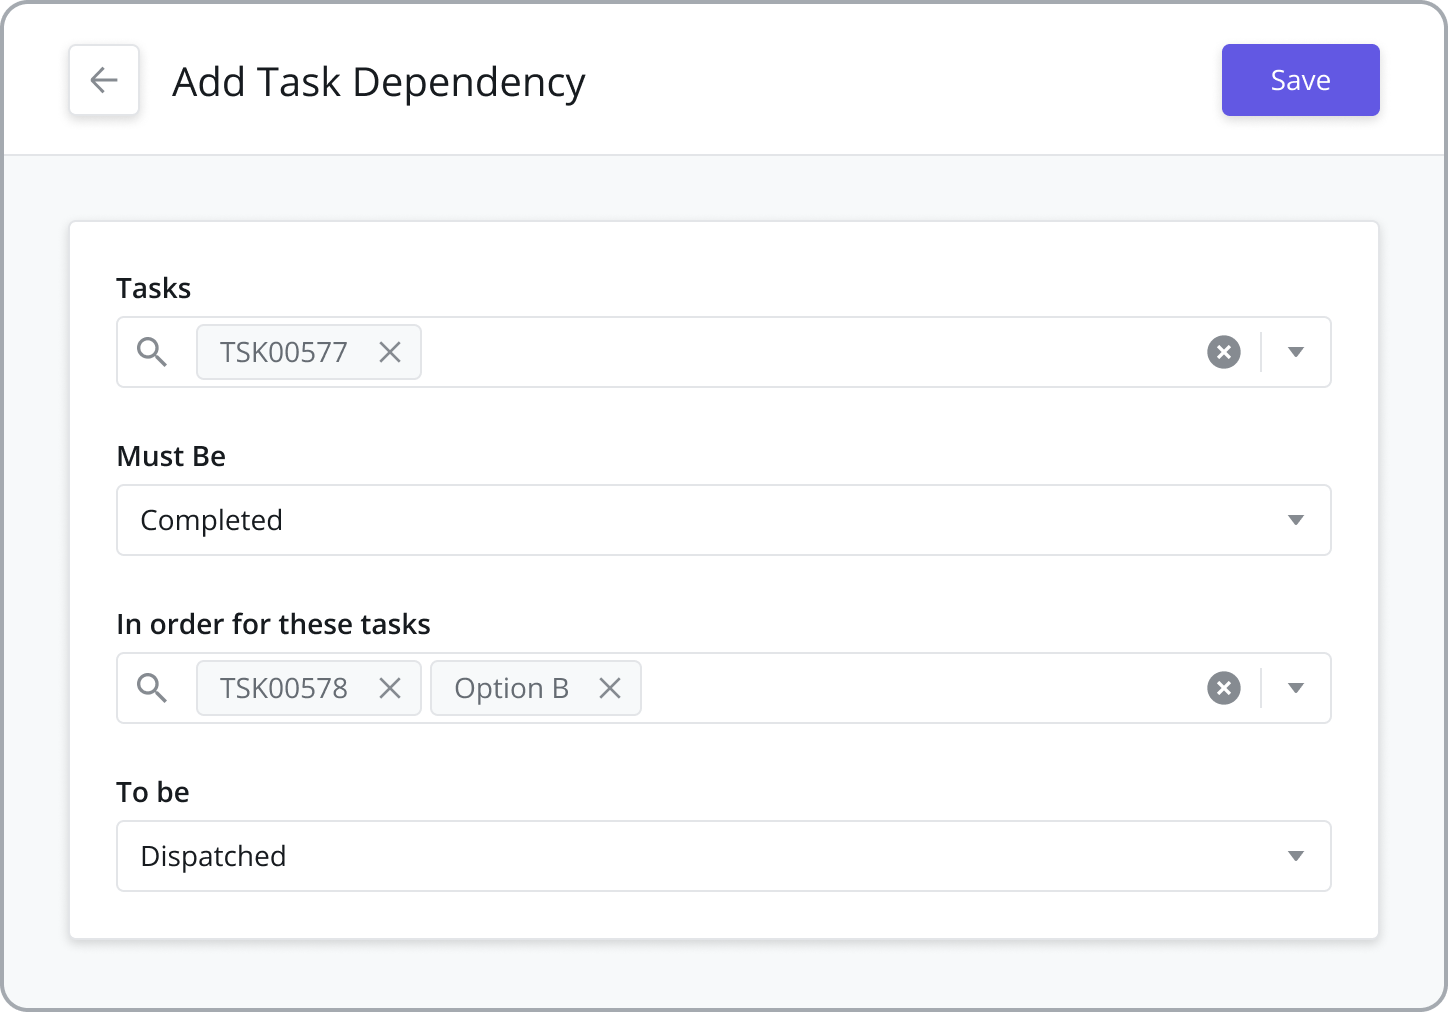
Task Dependency Example
To illustrate how this works, let’s take a simple example:
Let’s say I have 2 tasks in a Work Order: TASK 1 and TASK 2.
I would like to create a dependency between these two tasks such that TASK 2 can ONLY be dispatched once TASK 1 has been completed.
To do so, I would do the following:
From the “Task” dropdown menu, select TASK 1
From the “Must be” dropdown menu, select “Completed” as the status
From the “In order for these tasks” dropdown menu, select TASK 2
From the “To be” dropdown menu, select “Dispatched” as the status.
Please note that as of today Task dependencies are not being honored by the auto schedulers.
Adding Required Parts / Materials to Tasks
If certain parts and materials are required to complete a task, you have the option of adding them to a task that has been added to a work order.
To add Parts and Materials to a Task in a Work Order, do the following:
Add at least one Task to the work order
Next, click on the Part Requirements tab
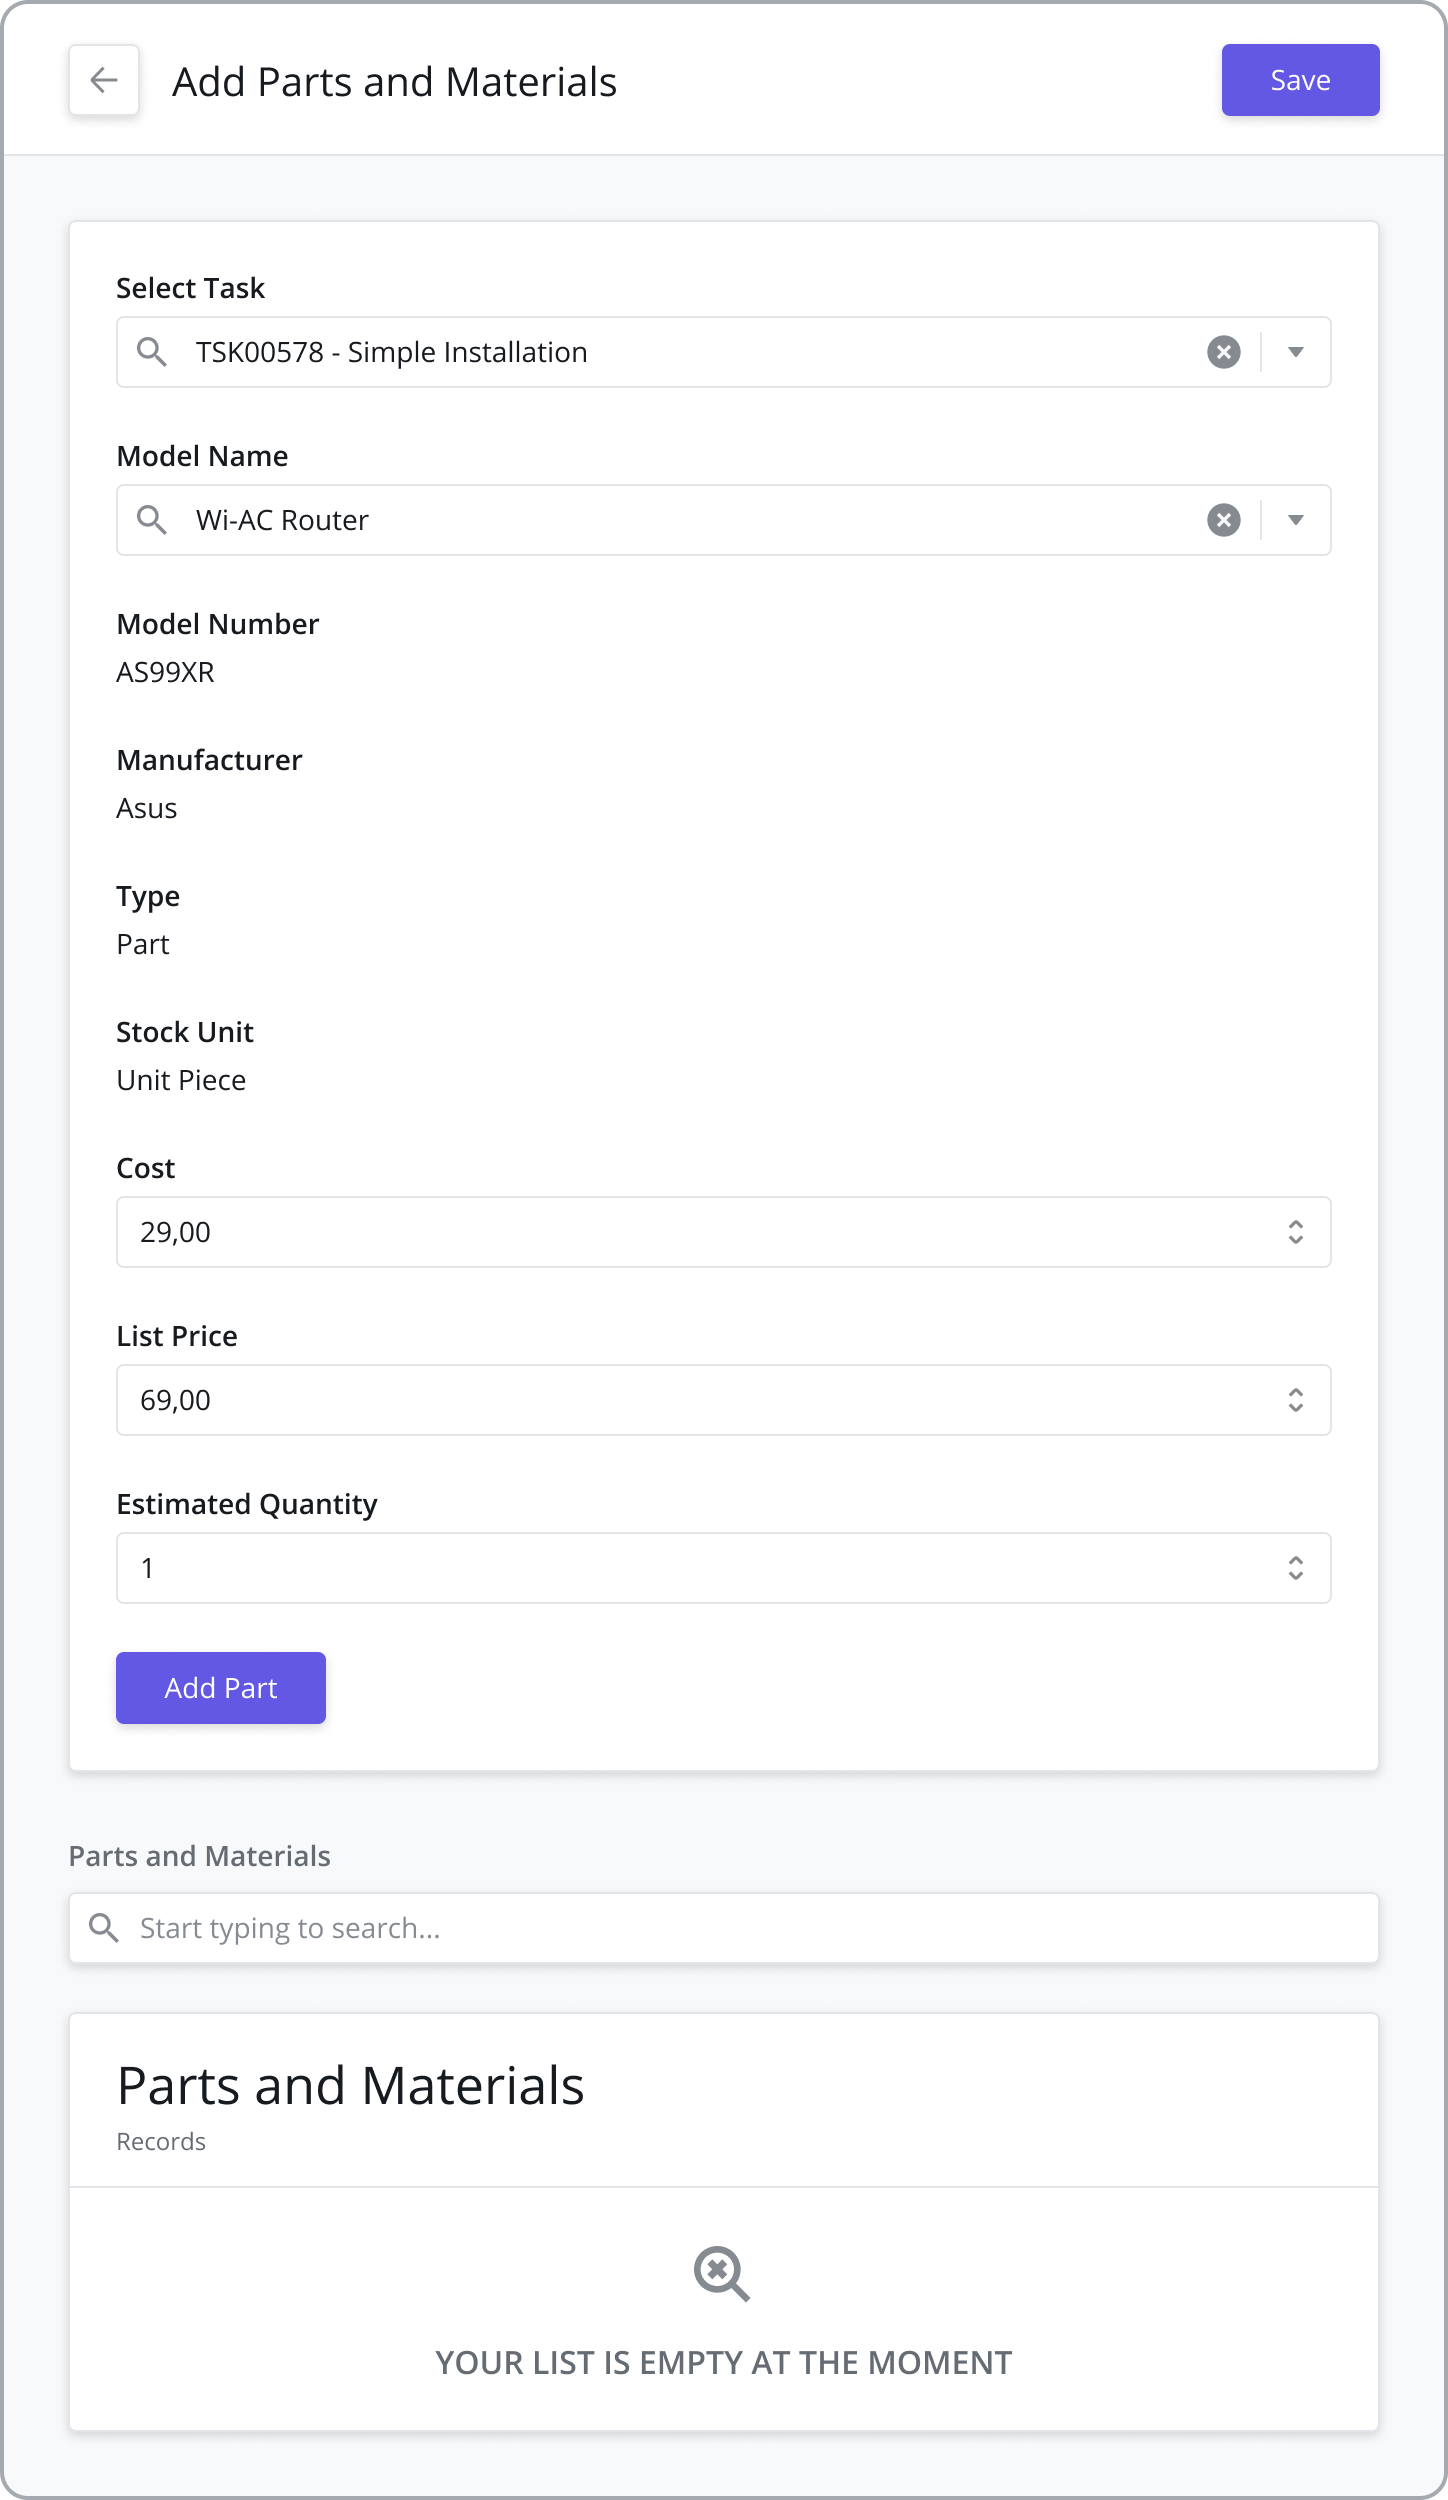
Click the “Add New” button in the top right of the data grid
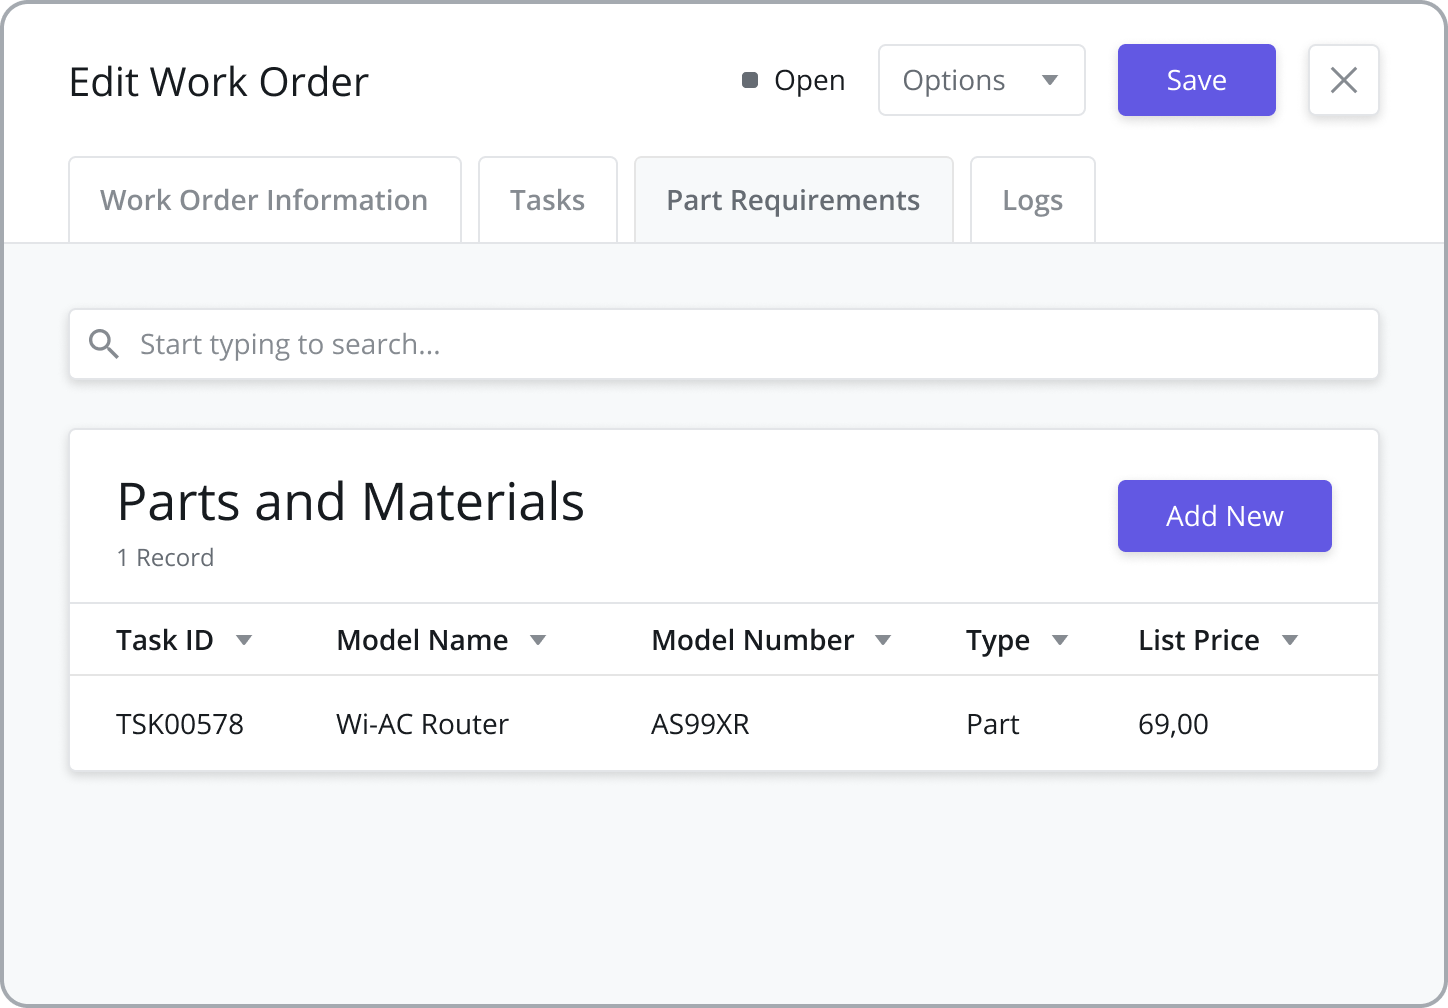
Select the Task which requires the parts/materials
Select the Model Name of the part/material to add to the task
Enter the Cost and List Price. These fields are auto-populated based on what exists in the Catalog, but you have the option of overriding those values here.
Enter the Estimated Quantity required for the task
Click the Add Part button
If you’d like to add more than one part to the selected Task, repeat steps 3-8 as required
Click the Save button