Capacity Management Setup Guide
NEW (24.4)
The following section is a high-level guide for how to set up your organization to start using Capacity Management. To do so, we’ll take a simple example and walk you through the following steps to complete the setup.
Create the Regions
Create Default Shifts
Create the Task Types
Configure Appointment Windows by Task Type
Create Work Order Types and Add Task Types
Create Work Groups
Invite Techs and add them to Work Groups
Sample Organization Attributes
Let’s imagine you want to use Capacity Management for a team with the following attributes:
Task Types
Name | Average Task Duration | Appointment Booking Mode | Default Lead Time | Default Maximum Booking Horizon | Explanation |
|---|---|---|---|---|---|
Fiber Installation | 1 hour | Appointment Windows
| 1 day | 7 days | In this fictional organization, 2 different Task Types are performed by techs. Fiber Installations are more time-consuming and have a higher task duration variance. So I choose to use Appointment Windows as the booking mode, giving me greater flexibility in terms of when the tech can arrive on site. |
Router Maintenance | 45 mins | Appointment Slots
| 1 day | 7 days | Router Maintenance tasks are more predictable in terms of task duration. In addition, because my end-customer is usually facing a service outage, I chose Appointment Slots as the booking mode as I want my techs to arrive on-site at a specific time to ensure a better customer experience at a time of greater need. |
Regions
Name | Average Travel Time | Dispatcher / Manager | Technicians | Explanation |
|---|---|---|---|---|
Sausalito | 15 mins | Dispatcher - Sausalito | Tech 1 Tech 2 | In the Sausalito region, “Dispatcher - Sausalito” manages 2 techs, one of whom can perform Fiber Installations while the other can perform Router Maintenance. |
San Francisco | 15 mins | Dispatcher - SF | Tech 3 Tech 4 | In the San Francisco region, “Dispatcher - SF” manages 2 techs, one of whom can perform Fiber Installations while the other can perform Router Maintenance. |
Workforce
Name | Type | Default Shift | Assigned Region | Assigned Task Type(s) |
|---|---|---|---|---|
Dispatcher - Sausalito | Dispatcher | 8:00 am - 7:00 pm (Mon-Fri) | Sausalito | Fiber Installation, Router Maintenance |
Tech 1 | Technician | 8:00 am - 7:00 pm (Mon-Fri) | Sausalito | Fiber Installation |
Tech 2 | Technician | 8:00 am - 7:00 pm (Mon-Fri) | Sausalito | Router Maintenance |
Dispatcher - SF | Dispatcher | 8:00 am - 7:00 pm (Mon-Fri) | San Francisco | Fiber Installation, Router Maintenance |
Tech 3 | Technician | 8:00 am - 7:00 pm (Mon-Fri) | San Francisco | Fiber Installation |
Tech 4 | Technician | 8:00 am - 7:00 pm (Mon-Fri) | San Francisco | Router Maintenance |
Step 1: Create Regions
Our first step is to add the Sausalito and San Francisco Regions to your Org. To do so, follow the steps below:
Go to the Settings > Business Settings > Regions module
Click the “Add New” button from the data grid
In the Name field enter “Sausalito” and provide a Description (Optional)
In the Average Travel Time (mins) field enter “15”. This is used when calculating Capacity for tasks performed in that Region. For more information on how travel time impacts capacity, visit the Capacity Points View page.
In the Timezone field, select “Americas/Los Angles”. The Timezone you select here can be leveraged in the Solution for various purposes.
Click Save and Continue. We can ignore Subregions for this example
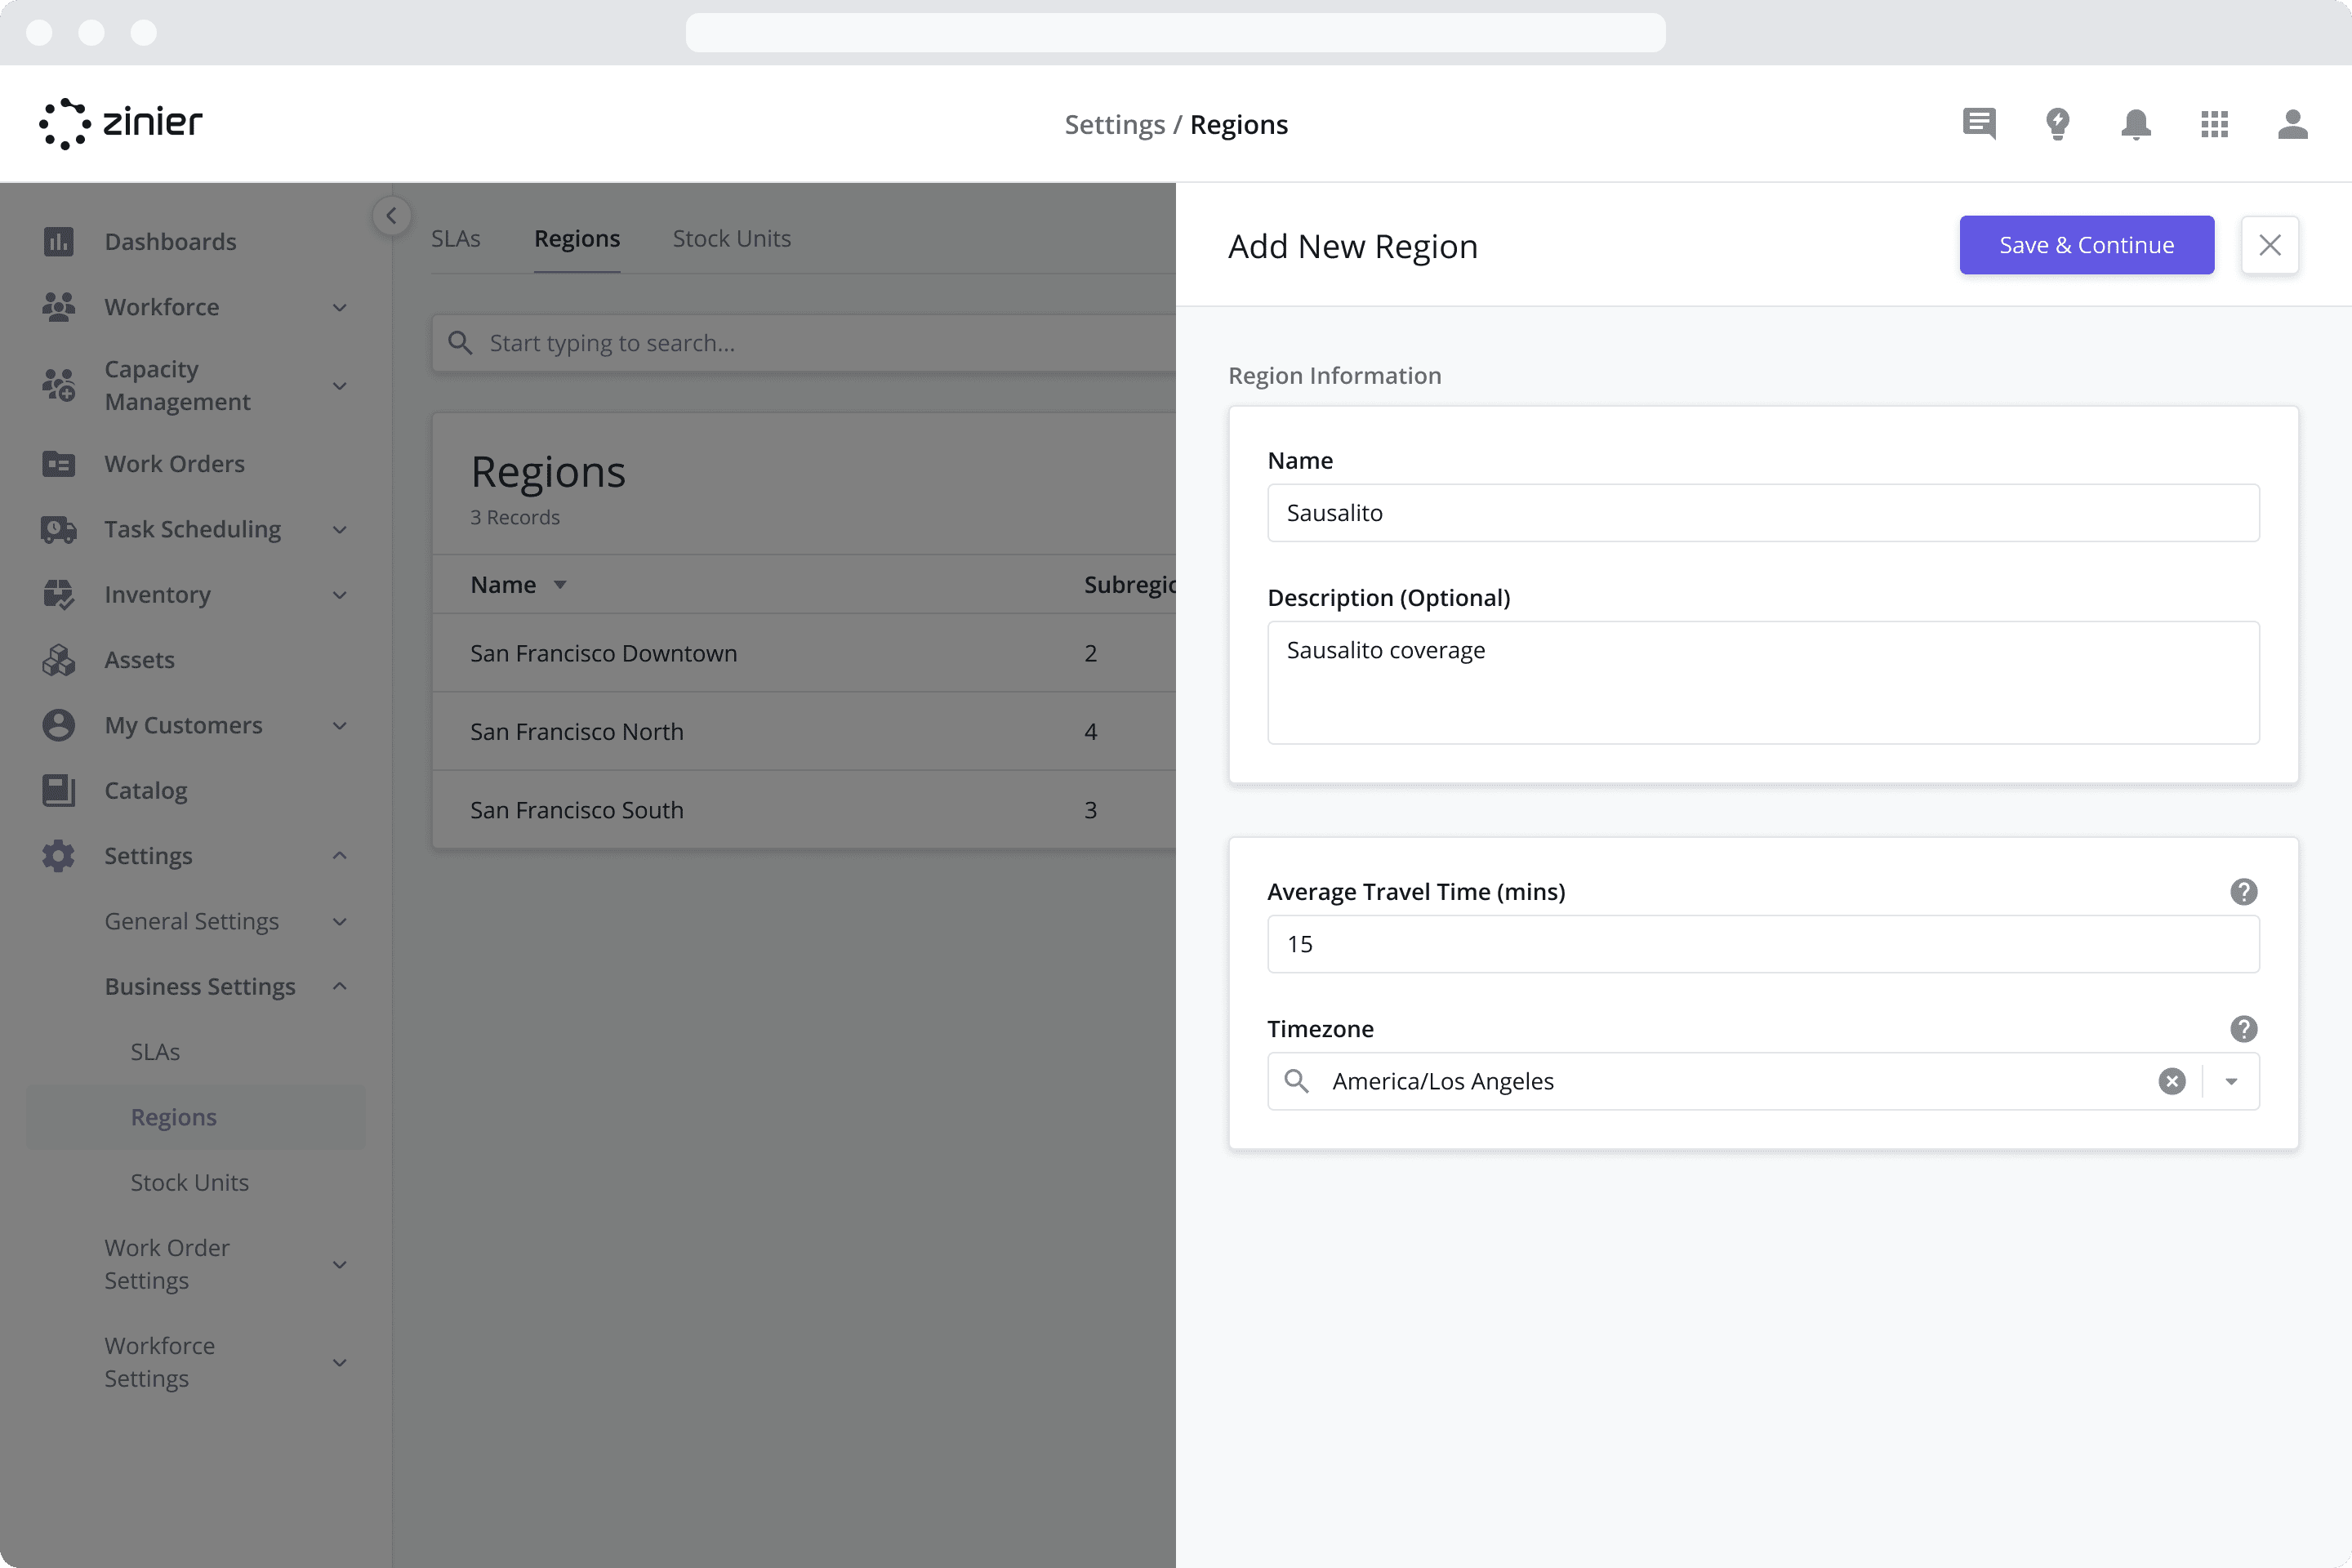
Click Save
Repeat the steps above for the “San Fransisco” Region.
Step 2: Create the Default Shift
Our next step is to create the Default Shift that your workforce will use. To do so, follow the steps below:
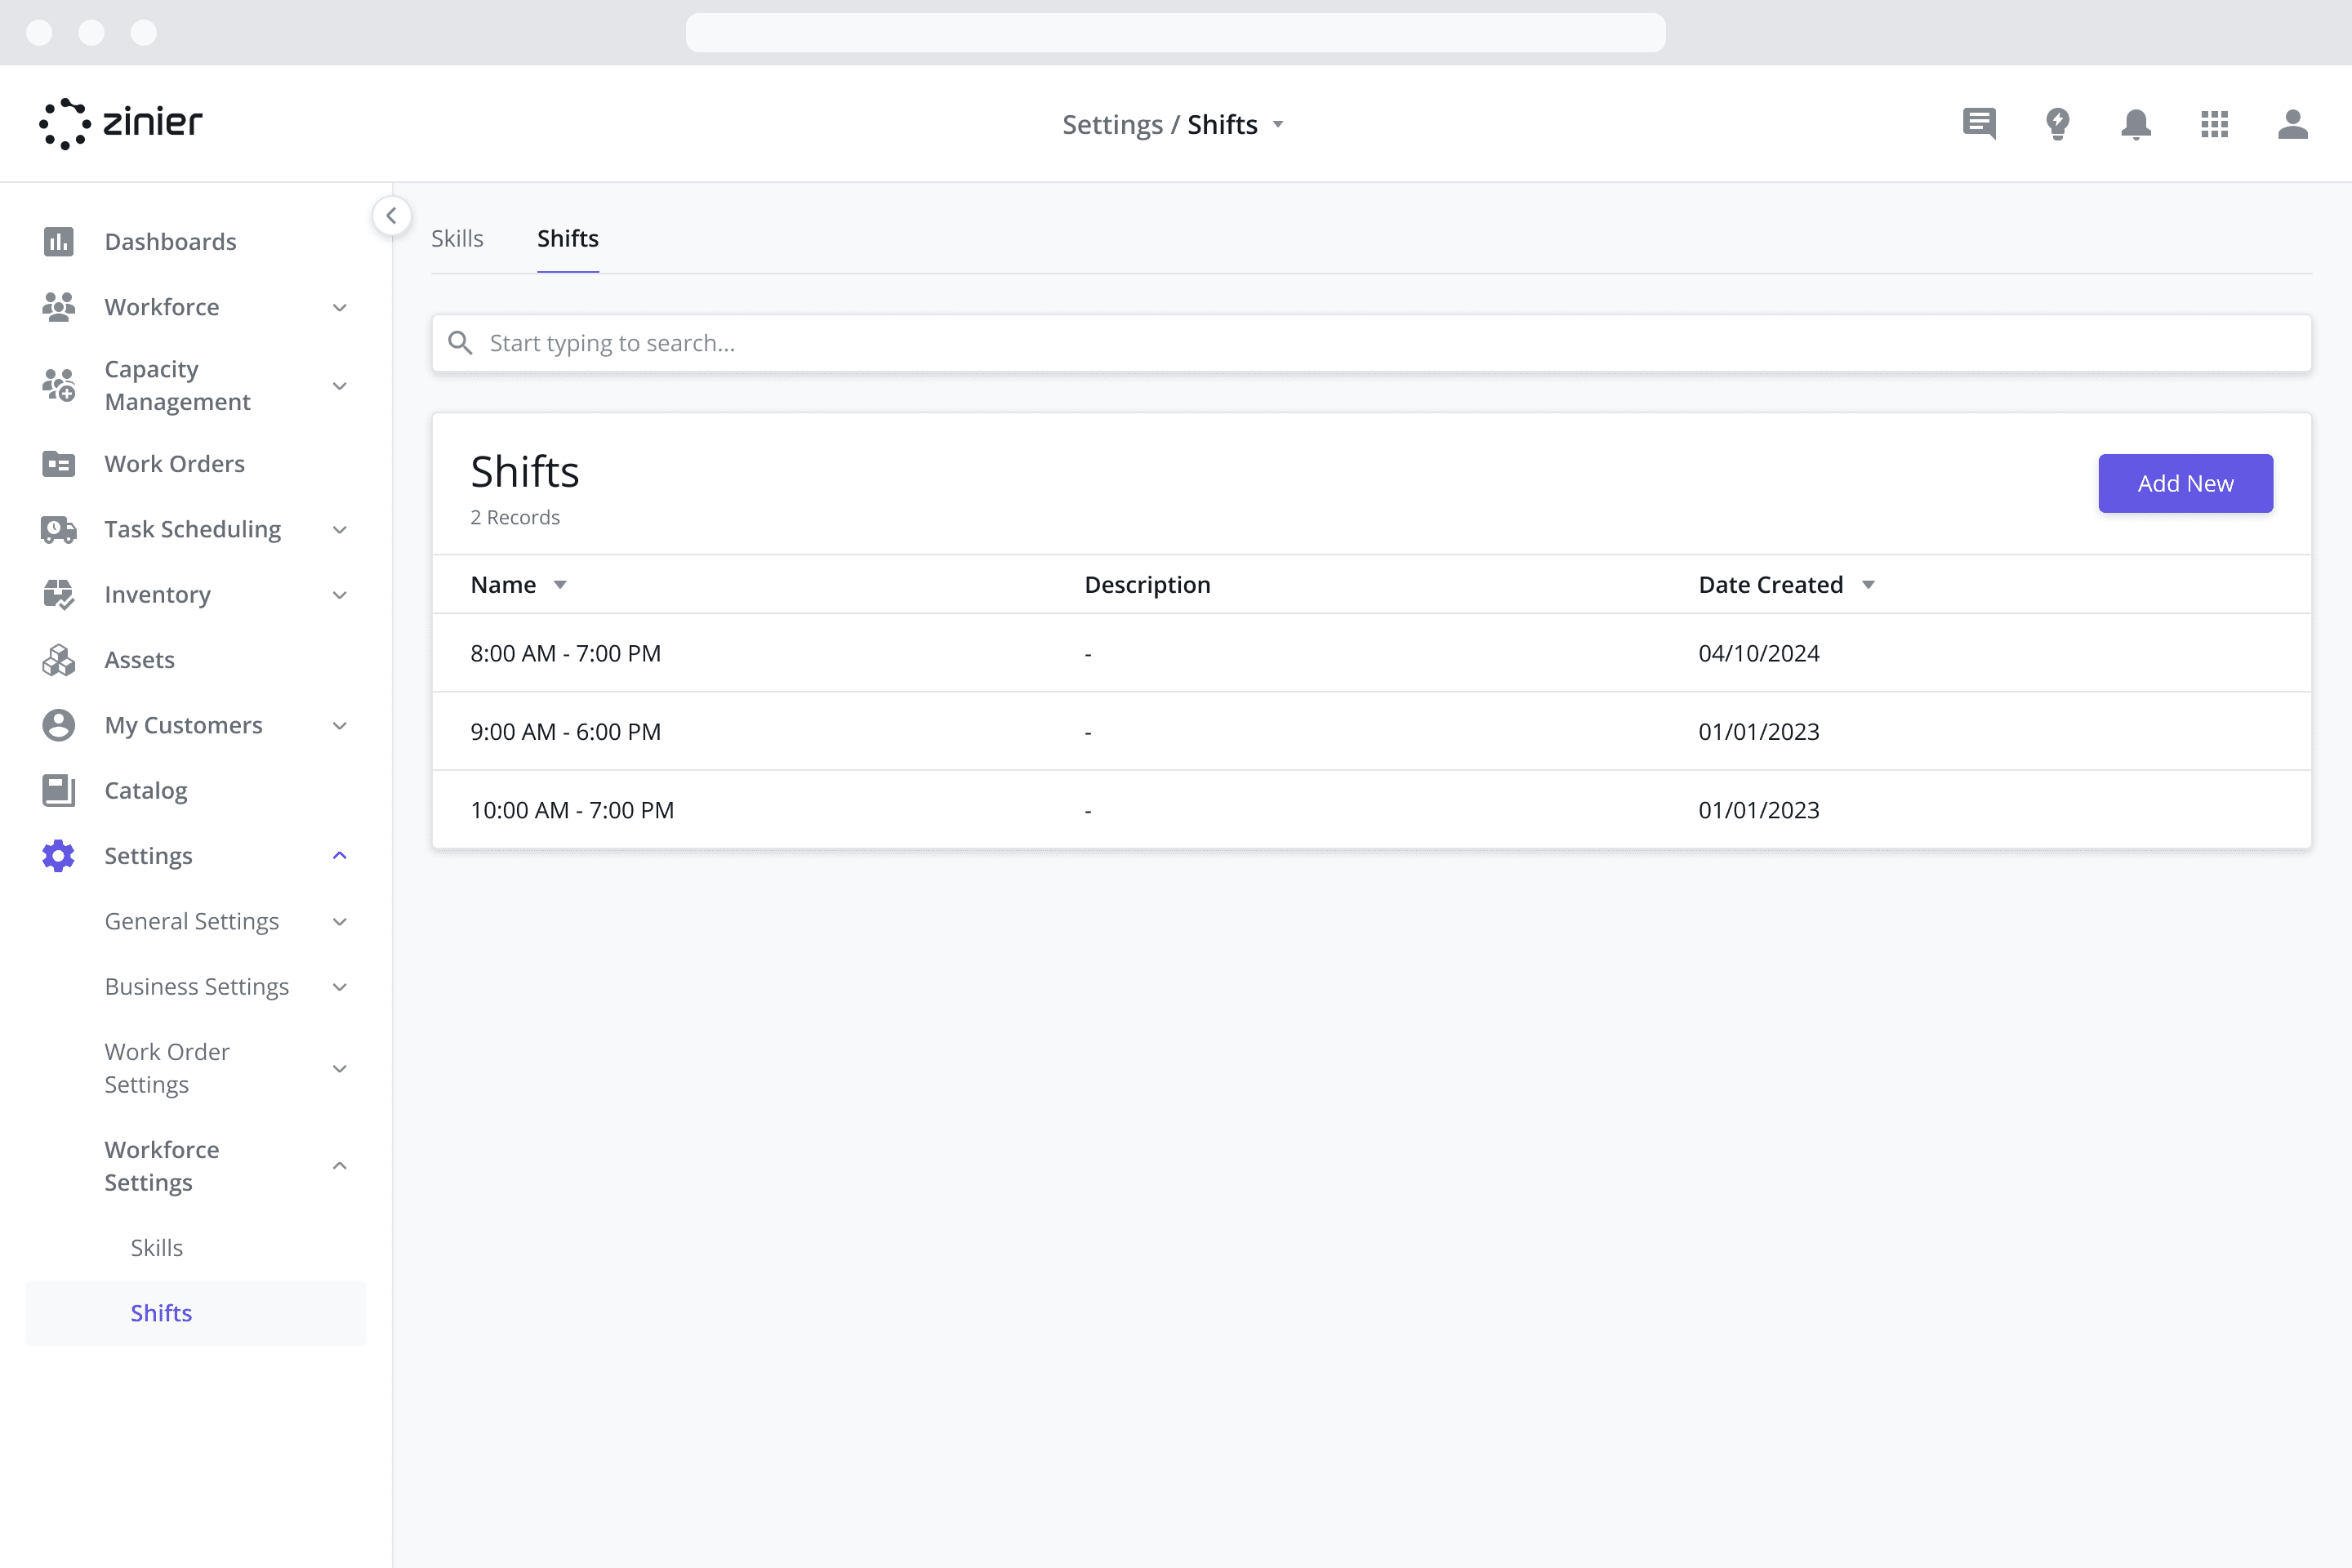
Go to the Settings > Workforce Settings > Shifts module
Click the “Add New” button from the data grid
In the Name field enter “8:00 AM - 7:00 PM” and provide a Description (Optional)
Click Save and Continue

Next, adjust the Weekly Schedule with the desired working hours by clicking on each day of the week from the data grid, starting with Monday:
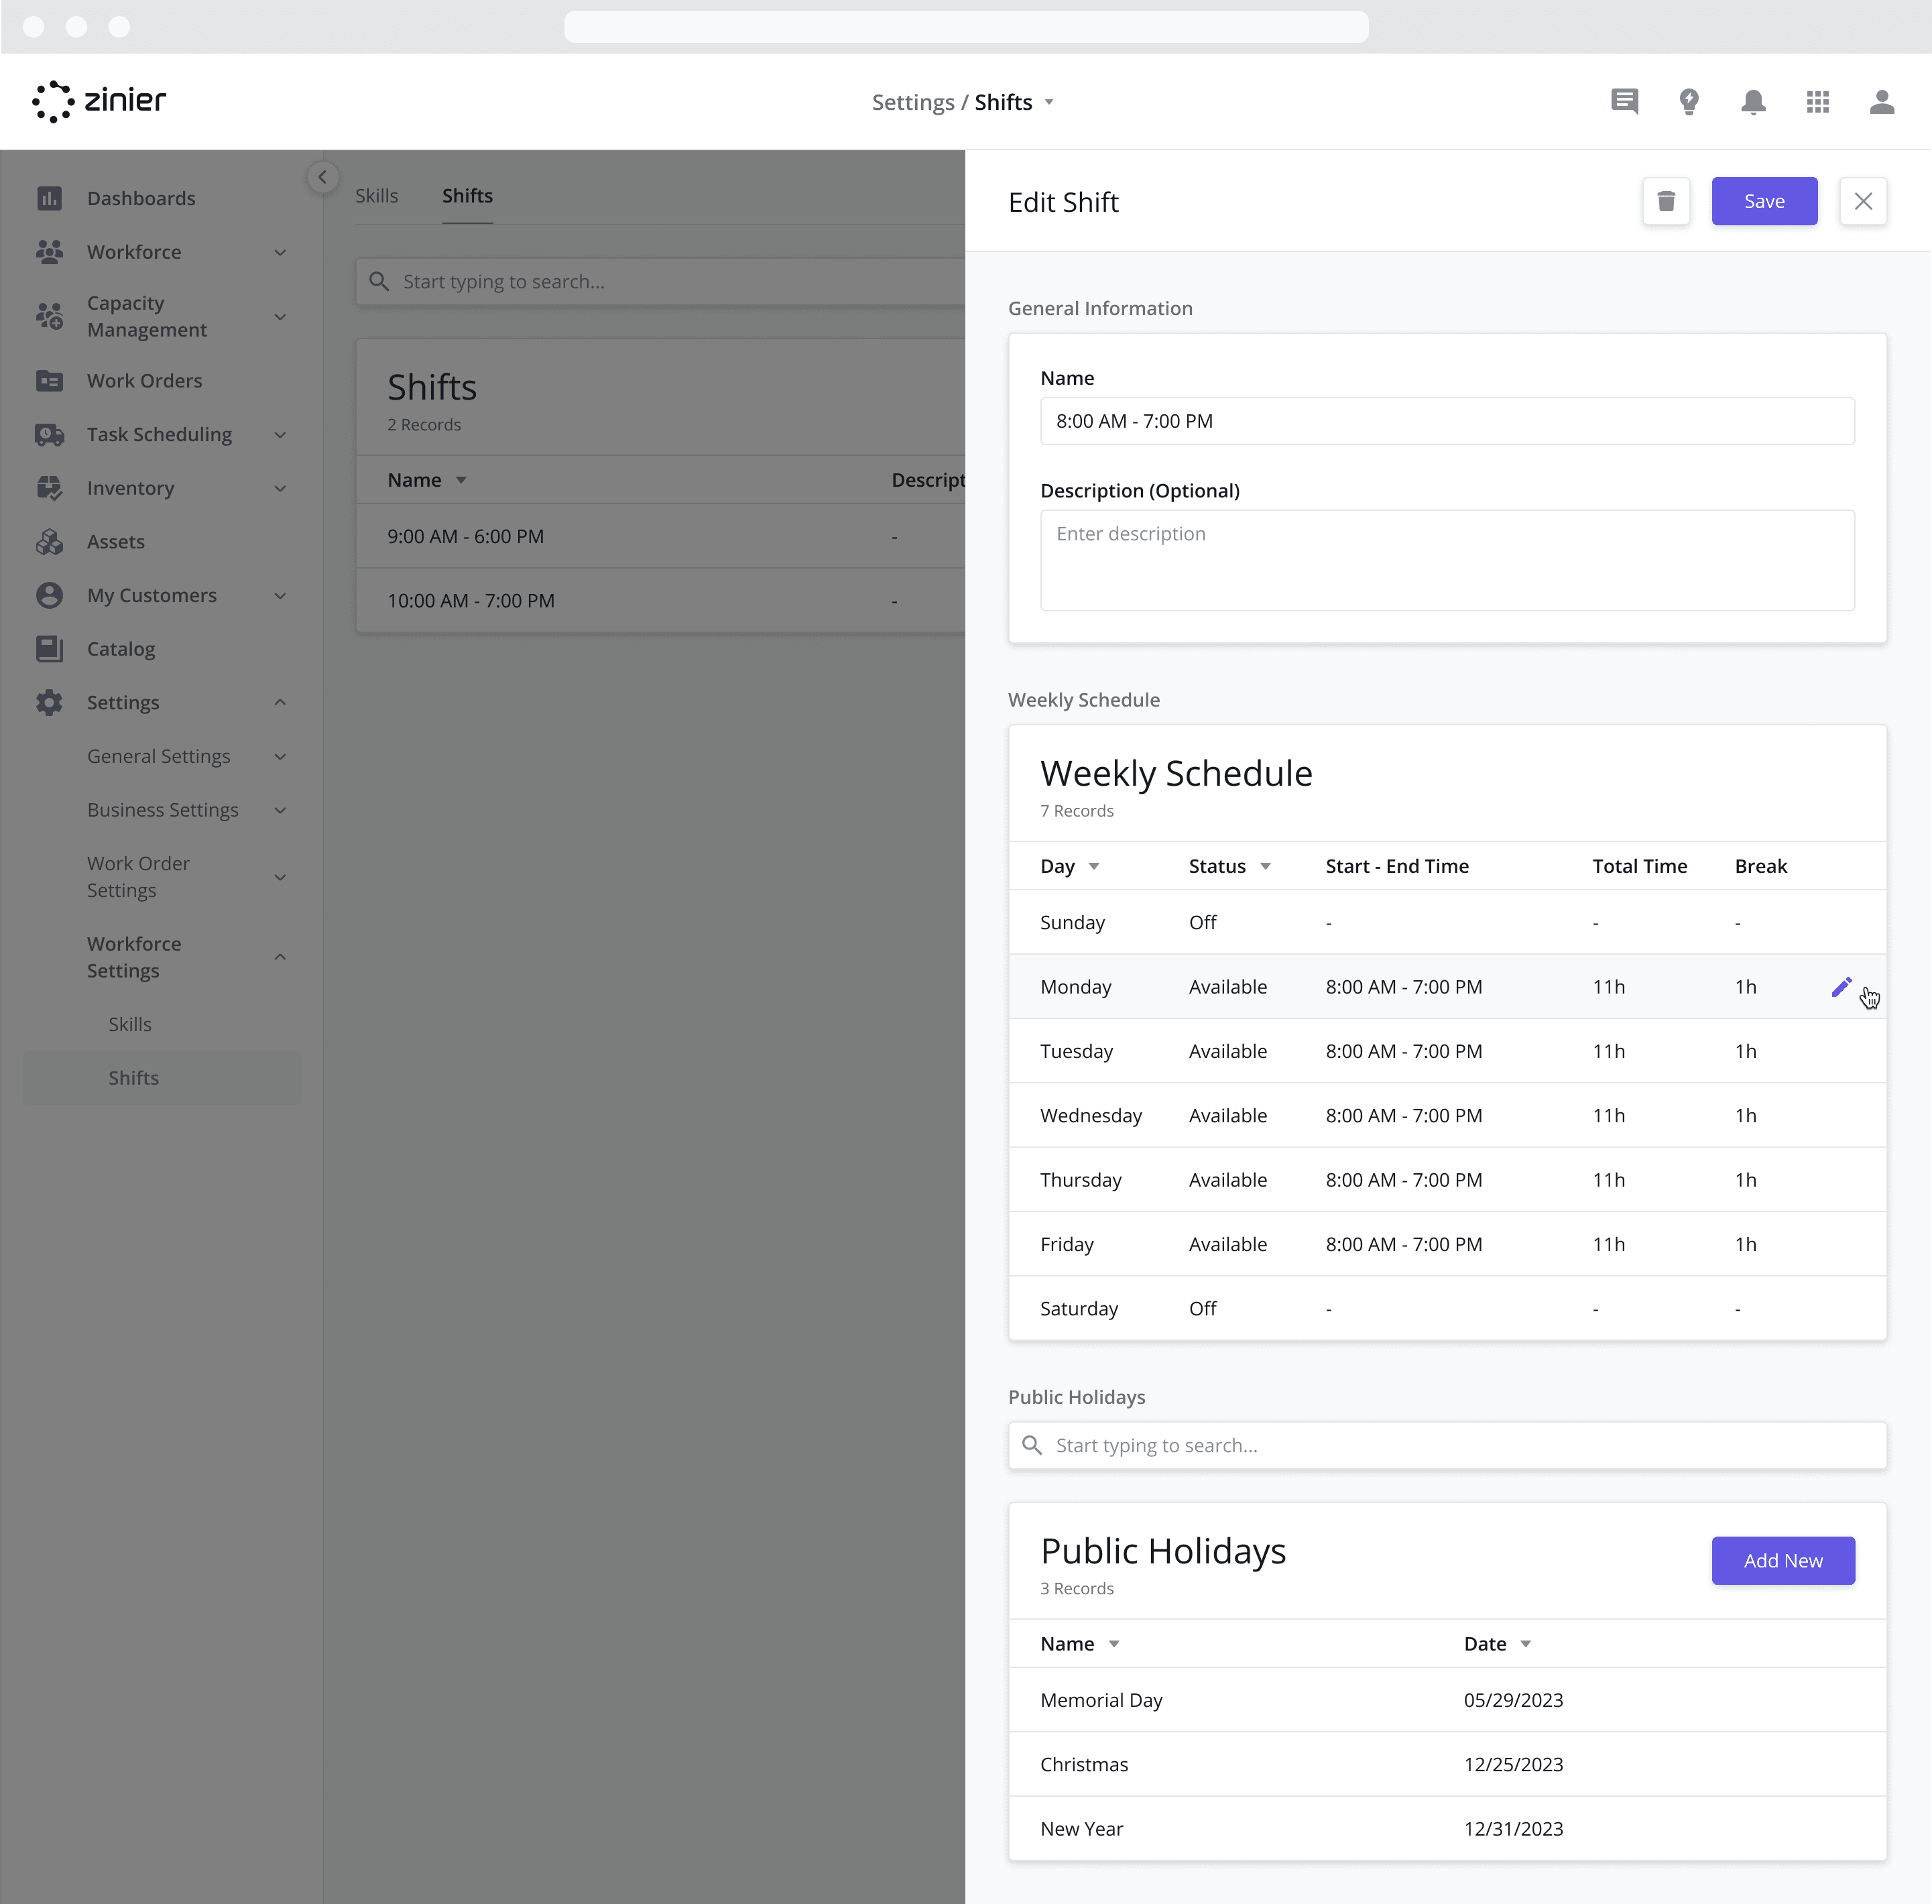
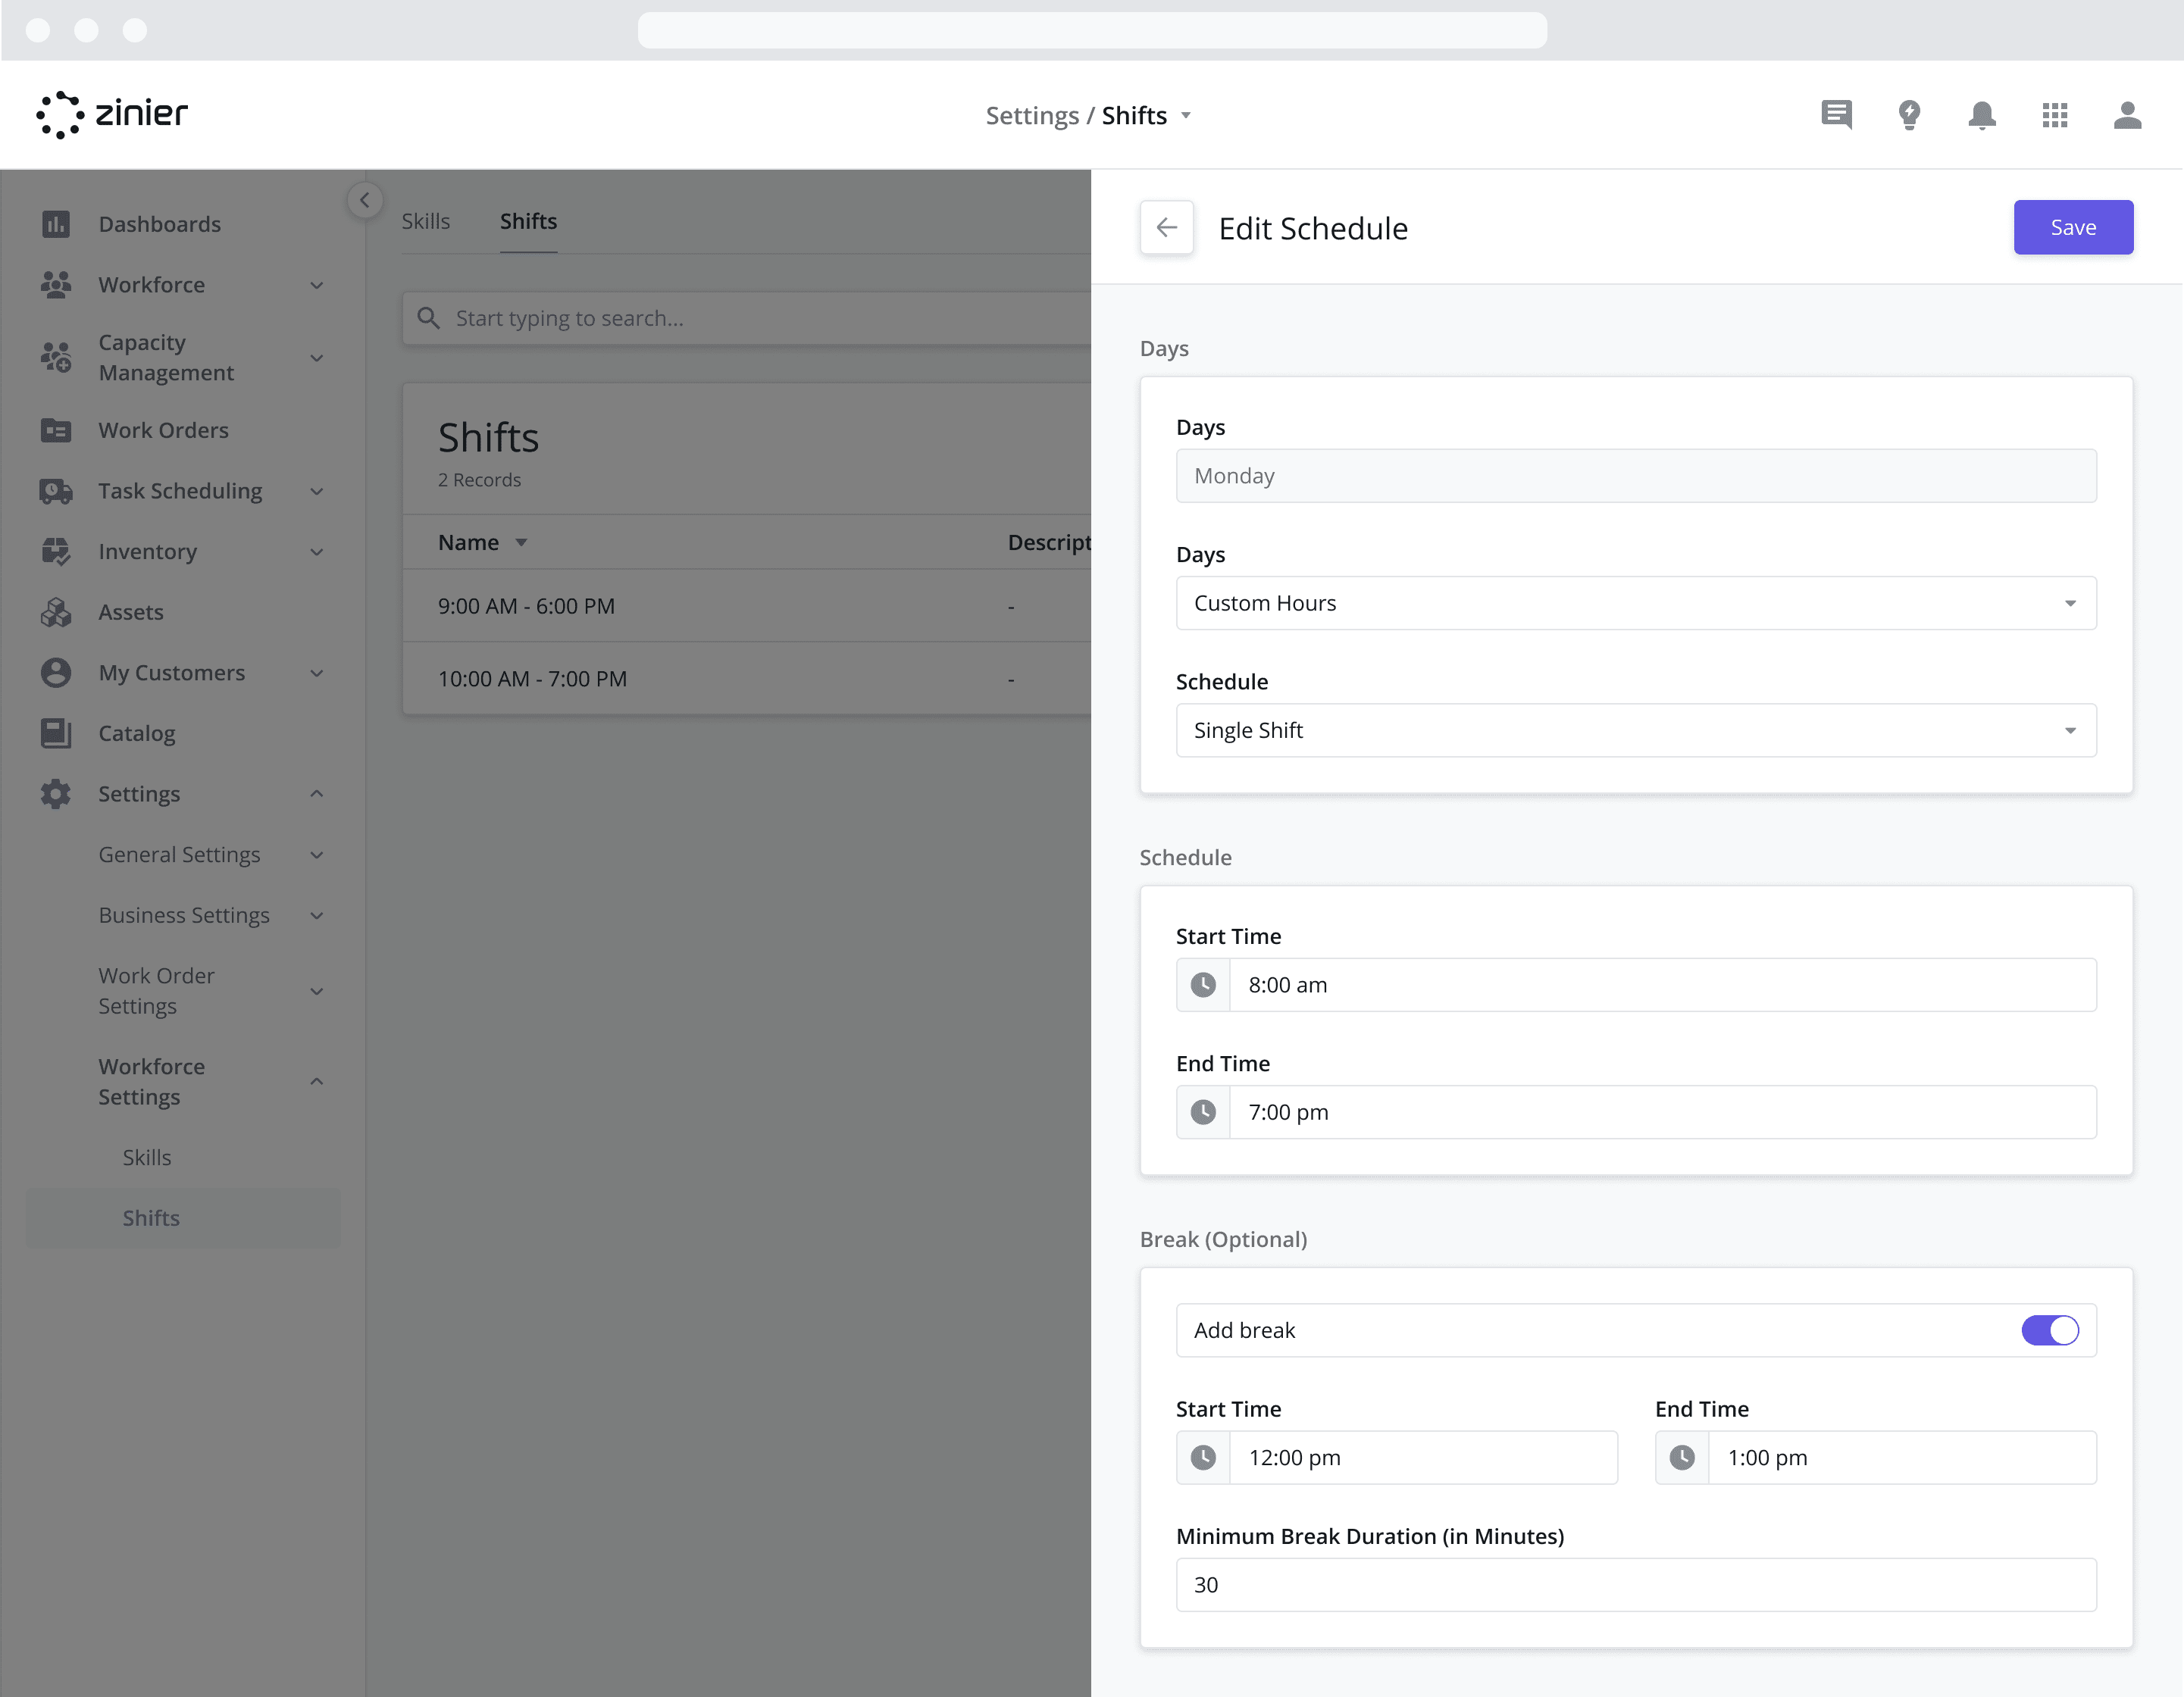
From the Hours dropdown menu, make sure Custom Hours is selected which allows you to enter a custom start and end time for the day
From the Schedule dropdown, make sure Single Shift is selected which is a standard Shift with a Start Time and End Time for the day
In the Start Time field select “8:00 am”
In the End Time field select “7:00 pm”
This is a long shift, so let’s Add a Break (Optional) by doing the following
Turn the “Add Break” toggle to On
In the Start Time field select “12:00 pm”
In the End Time field select “1:00 pm”
Provide a Minimum Break Duration of “30 mins”
Click Save
Repeat for Tuesday, Thursday and Friday using the same settings as Monday
For Saturday and Sunday, make sure Hours is set to “Off”.
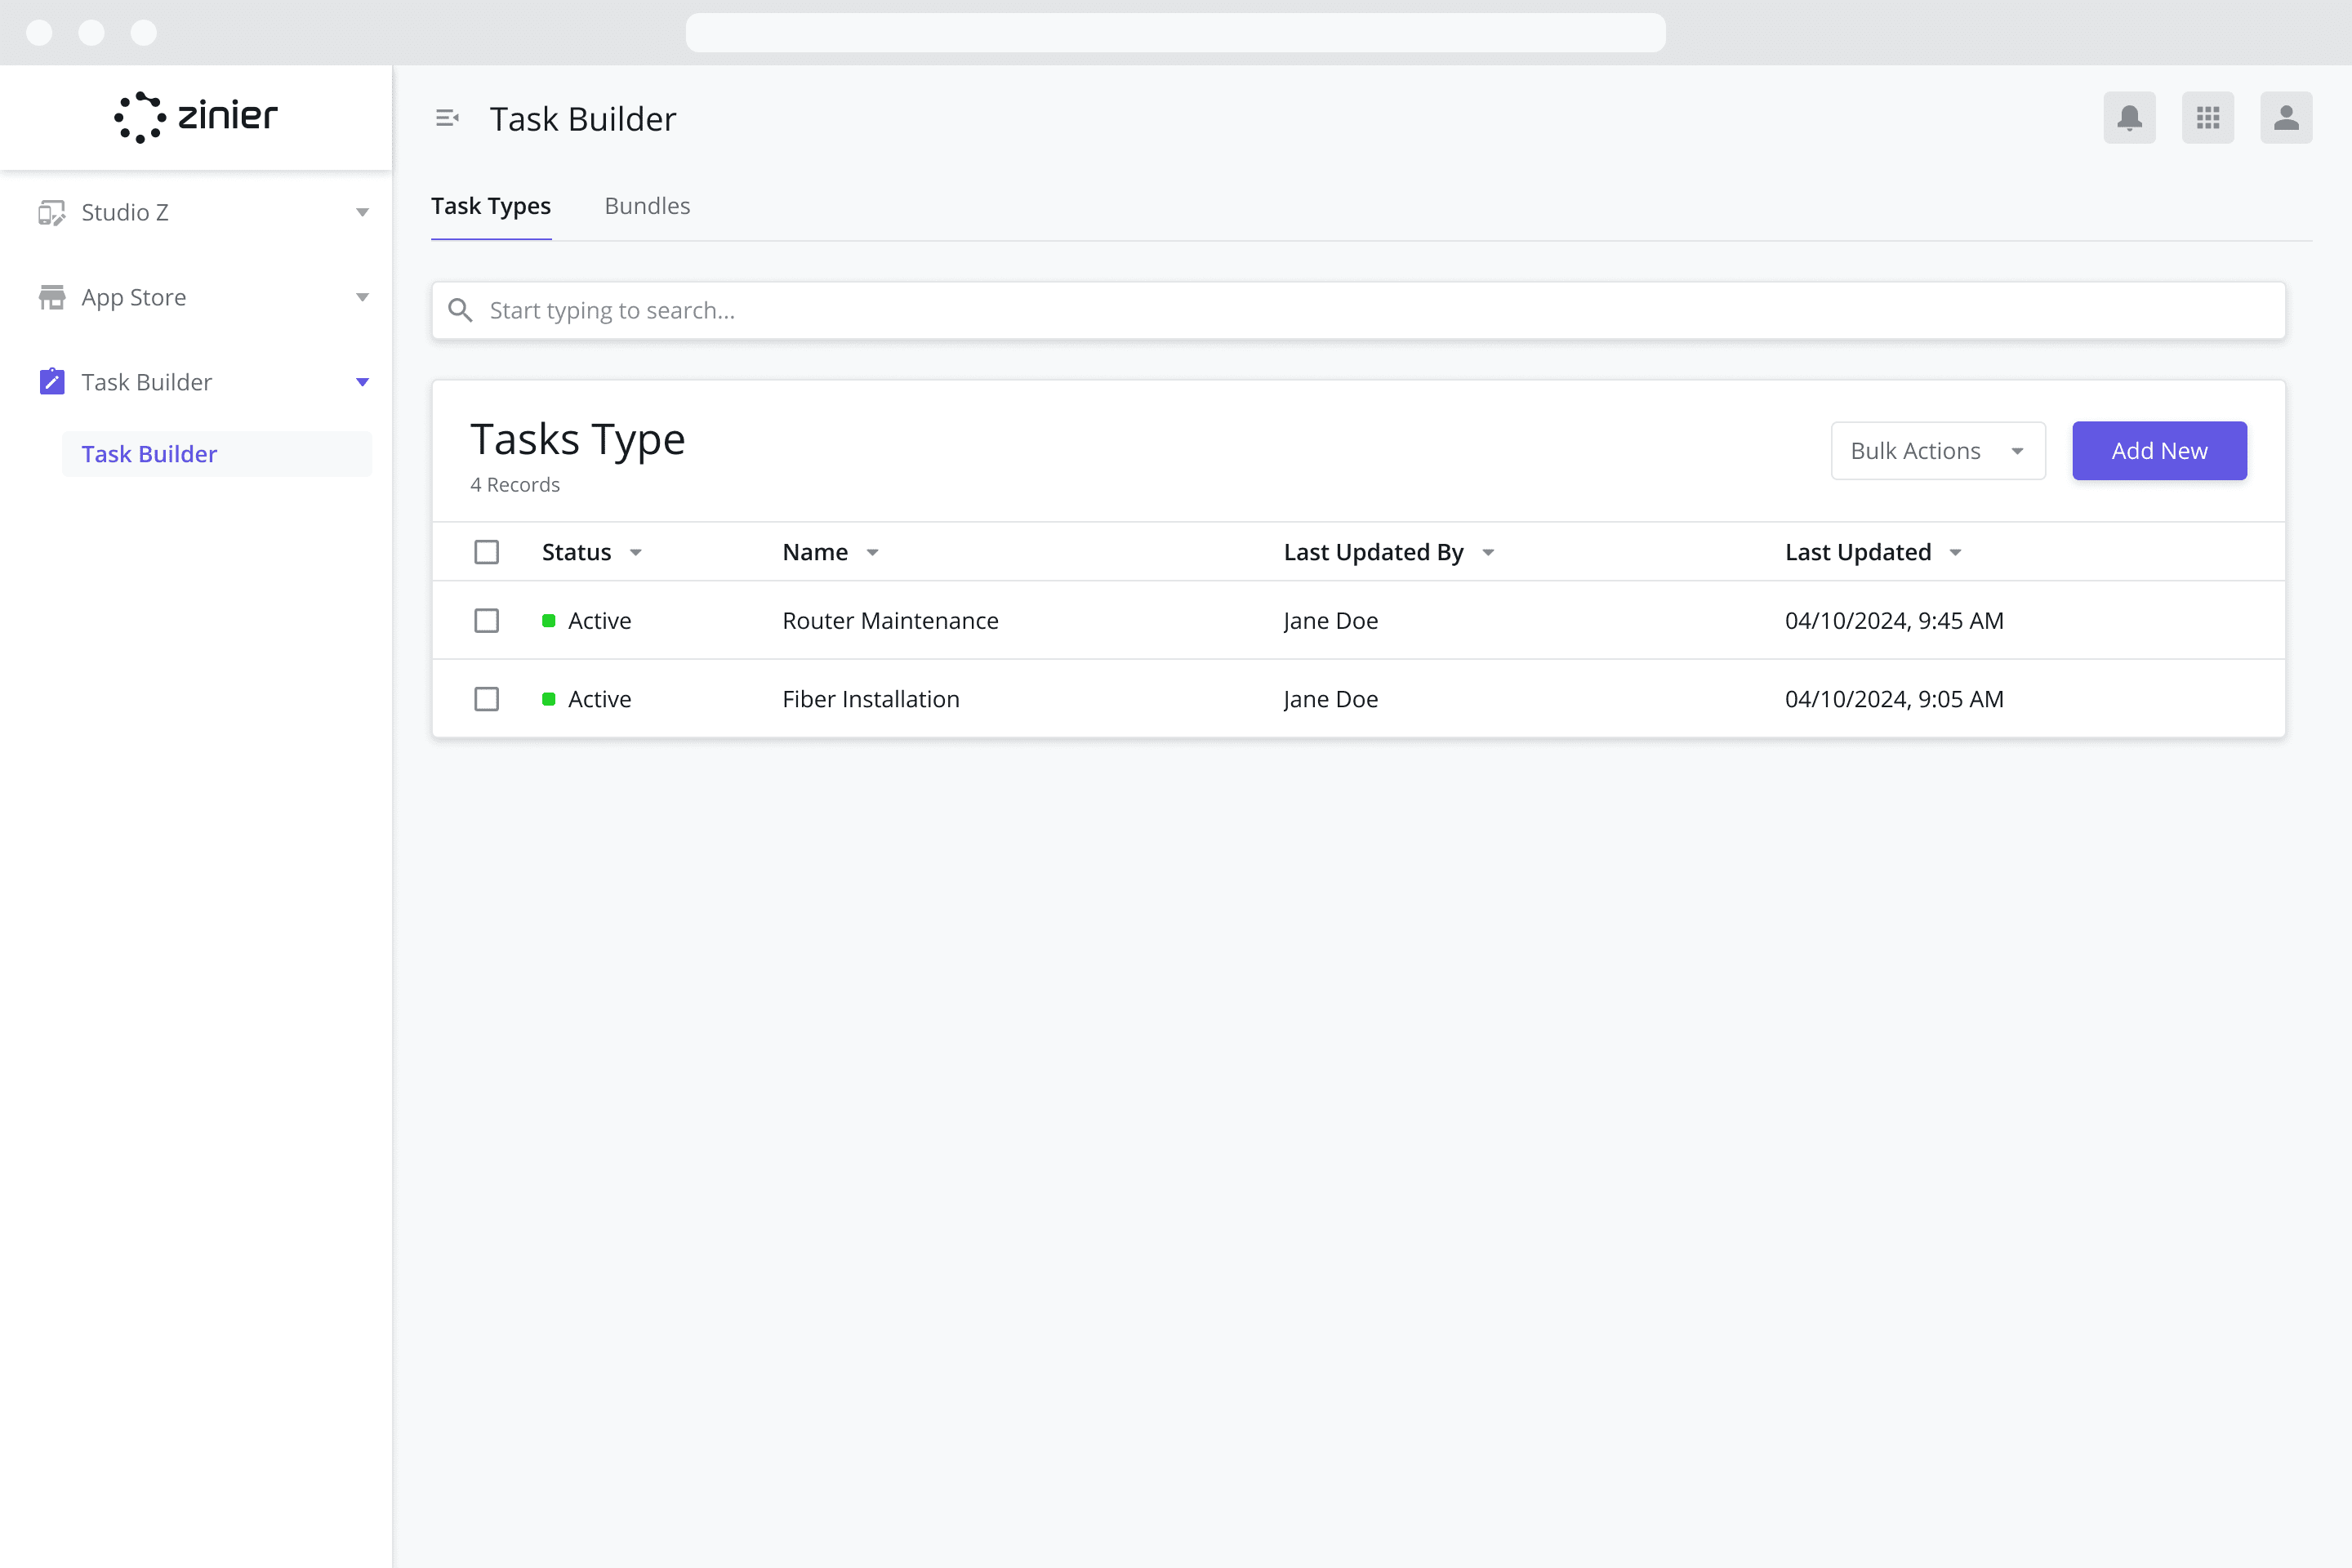
Step 3: Create your Tasks Using the Task Builder
Our next step is to create the Task Types for Fiber Installation and Router Maintenance using the Task Builder. To do so, follow the steps below:
To create a new task, open the Studio Z app by clicking on the Zinier Apps icon on the top right of the screen.
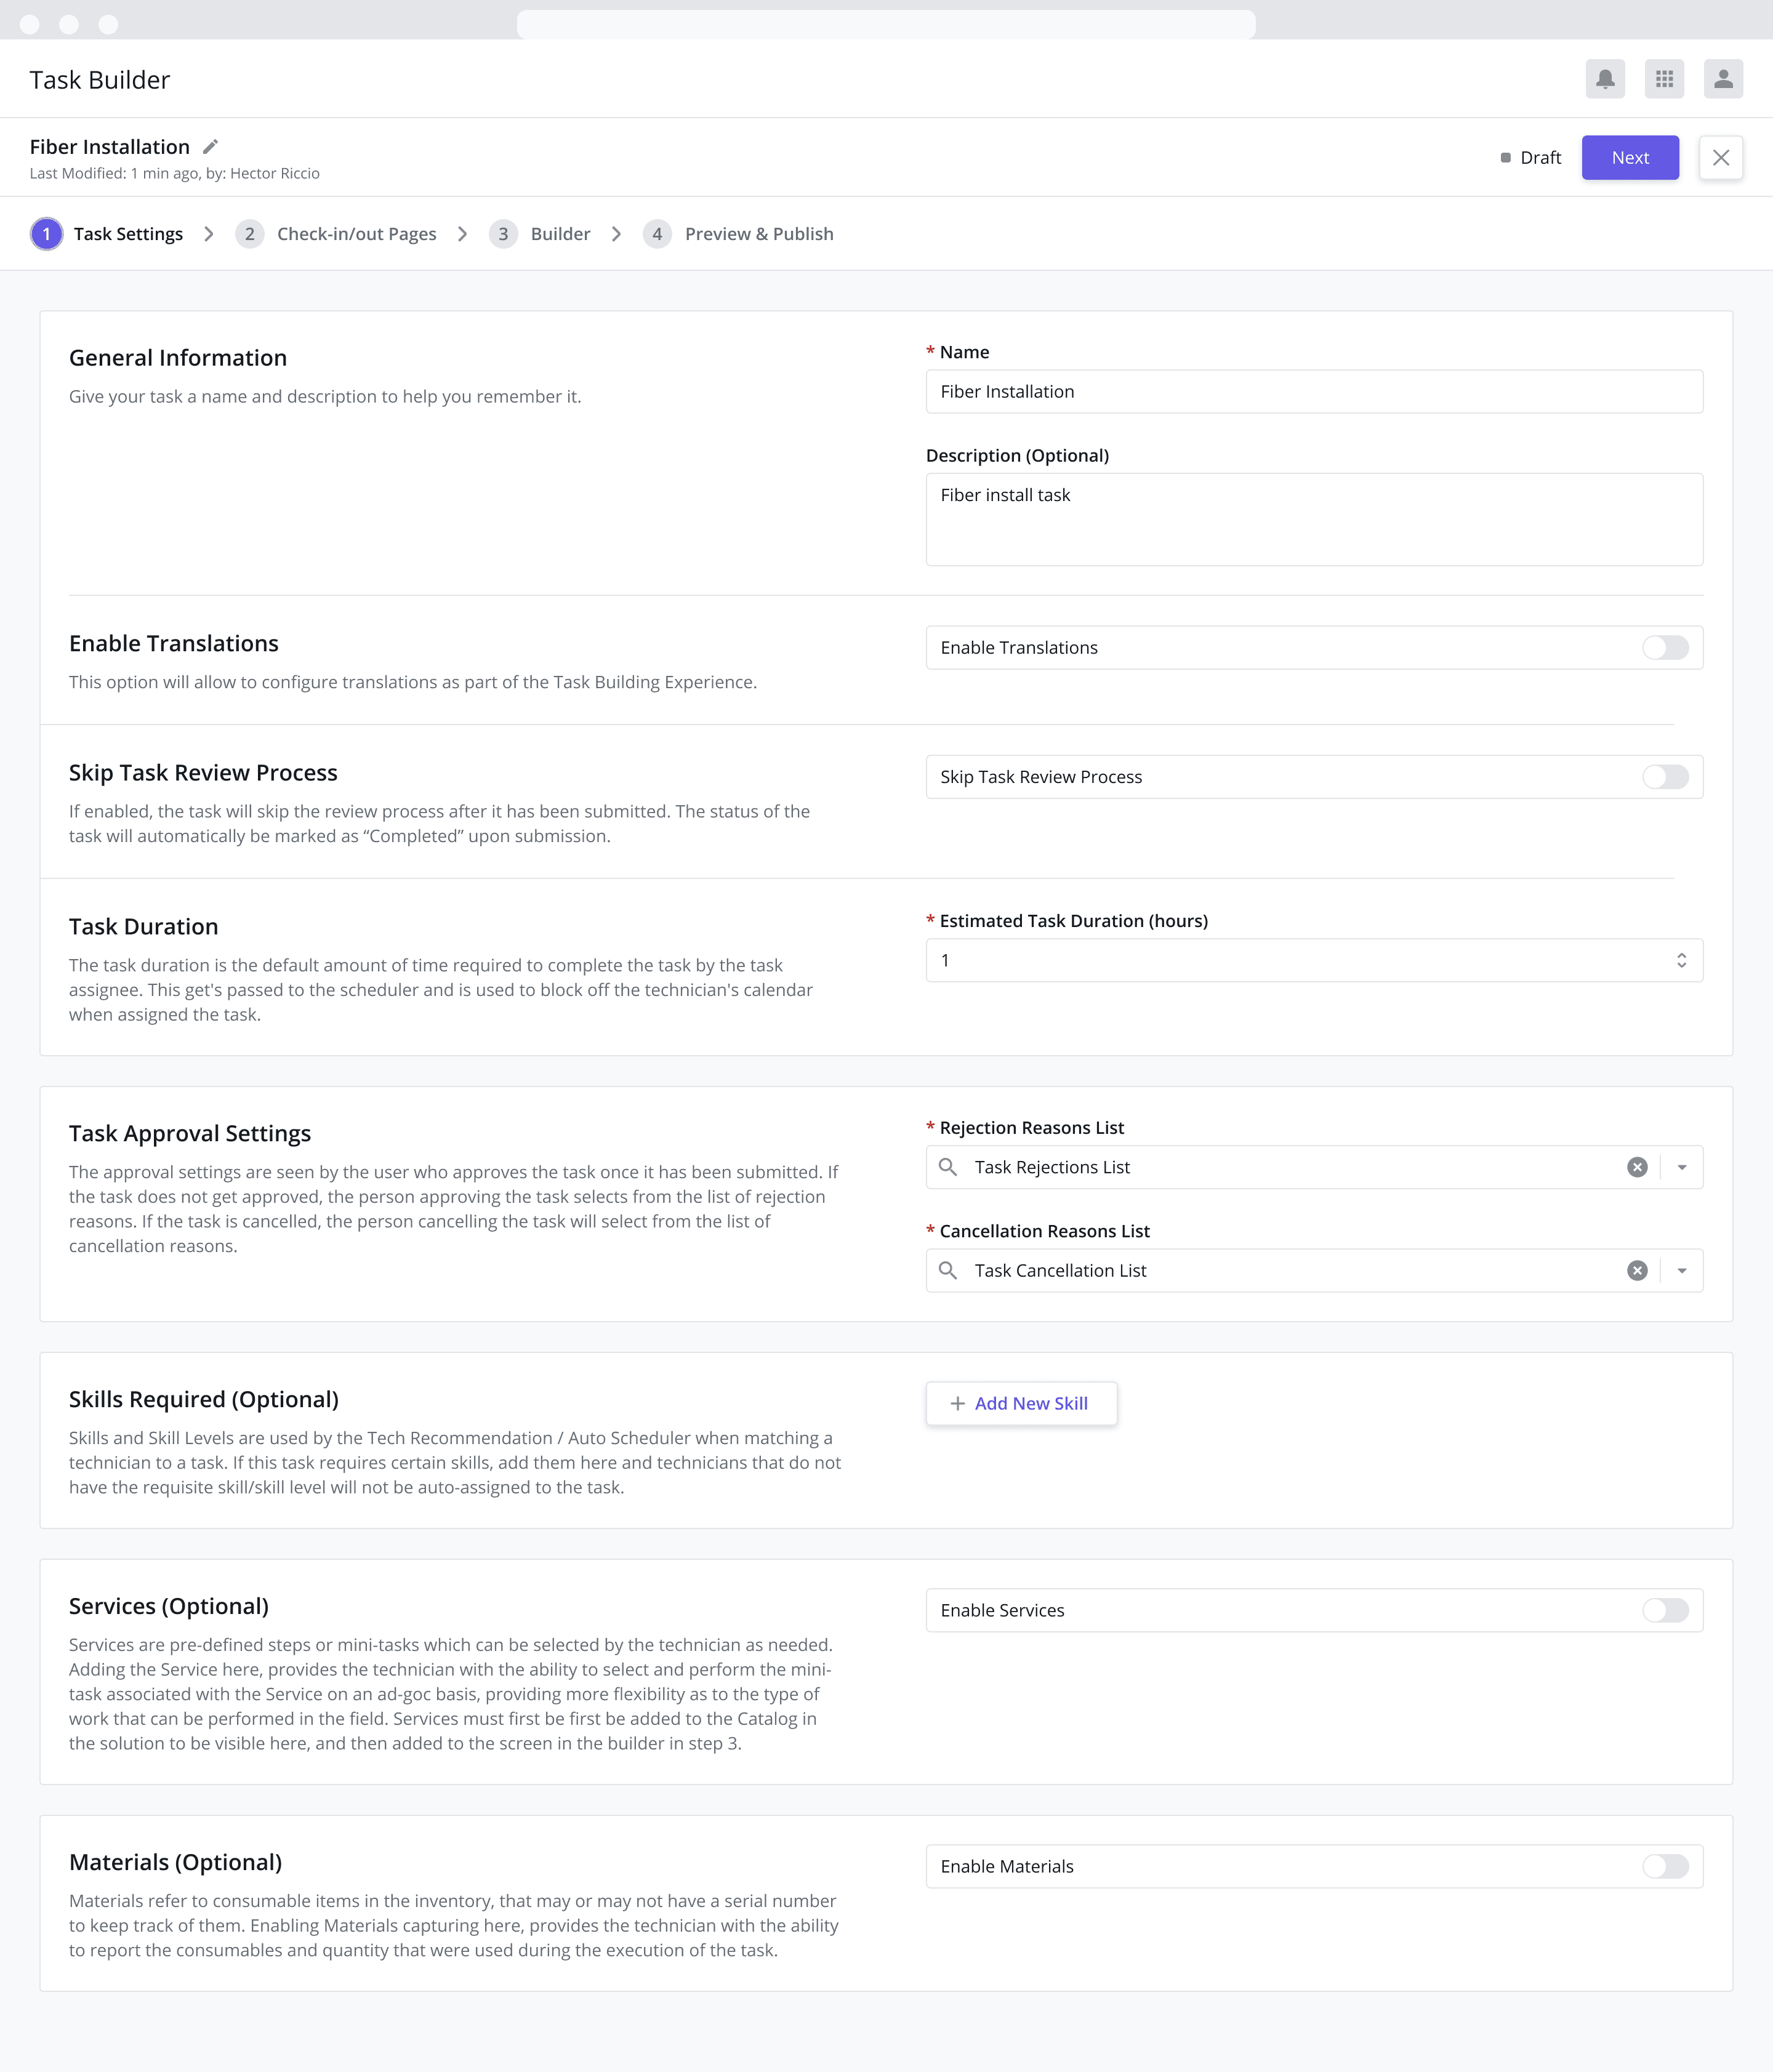
After opening Studio Z, go to the Task Builder module, and click the “Add New” button in the top right of the data grid to enter the Task Builder wizard.
In the Name field enter “Fiber Installation” and provide a Description (Optional).
In the Estimated Task Duration (hours) field enter “1”.
Fill in the remaining Task Settings fields according to how your service team operates
Fill out the Check-in/out Pages according to your wishes
Build out the mobile screens for the Fiber Installation task according to how you capture data in the field
Preview and Publish the task to make it active
Repeat the same process for the Router Maintenance task, ensuring you enter “.75” in the Estimated Task Duration (hours) field, which represents 45 minutes.
Step 4: Set up the Appointment Windows for your Tasks
Our next step is to create the configure the Appointment Windows for the Fiber Installation and Router Maintenance tasks.
Create the Appointment Windows for the Fiber Installation Task
We will first create the Appointment Windows (“Morning”, “Afternoon” and “Evening”) which will be used for the Fiber Installation task. To do so, follow the steps below:
Go to the Settings > Work Order Settings > Appointment Windows module
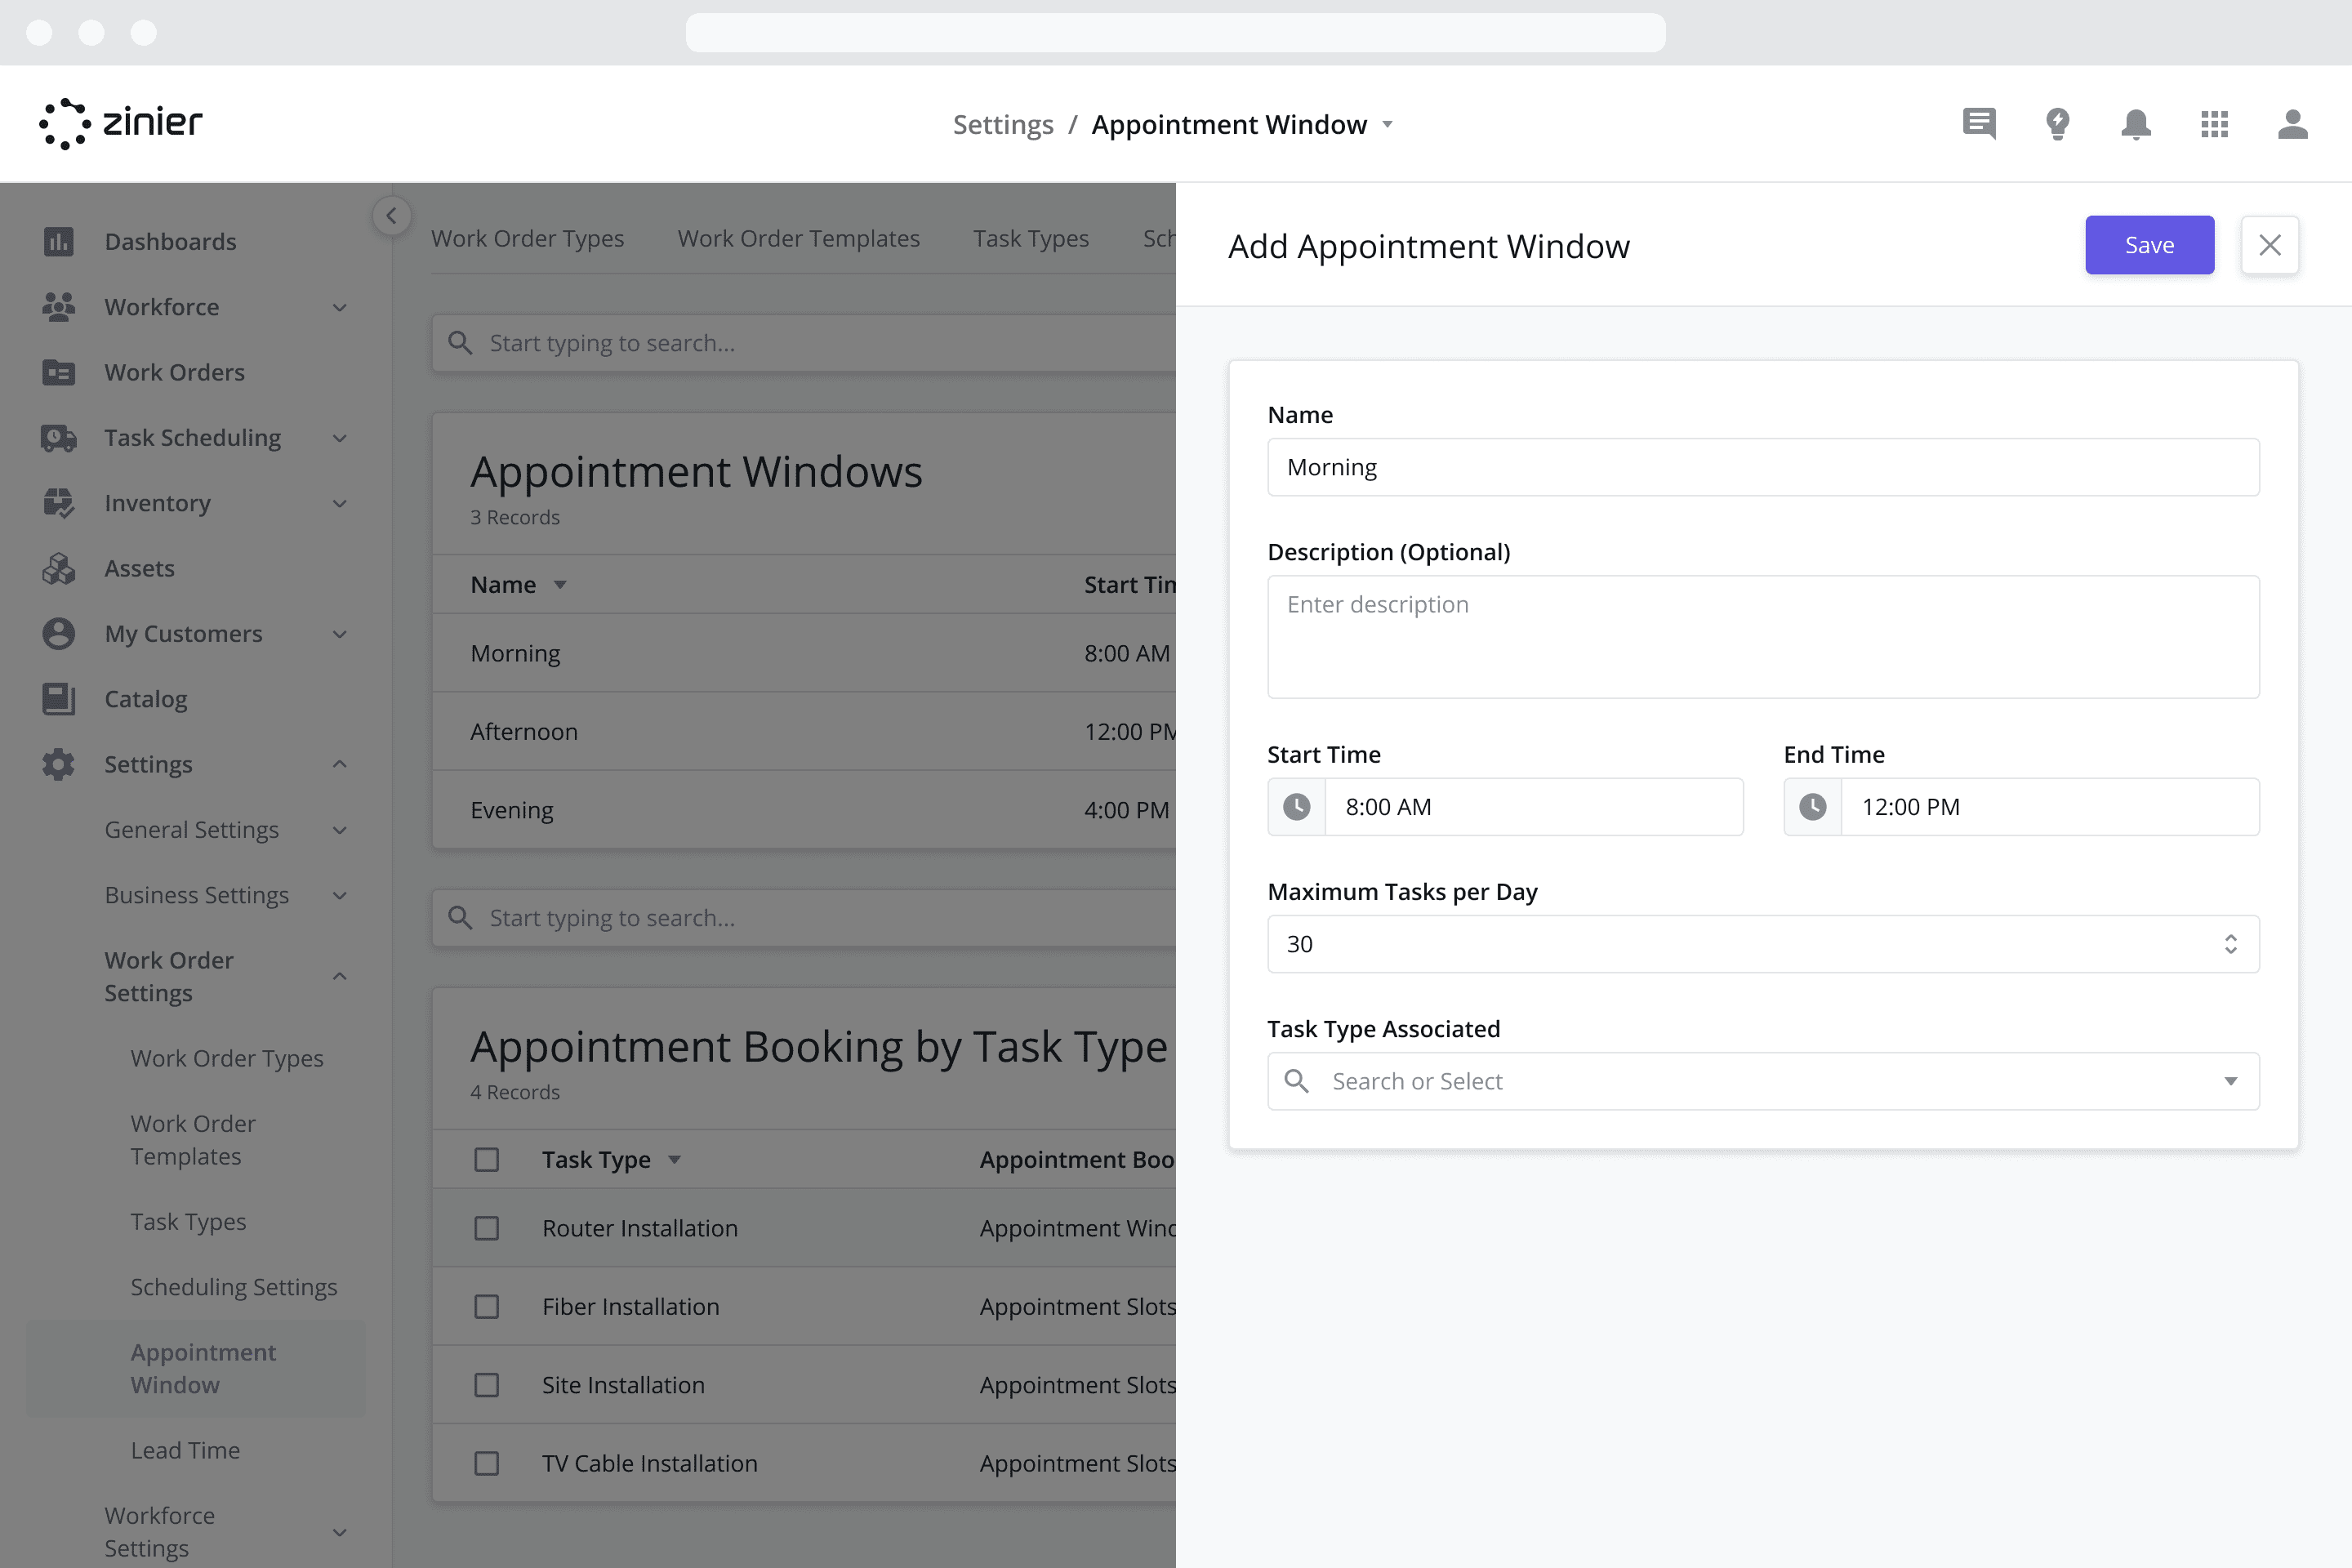
Click the “Add New” button from the data grid
In the Name field enter “Morning” and provide a Description (Optional).
Select a Start Time and End Time. These represent the time slots that end-customers can choose from when booking an appointment:
In the Start Time field select “8:00 am”
In the End Time field select “12:00 pm”
Select a Maximum Tasks per Day. This field allows you to set the maximum number of tasks or capacity for the time slot. While some older implementations still use this field, this field is no longer in use.
Click Save
Repeat the steps above to create the “Afternoon” and “Evening” Appointment Windows
Configure Appointment Windows for the Fiber Installation Task
Go to the Settings > Work Order Settings > Appointment Windows module
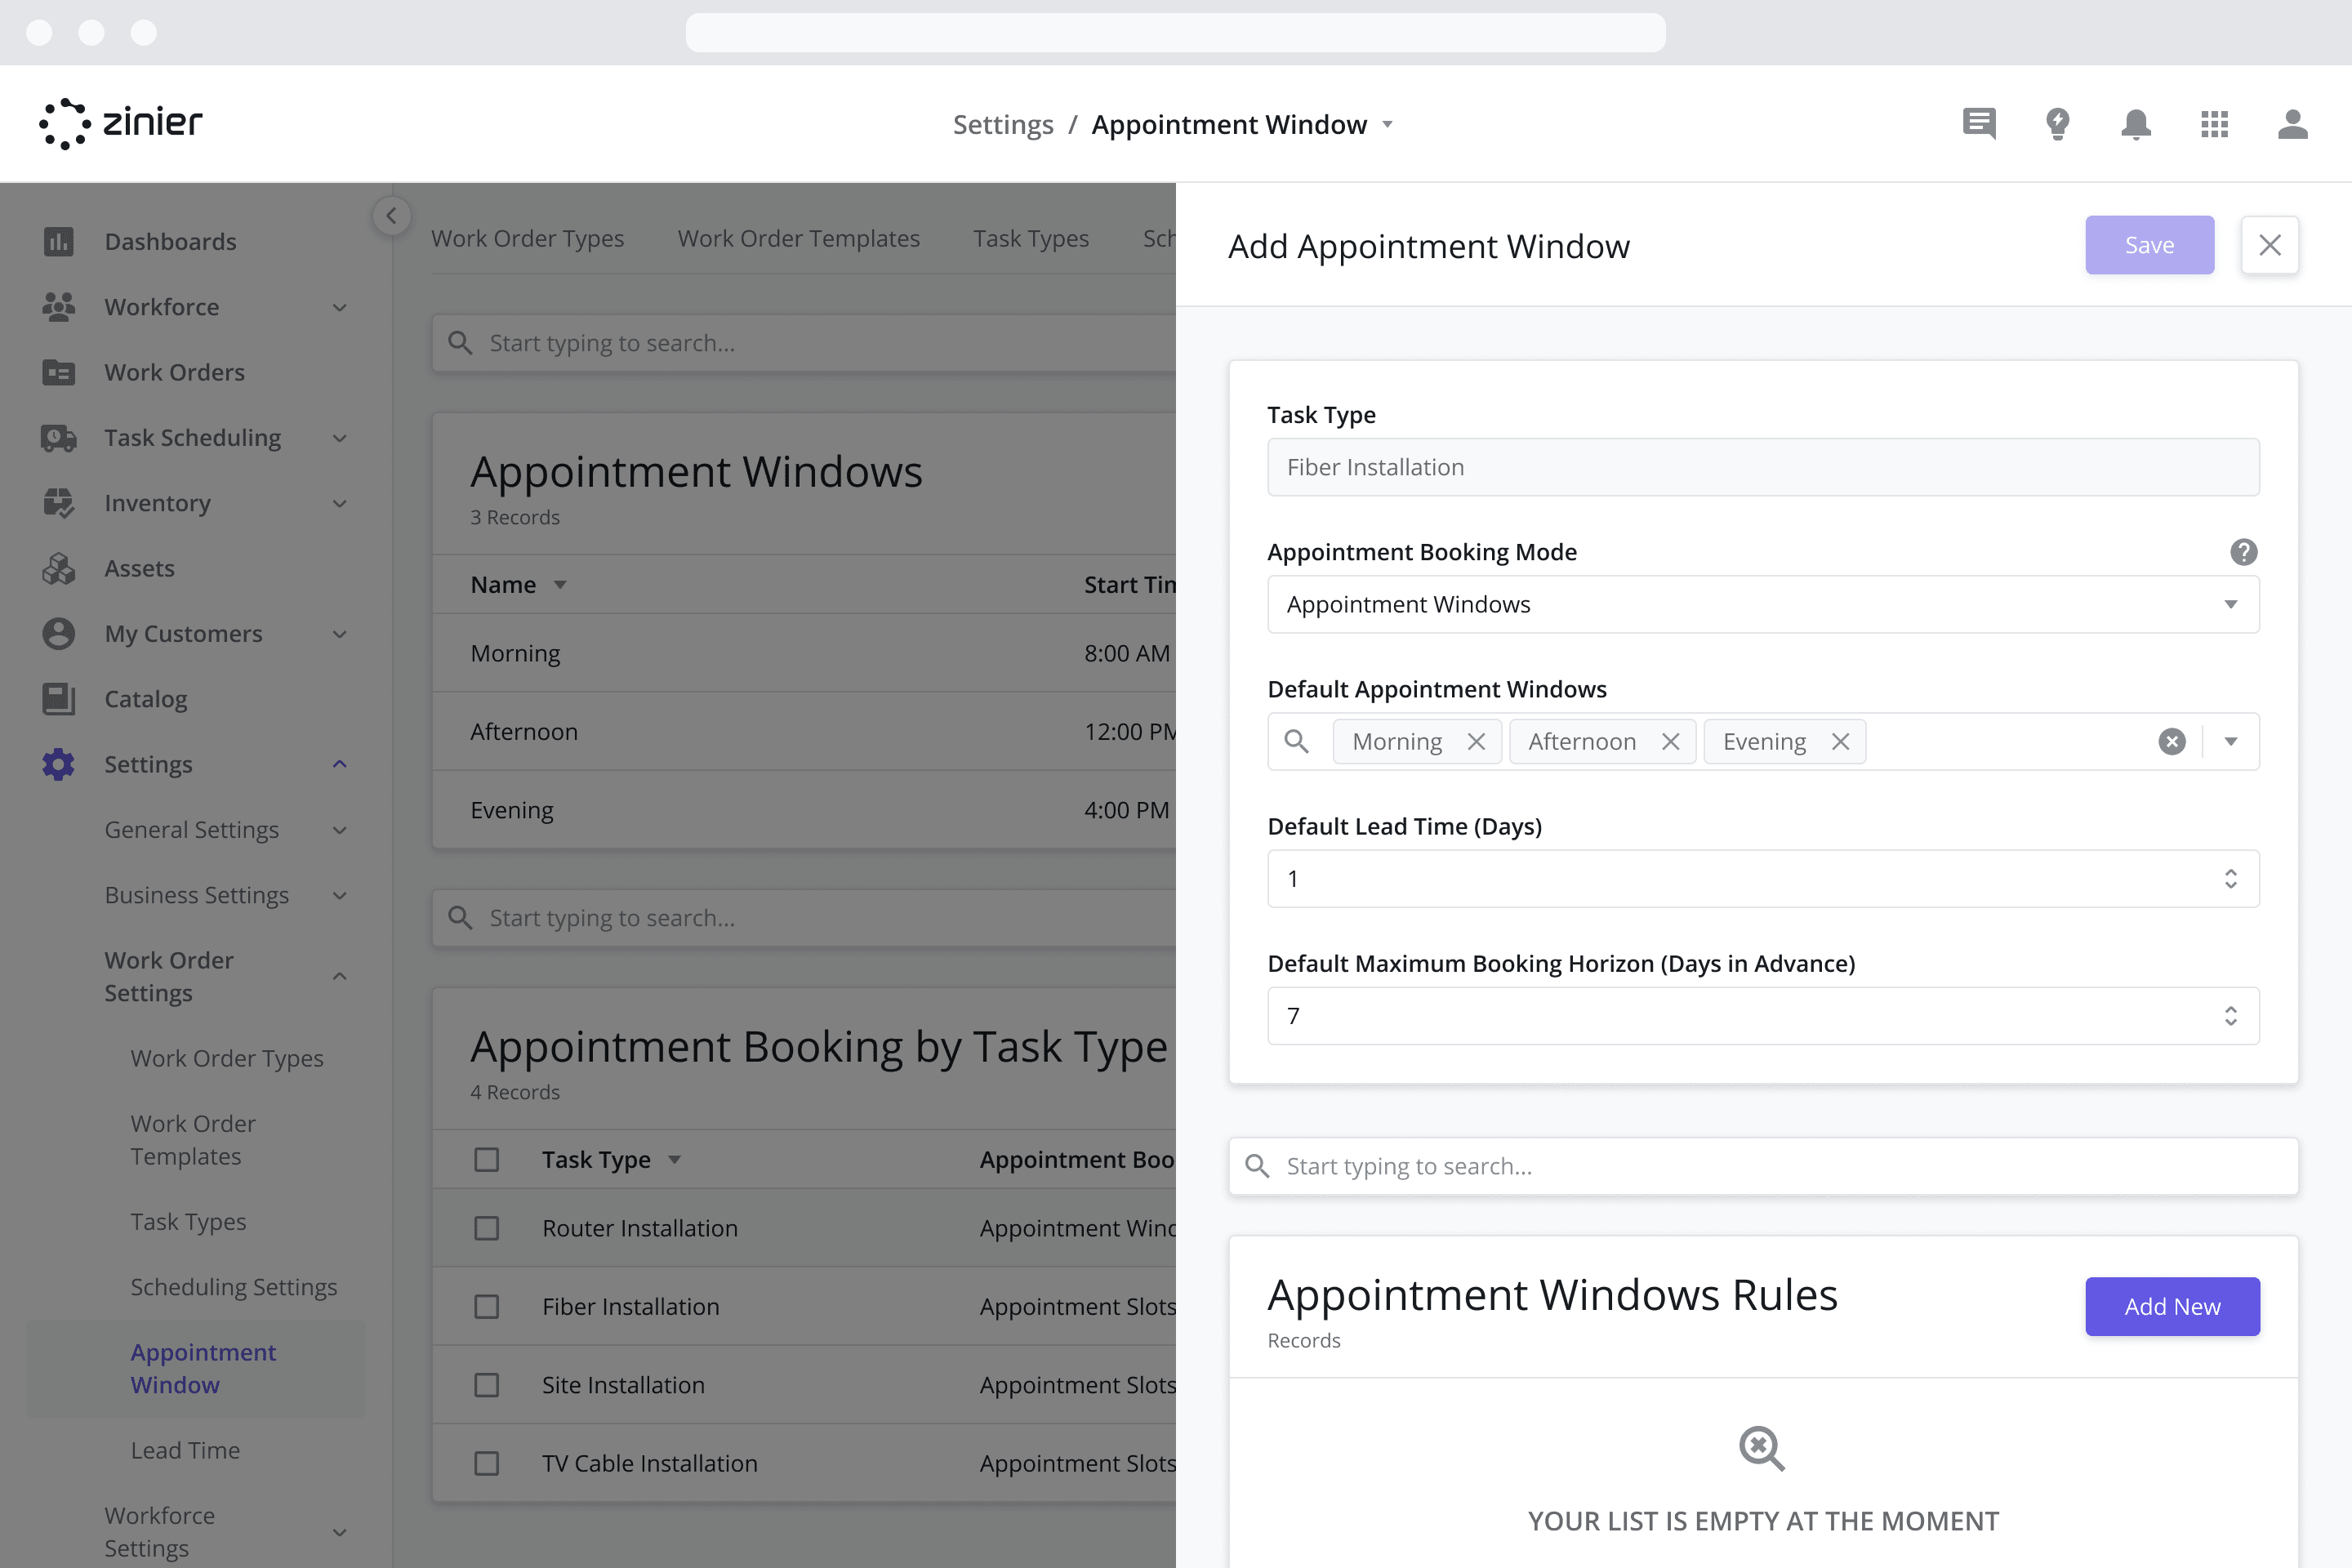
Hover over the “Fiber Installation” task in the Appointment Booking by Task Type data grid and click the “Edit” icon to open the sidepanel.
From the Appointment Booking Mode dropdown, select “Appointment Windows”
From the Default Appointment window(s) dropdown, select “Morning”, “Afternoon” and “Evening”.
In the Default Lead Time (Days) field, enter “1”. This represents the minimum number of days required between the time a task is created and the time it can be scheduled/booked using the customer portal.
In the Default Maximum Booking Horizon (Days in Advance) enter “7”. This represents the maximum number of days in advance that a task can be scheduled/booked using the customer portal (starting from the task creation date).
Click the “Save” button
Configure Appointment Slots for the Router Maintenance Task
Go to the Settings > Work Order Settings > Appointment Windows module
Hover over the “Router Maintenance” task in the Appointment Booking by Task Type data grid and click the “Edit” icon to open the sidepanel.
From the Appointment Booking Mode dropdown, select “Appointment Slots”
From the Slot Duration (in number of minutes) field, enter “45”.
In the Appointments Booking Start Time field select “8:00 am”
In the Appointments Booking End Time field select “7:00 pm”
In the Default Lead Time (Days) field, enter “1”. This represents the minimum number of days required between the time a task is created and the time it can be scheduled/booked using the customer portal.
In the Default Maximum Booking Horizon (Days in Advance) enter “7”. This represents the maximum number of days in advance that a task can be scheduled/booked using the customer portal (starting from the task creation date).
Click the “Save” button

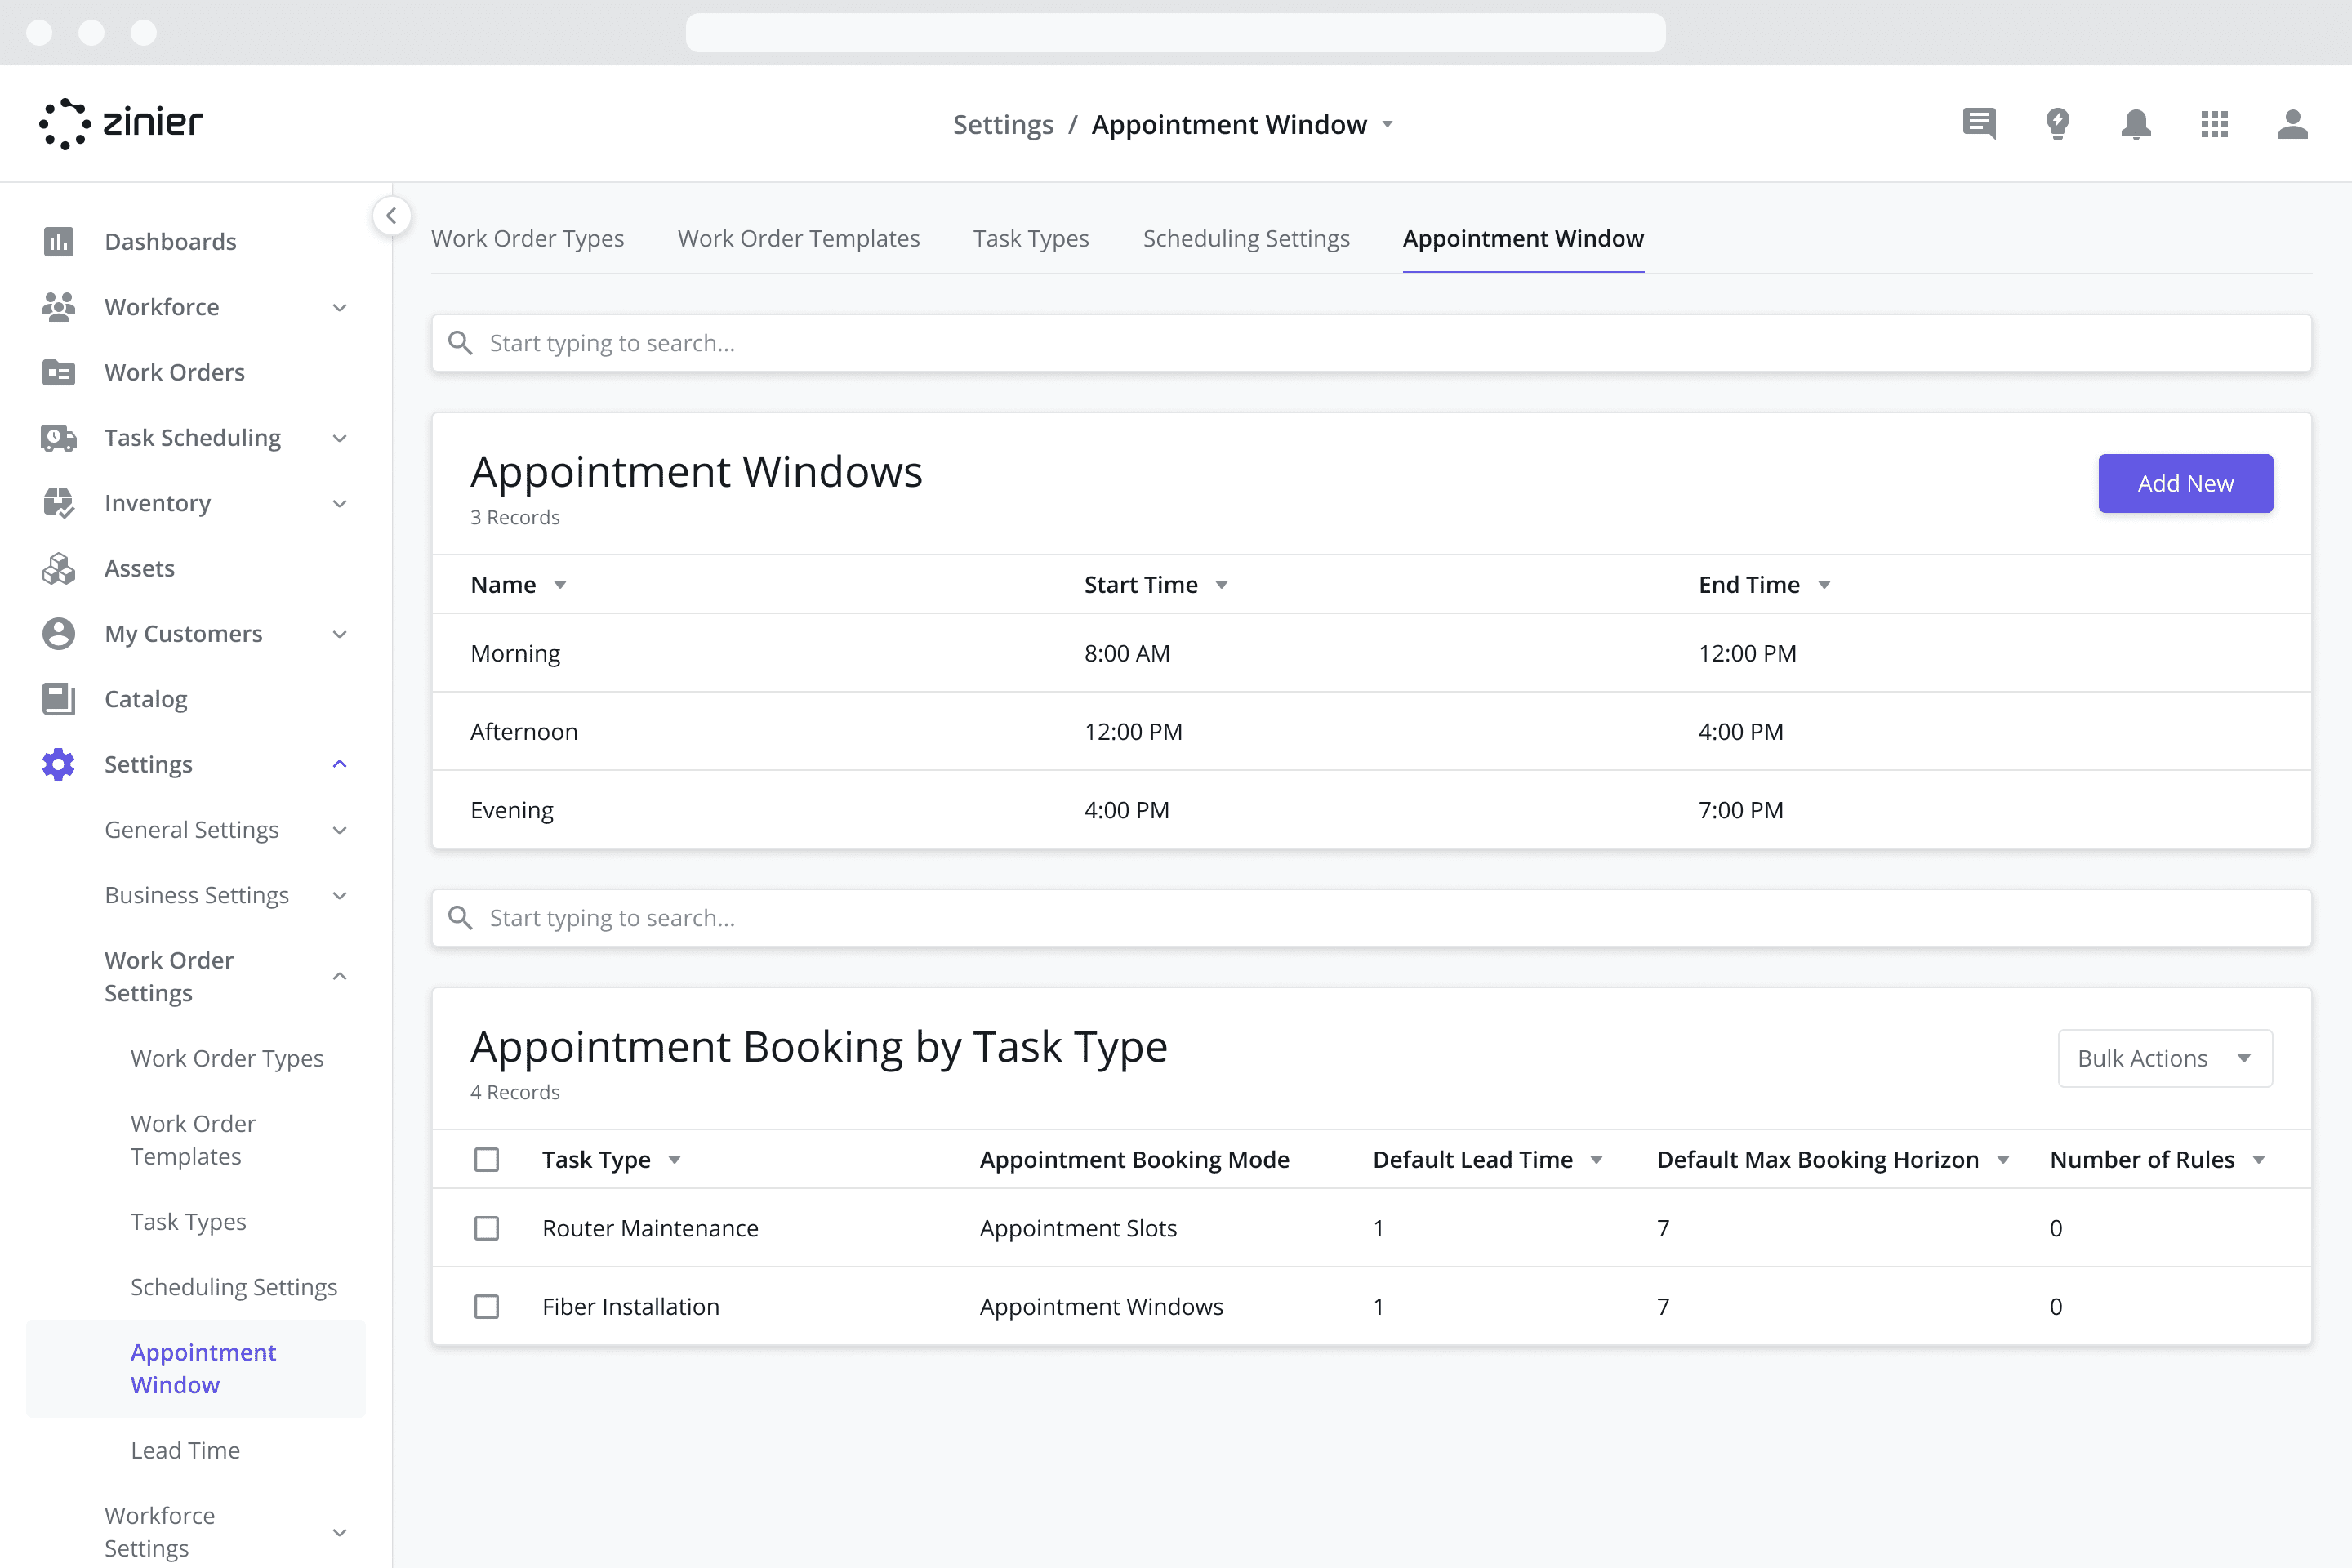
Once you are done, the Appointment Windows page should look like this:
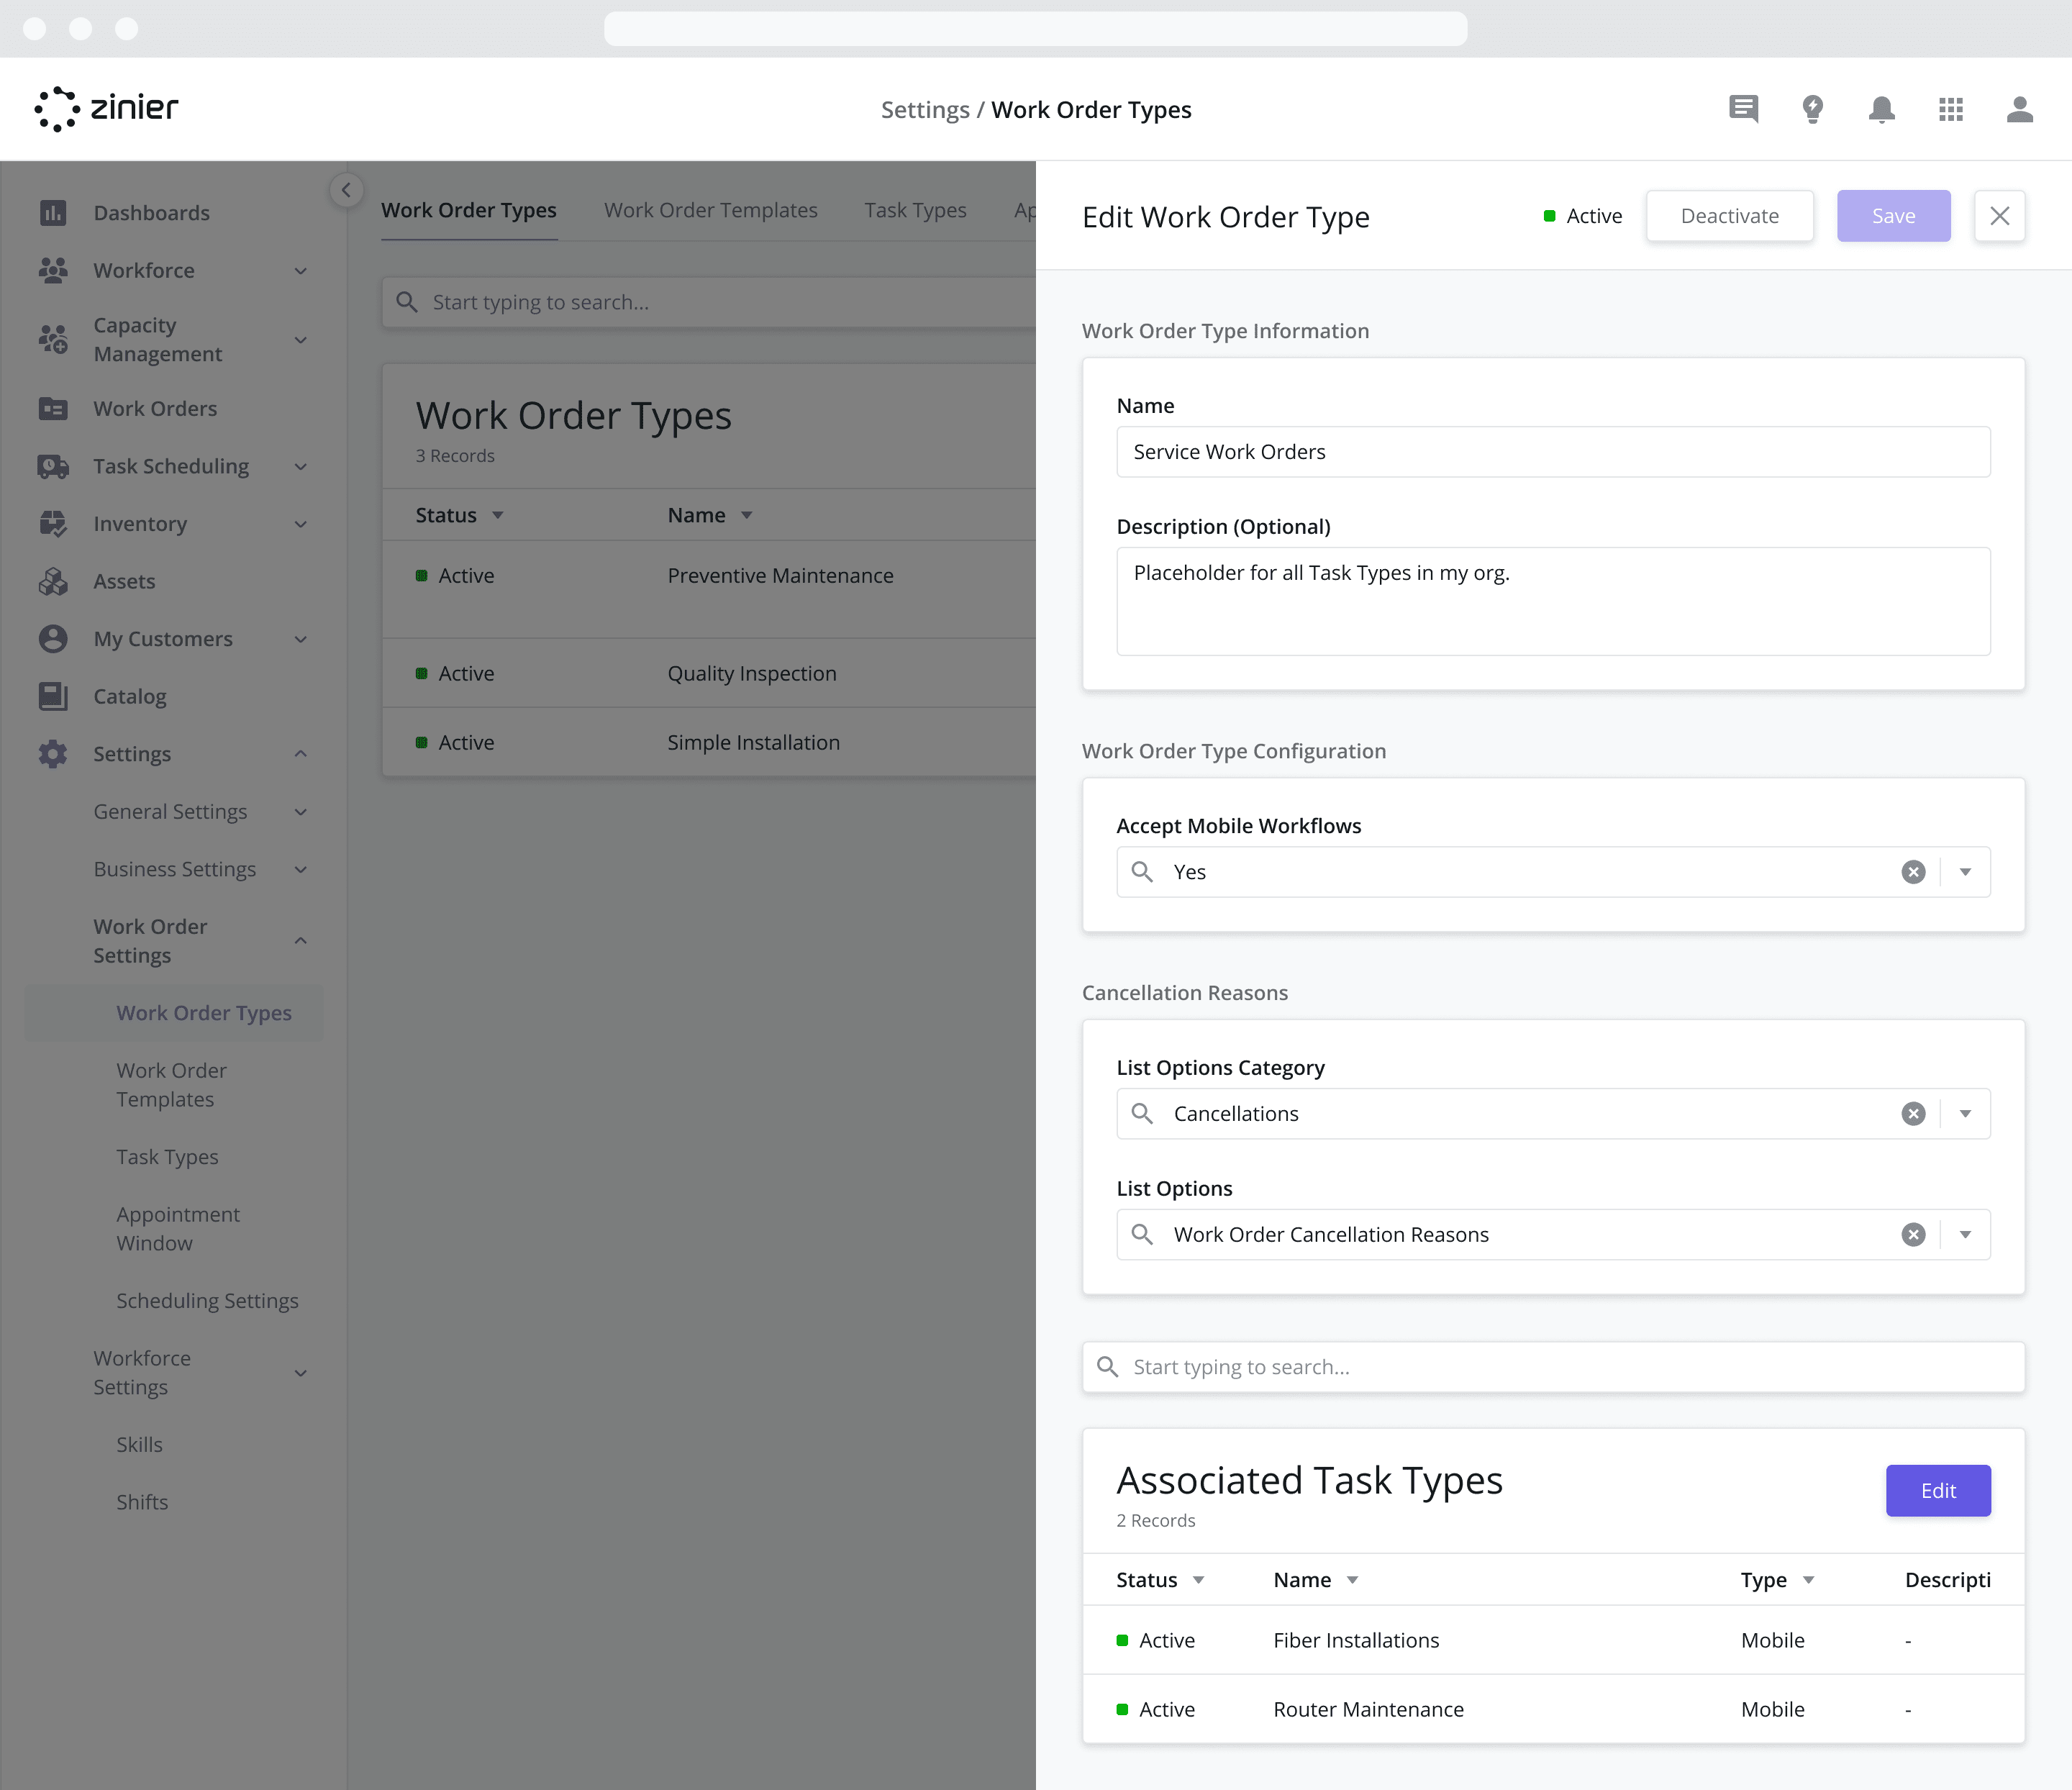
Step 5: Create a New Work order Type and add your Tasks
The final step in setting up your tasks is to create a Work Order Type for use in Work Orders created in the system that utilize the tasks created above. To do so, follow the steps below:
Go to the Settings > Work Order Settings > Work Order Types module
Click the “Add New” button from the data grid
In the Accept Mobile Workflows dropdown, select “Yes”. This field has been deprecated and has no functional use for new implementations.
Select the List Options Category you would like to use for the Cancellation Reasons.
Select the List Options you would like to use for the Cancellation Reasons.
Click Save and Continue
From the Associated Task Types datagrid, click Edit and then select the “Fiber Installation” and “Router Maintenance” tasks
Return to the prior sidepanel and click Save
Step 6: Create Work Groups for your Regions and Task Types
In the next step, we will create Work Groups which are used to filter Tasks and Technicians so dispatchers can focus only on their area of responsibility. Work Groups also play an important role in Capacity Management, which requires a proper Work Group configuration to work as expected.
Work Group Organization & Best Practices
For Capacity Management to work properly, it is important to ensure that Technicians, Regions and Task Types are segregated properly within Work Groups. The best practice is to abide by the following rules:
Task Type-filtered Work Groups
Technicians should only be added to a single Task Type-filtered Work Group. For example, let’s say I have a Task Type-filtered Work Group called the “Fiber Tasks” Work Group which consists of 2 Task Types (“Fiber Install” and “Fiber Maintenance”) and a second Task Type-filtered Work Group called the “Router Tasks” Work Group which consists of 2 Task Types (“Router Install” and “Router Maintenance”). An individual Tech should be added to only 1 of those Work Groups.
Task Types should only be added to a single Task Type-filtered Work Group. Taking the example above, each Task Type should only be added to only 1 of those Work Groups. For example, the “Fiber Install” Task Type should only belong to the “Fiber Tasks” Work Group and NOT the “Router Tasks” Work Group.
Region-filtered Work Groups
Technicians should only be added to a single Region-filtered Work Group. For example, let’s say I have a Region-filtered Work Group called the “North” Work Group which consists of 2 Regions (“North East” and “North West”) and a second Region-filtered Work Group called the “South” Work Group which consists of 2 Regions (“South East” and “South West”). An individual Tech should be added to only 1 of those Work Groups.
Regions should only be added to a single Region-filtered Work Group. Taking the example above, each Region should only be added to only 1 of those Work Groups. For example, the “North East” Region should only belong to the “North” Work Group and NOT the “South” Work Group.
Create Work Groups for Your Task Types
We will first create Work Groups for the 2 different Task Types. To do so, follow the steps below:
Go to the Workforce > Work Groups module
Click the “Add New” button in the top right of the data grid
In the Name field enter “Fiber Installation” and provide a Description (Optional)
From the Filter Method dropdown, select “Task Type”
From the Filters dropdown, select “Fiber Installation”
Click Save and Continue

Click Save
Repeat the steps above to create the Work Group for “Router Maintenance”
Create Work Groups for Your Regions
We will next create Work Groups for the 2 different Regions. To do so, follow the steps below:
Go to the Workforce > Work Groups module
Click the “Add New” button in the top right of the data grid
In the Name field enter “Sausalito” and provide a Description (Optional)
From the Filter Method dropdown, select “Region”
From the Filters dropdown, select “Sausalito”
Click Save and Continue
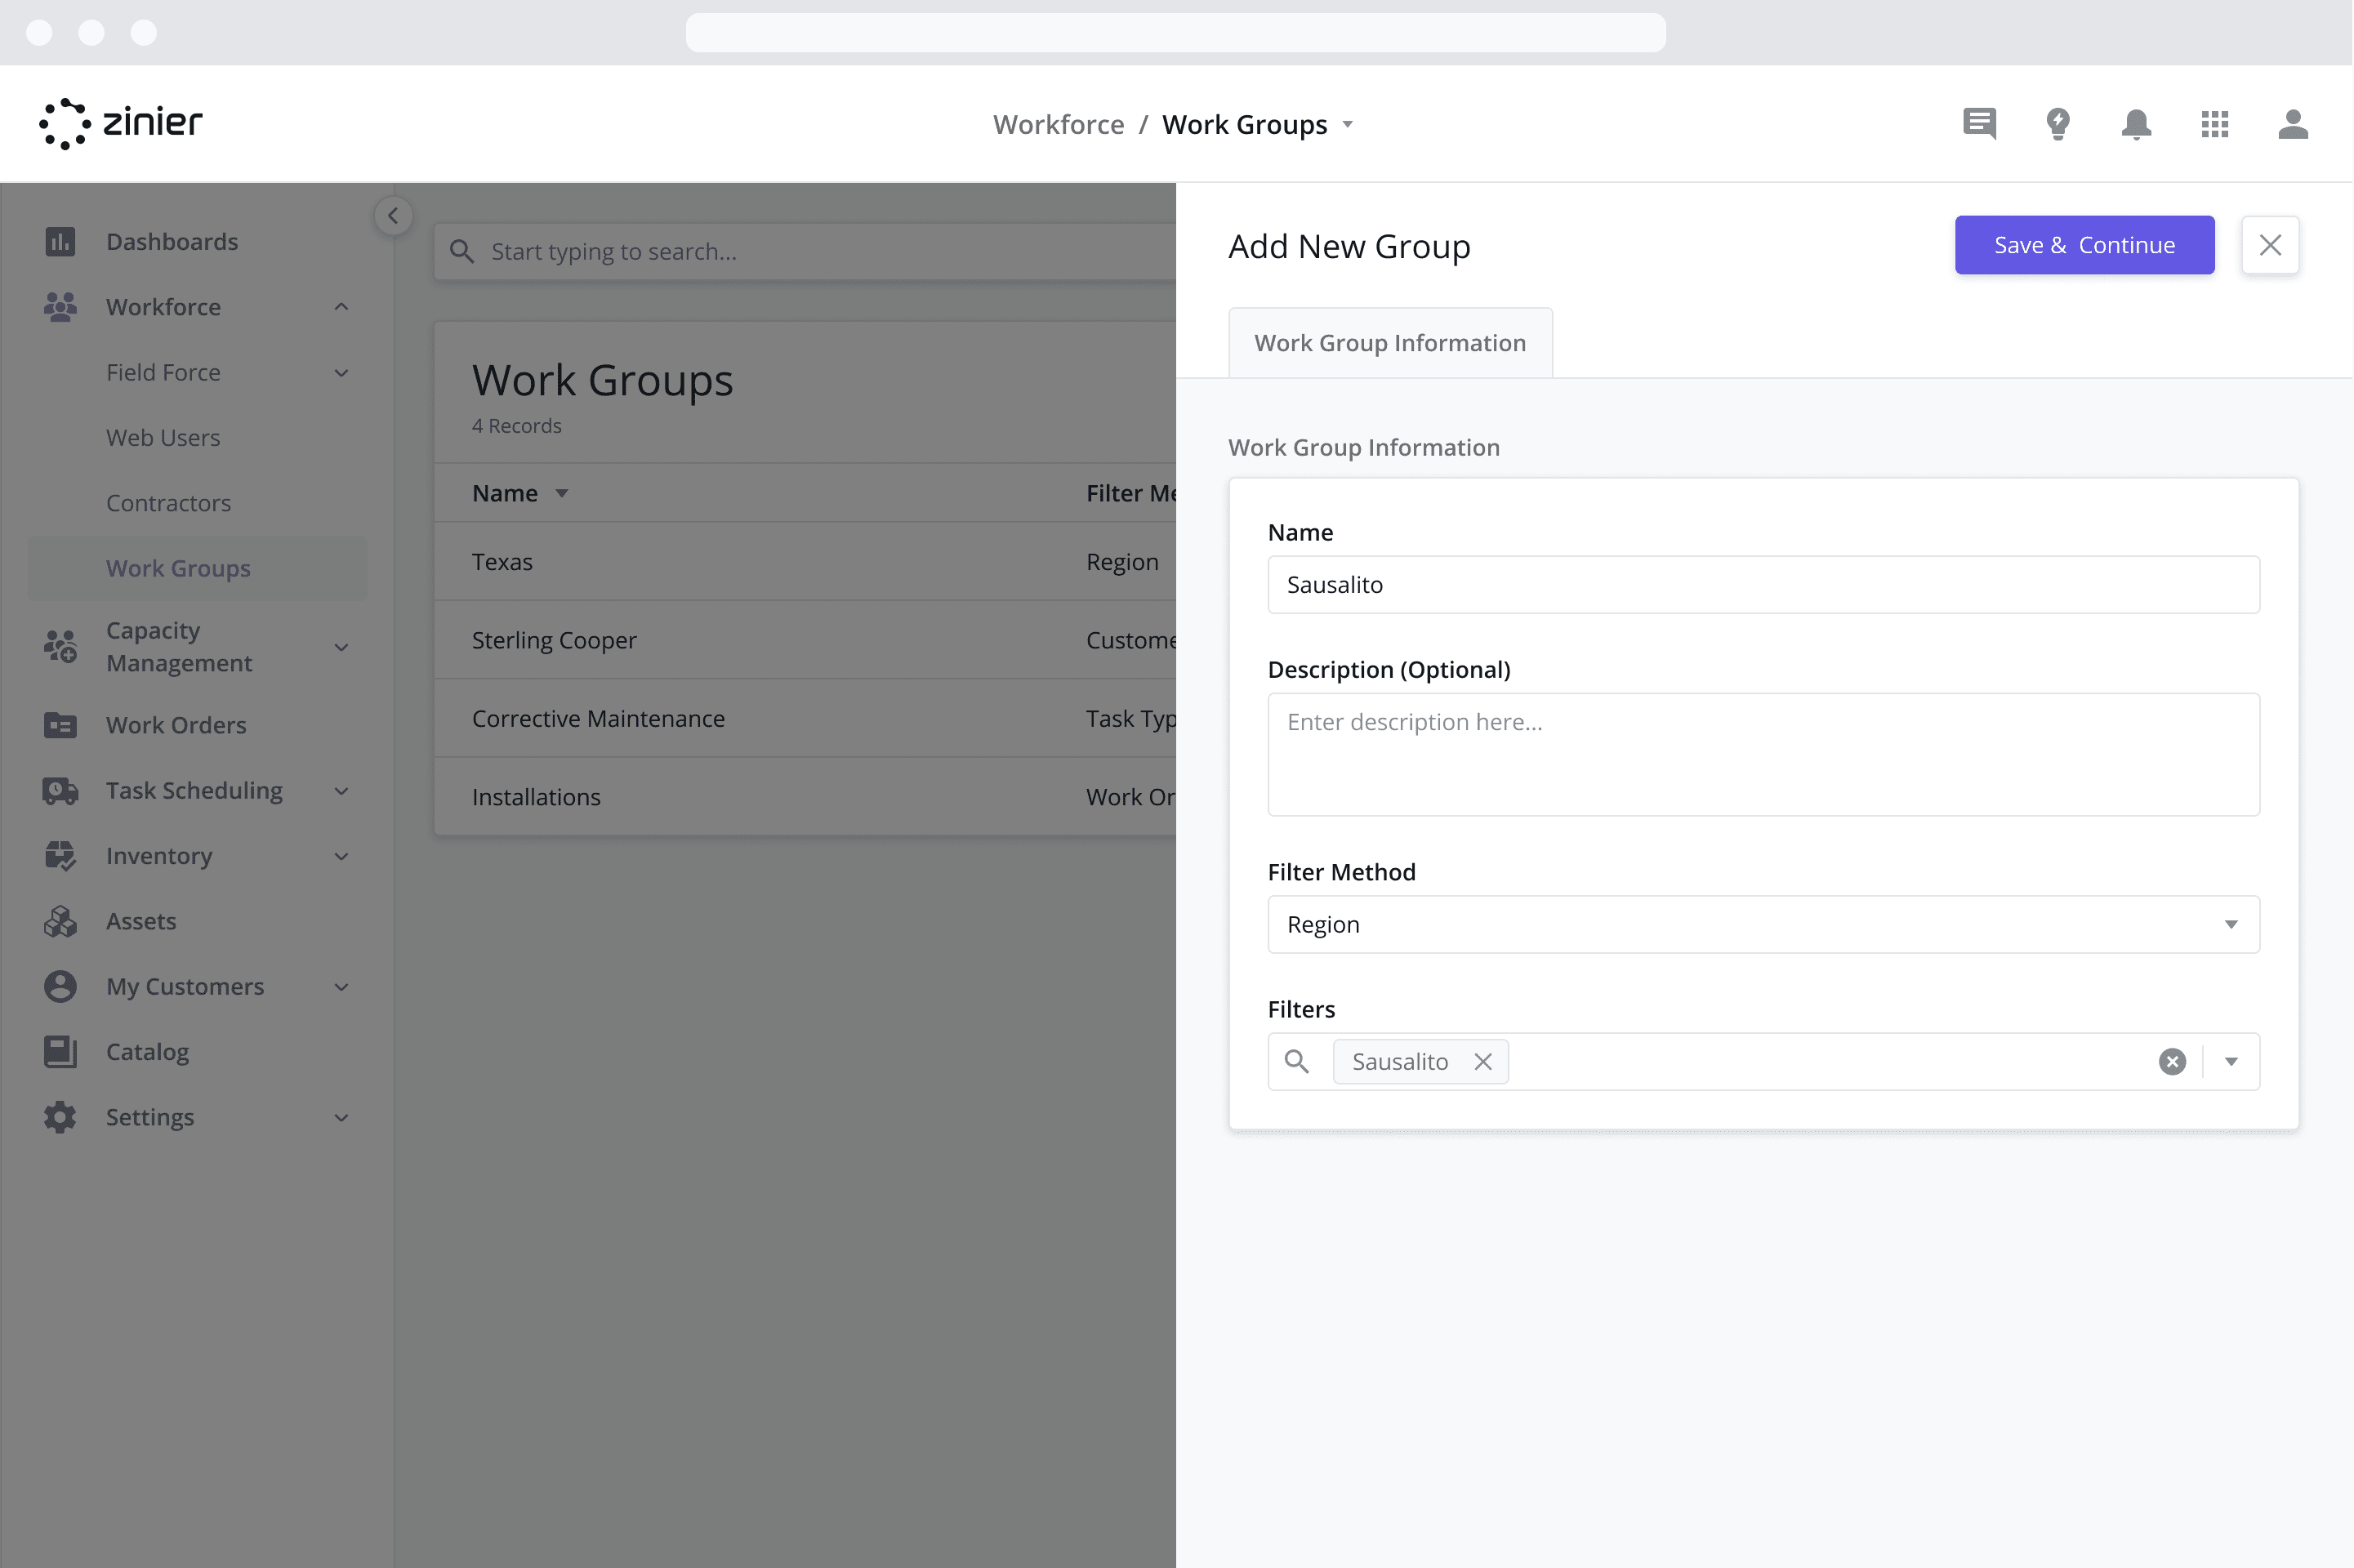
Click Save
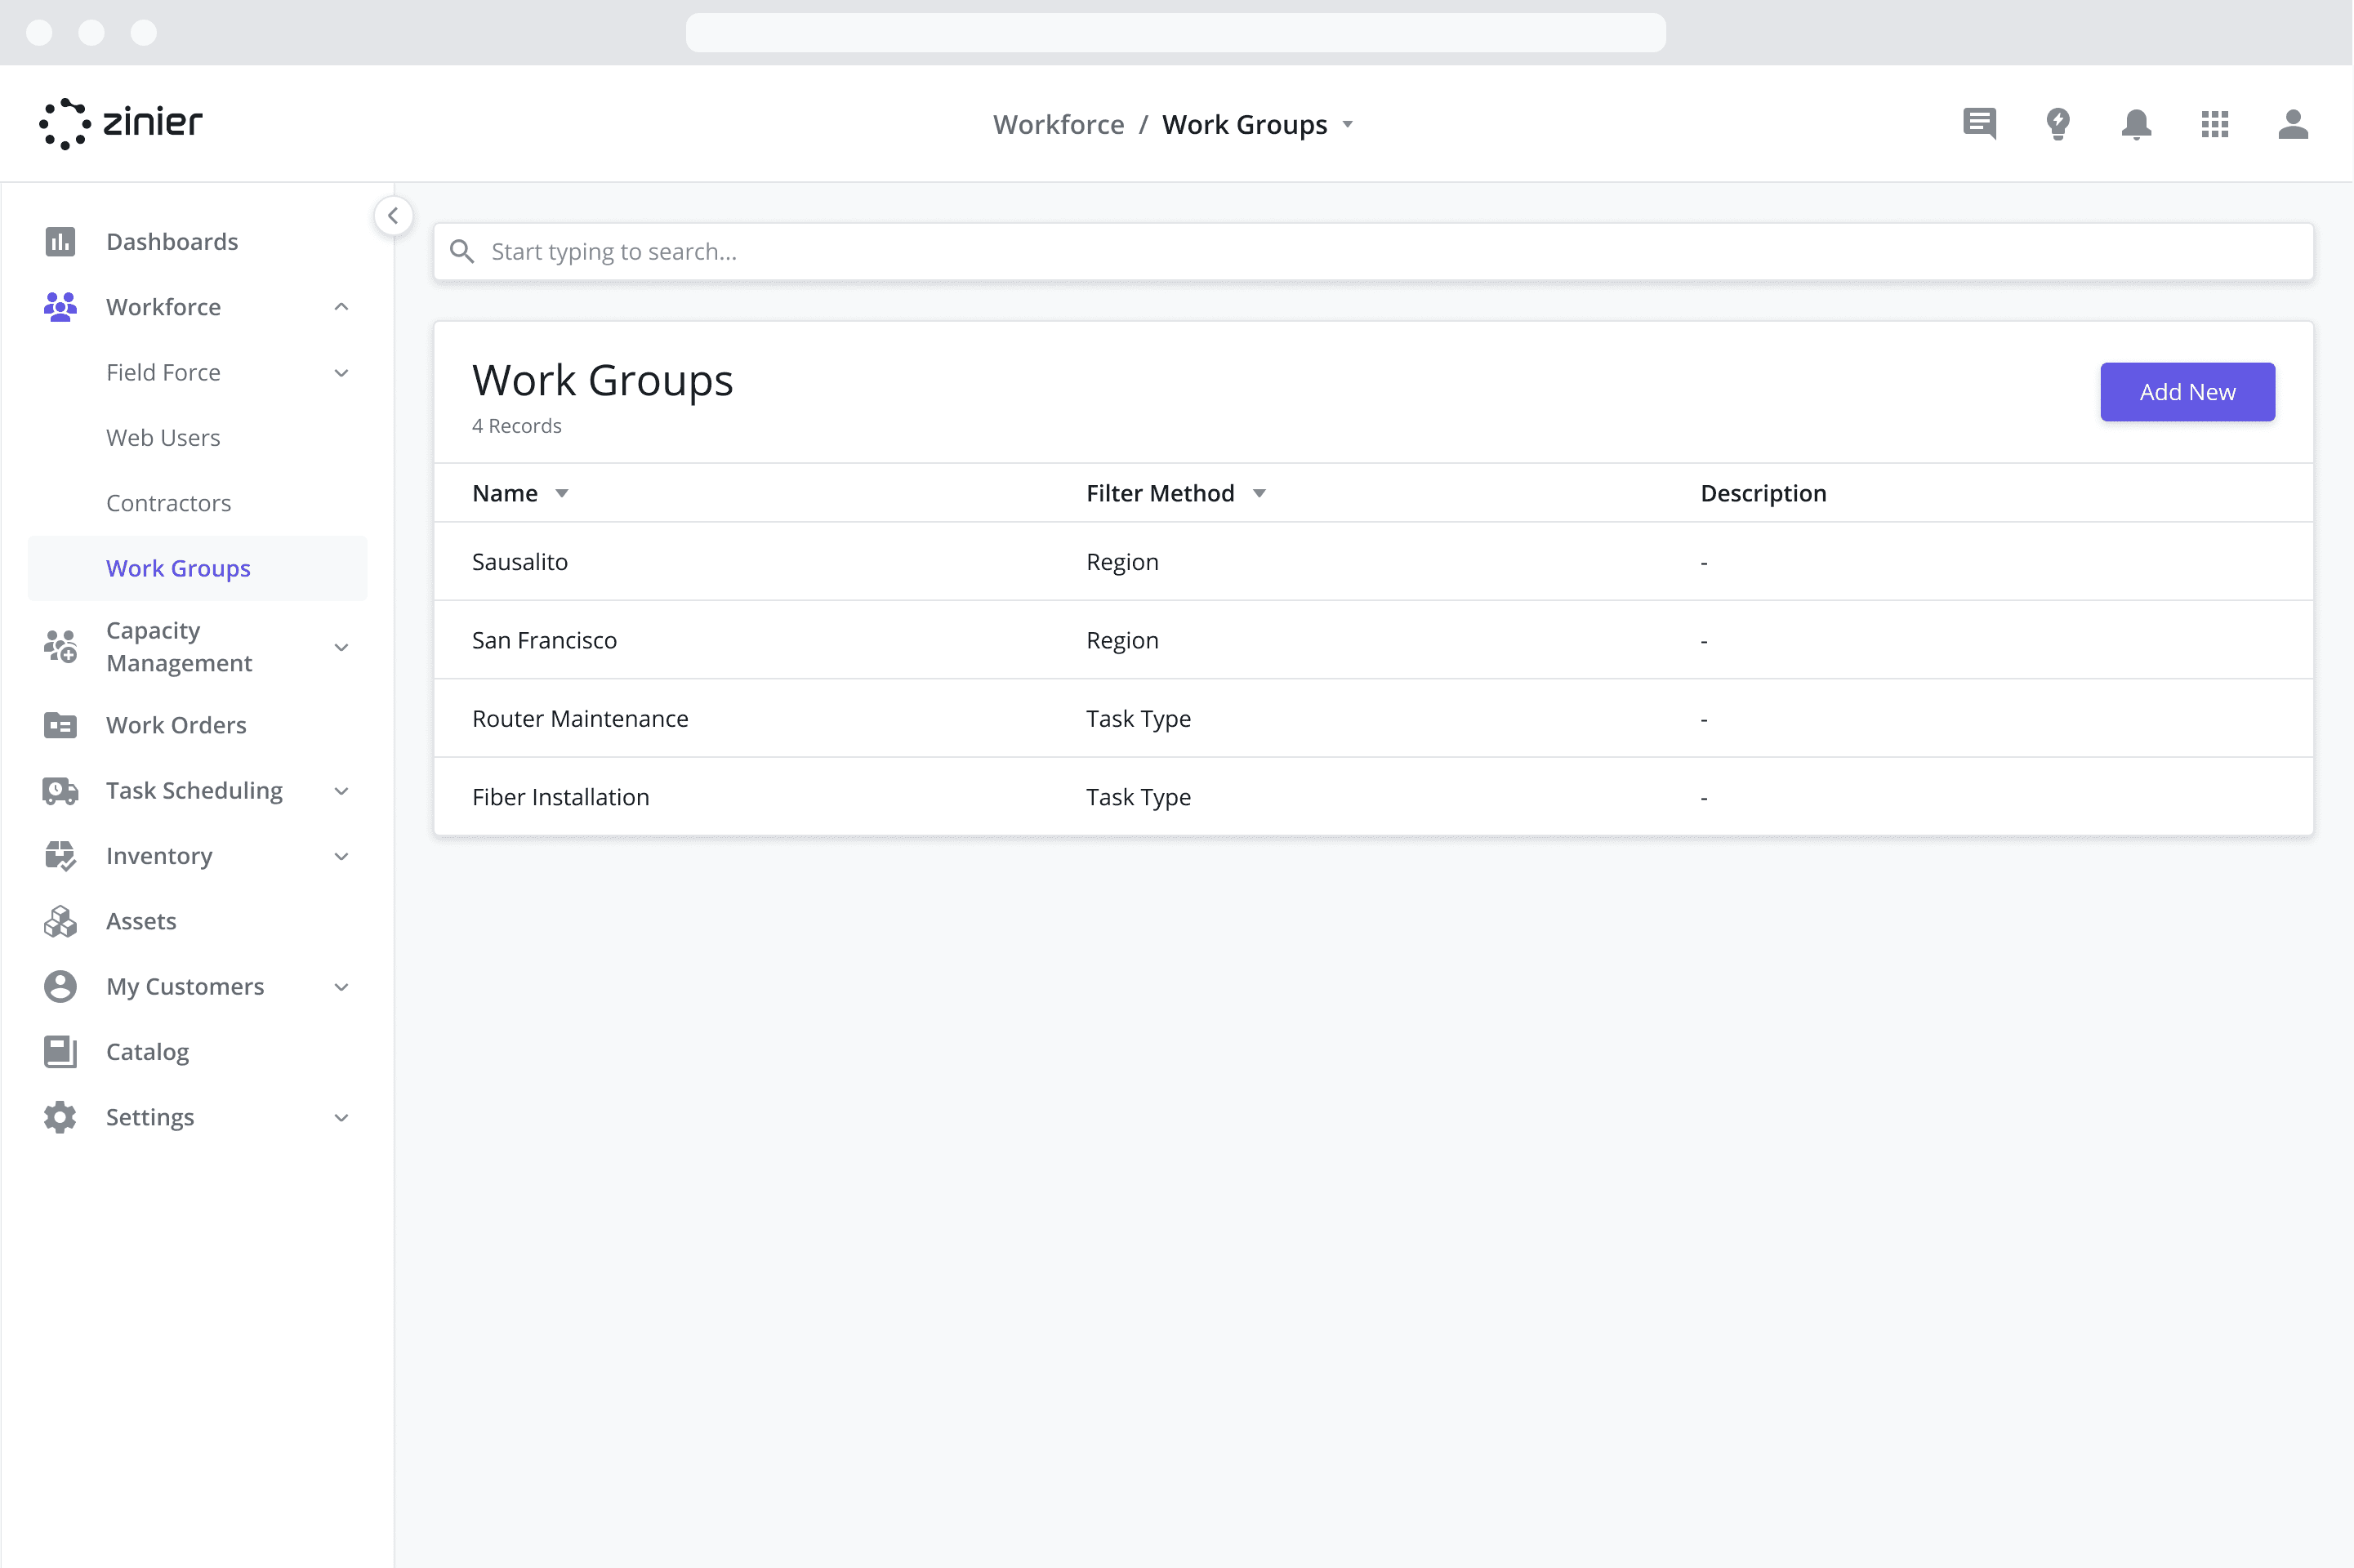
Repeat the steps above to create the Work Group for “San Francisco”
Once you are done, the Work Groups page should look like this:
Step 7: Invite your Workforce
In the final step, we will invite the 4 Technicians and 2 Dispatchers to the org. This is done in 2 sub-steps: first by inviting the user to access the ZInier platform, then by adding the users to the Workforce from the Workforce module.
Invite the user to Access Zinier
The first step in getting your workforce up and running is inviting them to the Zinier platform. To do so, follow the steps below:
Open the Admin app by clicking on the Zinier Apps icon on the top right of the screen.
Go to the Users > User Base module
Click the “Add New” button in the top right of the data grid
Enter the personal information shown in the side panel for each user
Role for Dispatchers: for your two dispatchers, select “Project User” from the Role dropdown. This will give dispatchers access to both the web and mobile applications.
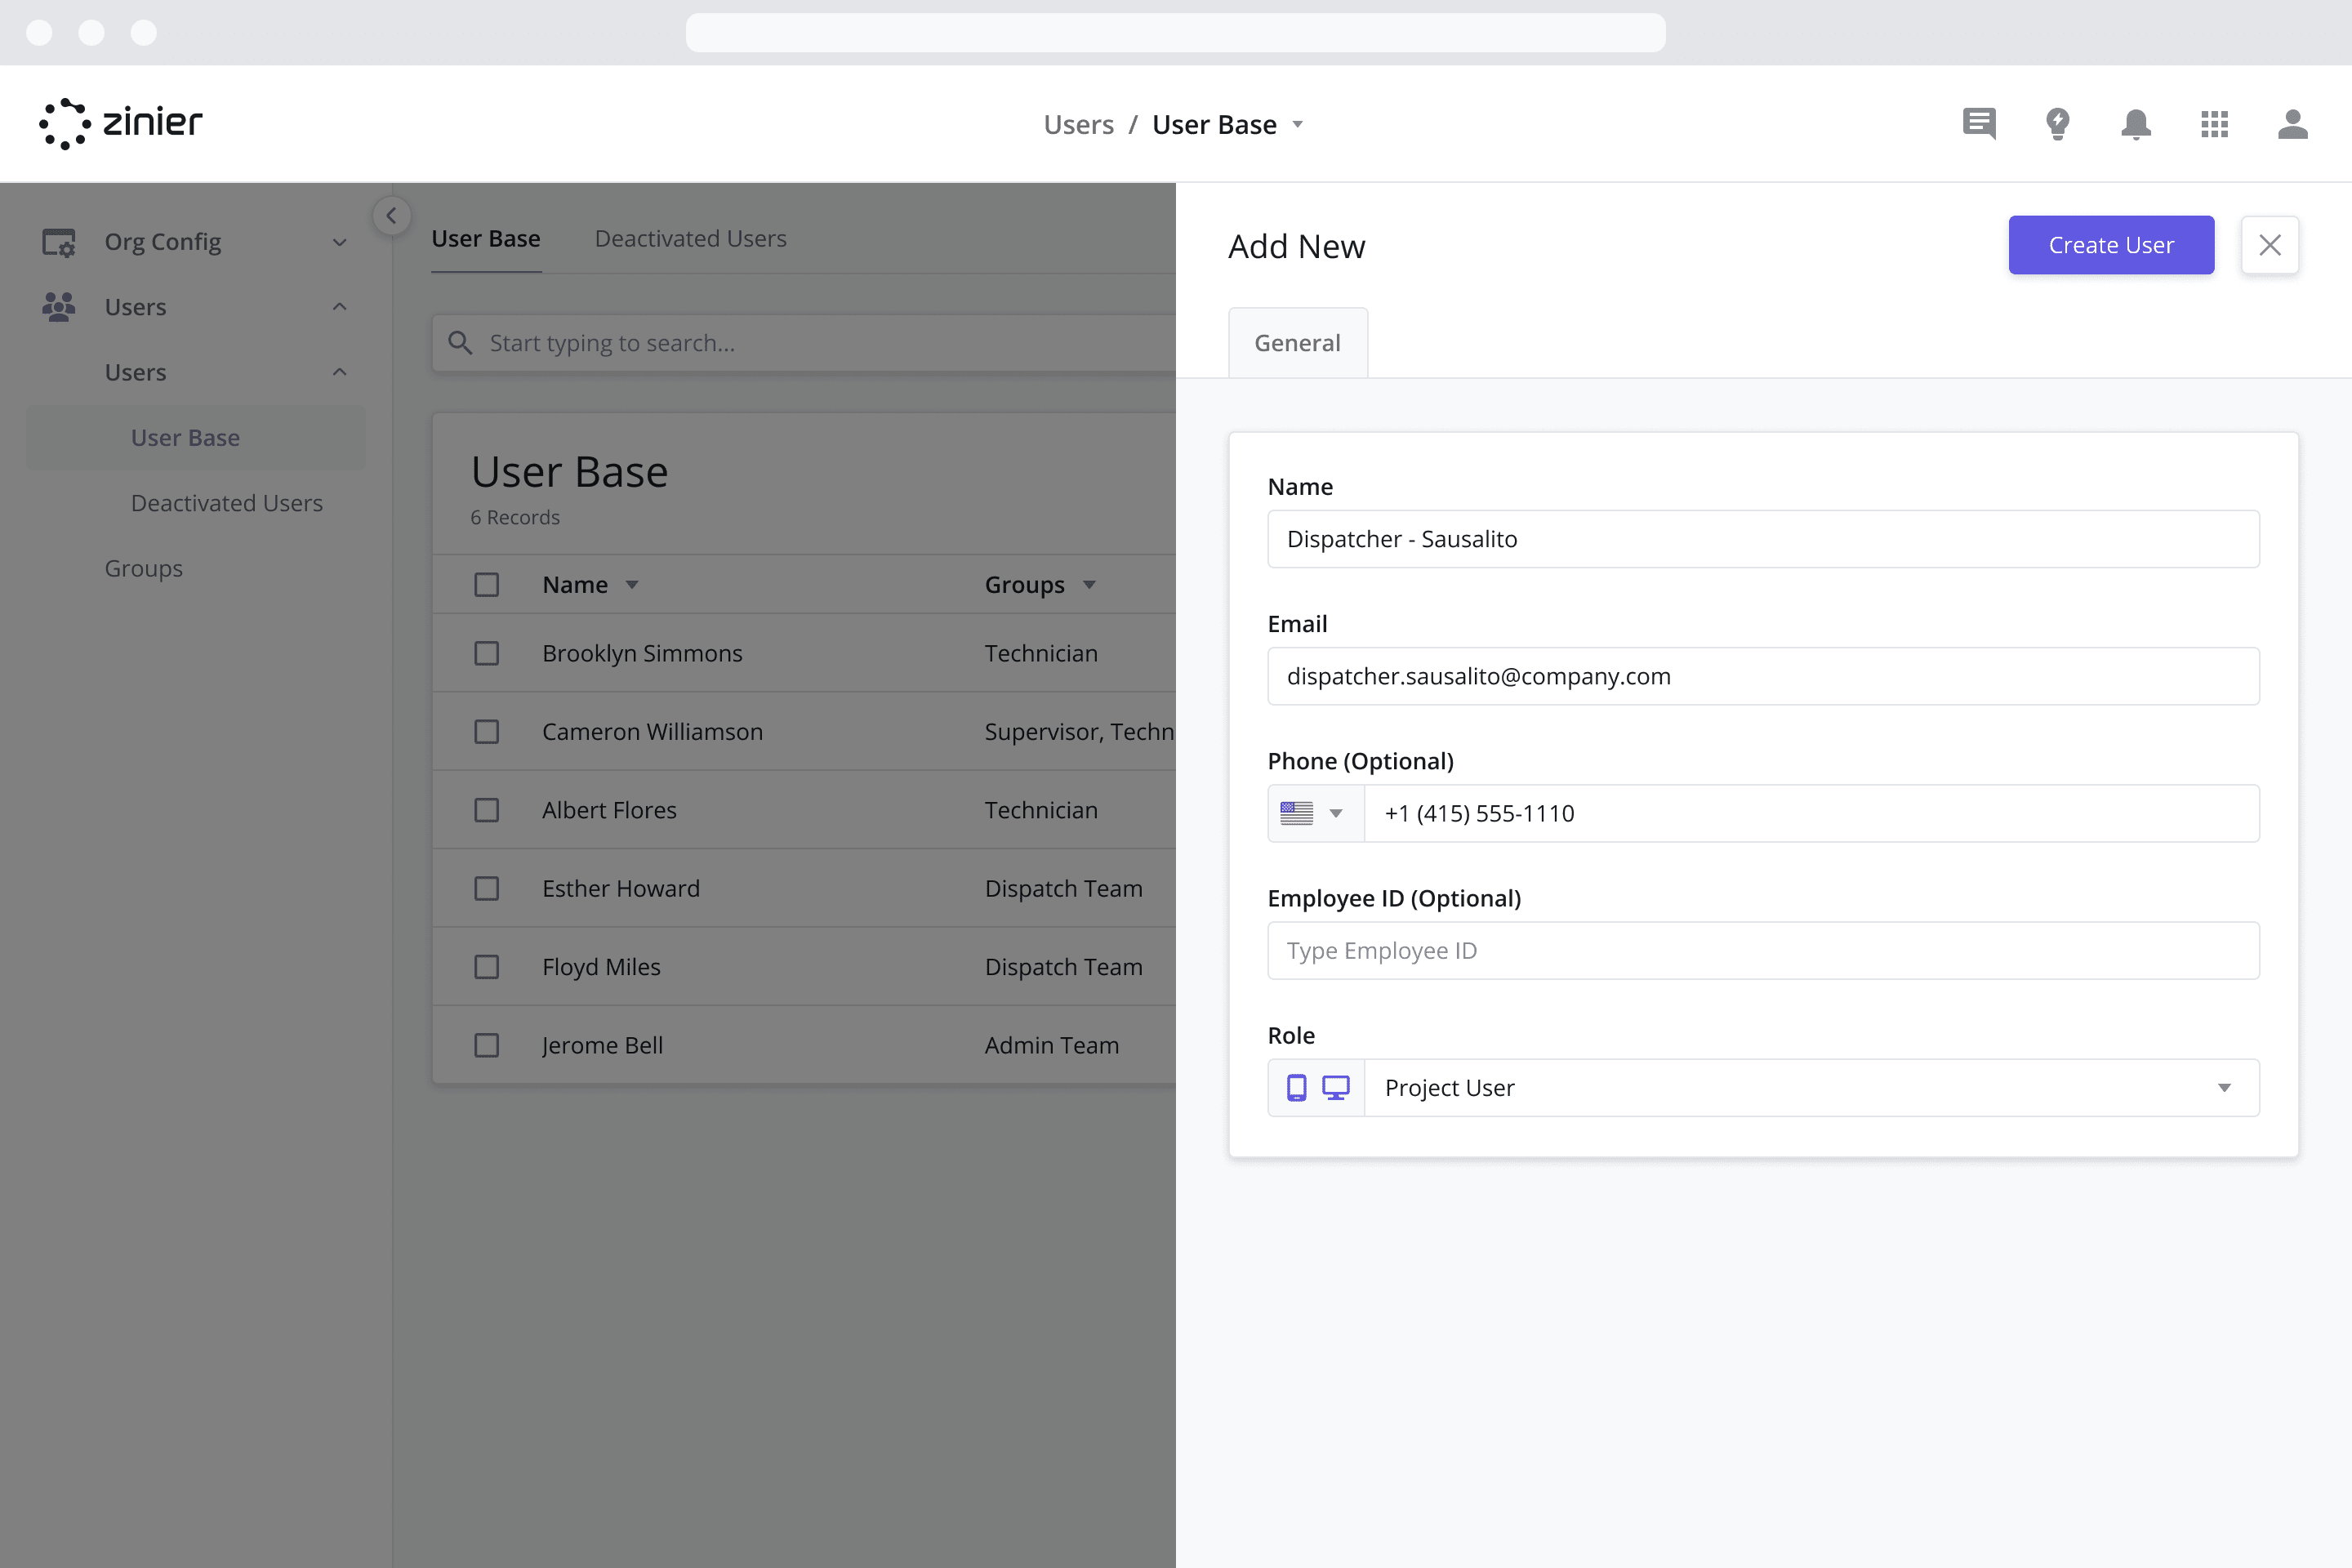
Role for Technicians: for your four techs, select “Mobile User” from the Role dropdown. This will give techs access to the mobile application.
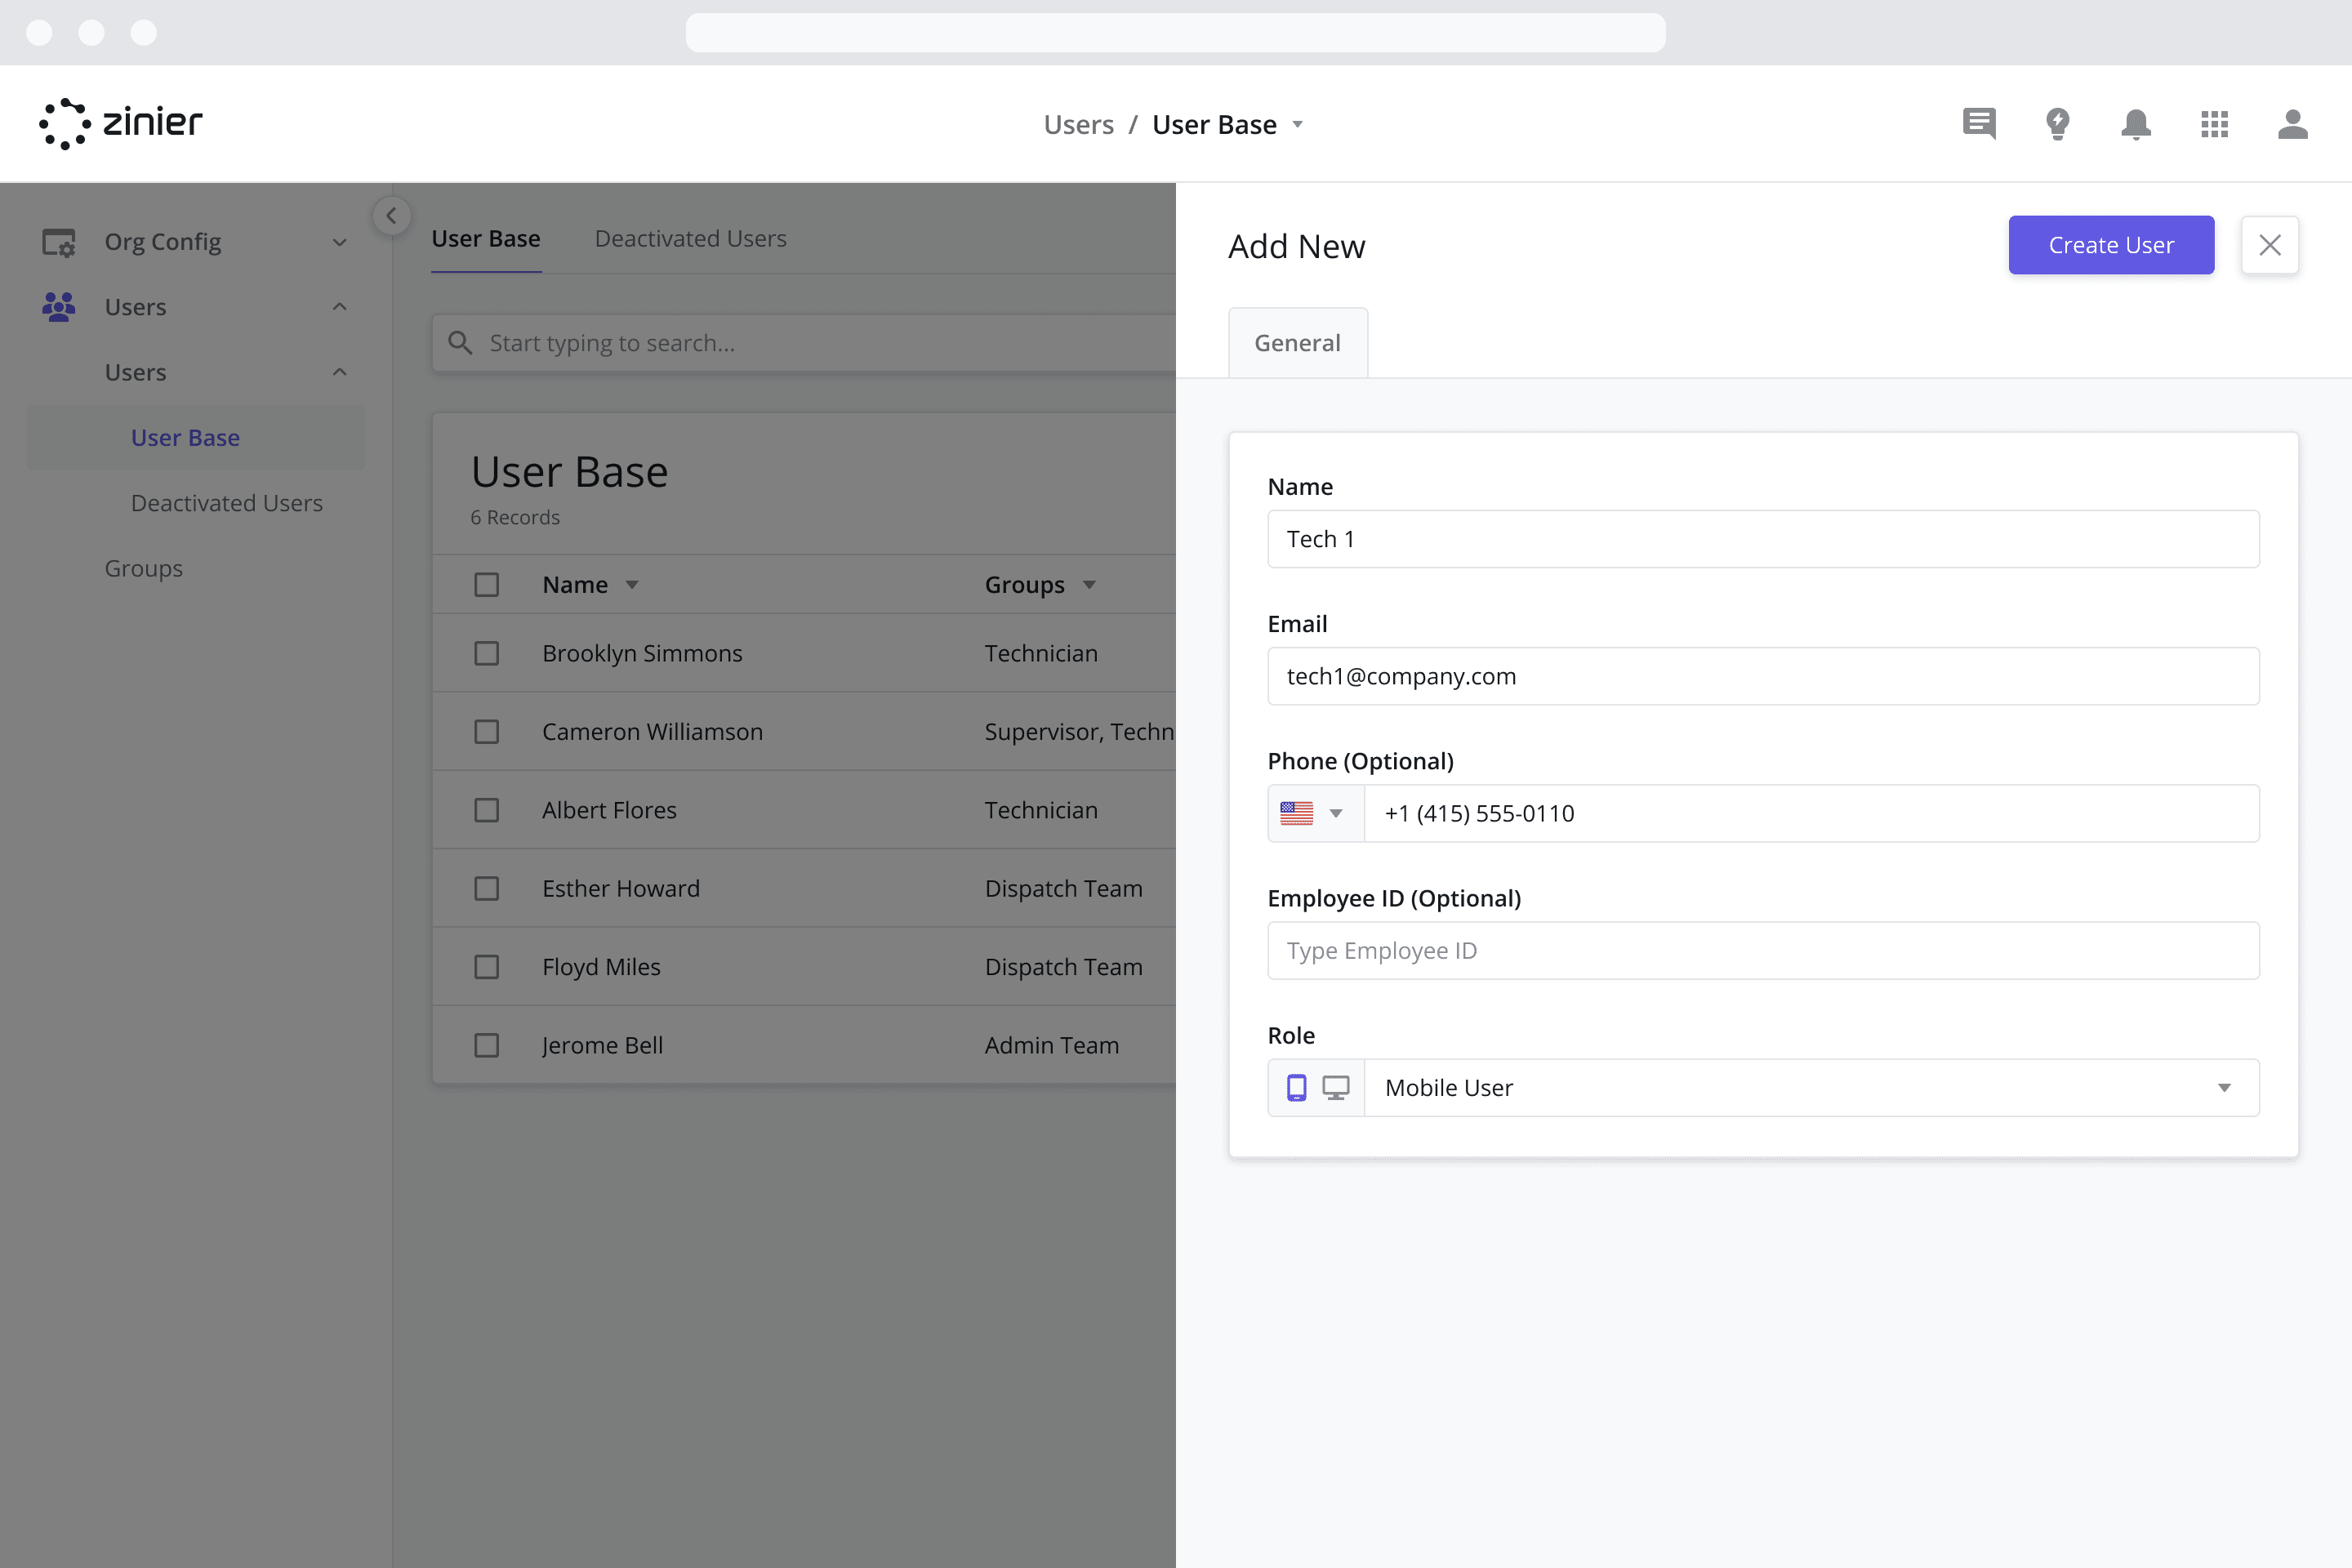
Click the Create User button
Navigate to the Groups tab and assign your users to their appropriate Groups so that they are granted relevant access to the Web Apps and Mobile Projects. Once you’ve selected the groups for each user, click the Add to Selected Groups button and then click Save. For more information on setting up Groups, contact your account admin.
Click Invite to invite the users to the platform. Doing so will trigger account activation emails to the user and change their status to “Invited”. Once the user activates their account, the status changes to “Active” and they can start interacting in the platform.
Add Dispatchers to your Workforce as Web Users
After a user has been invited to the platform, he or she must then be added to the appropriate team (Web Users / Dispatchers vs. Technicians) from the Workforce web app. Let’s start by adding the two dispatchers as Web Users. To do so, follow the steps below:
Open the Solution app by clicking on the Zinier Apps icon on the top right of the screen
Go to the Workforce > Web Users module
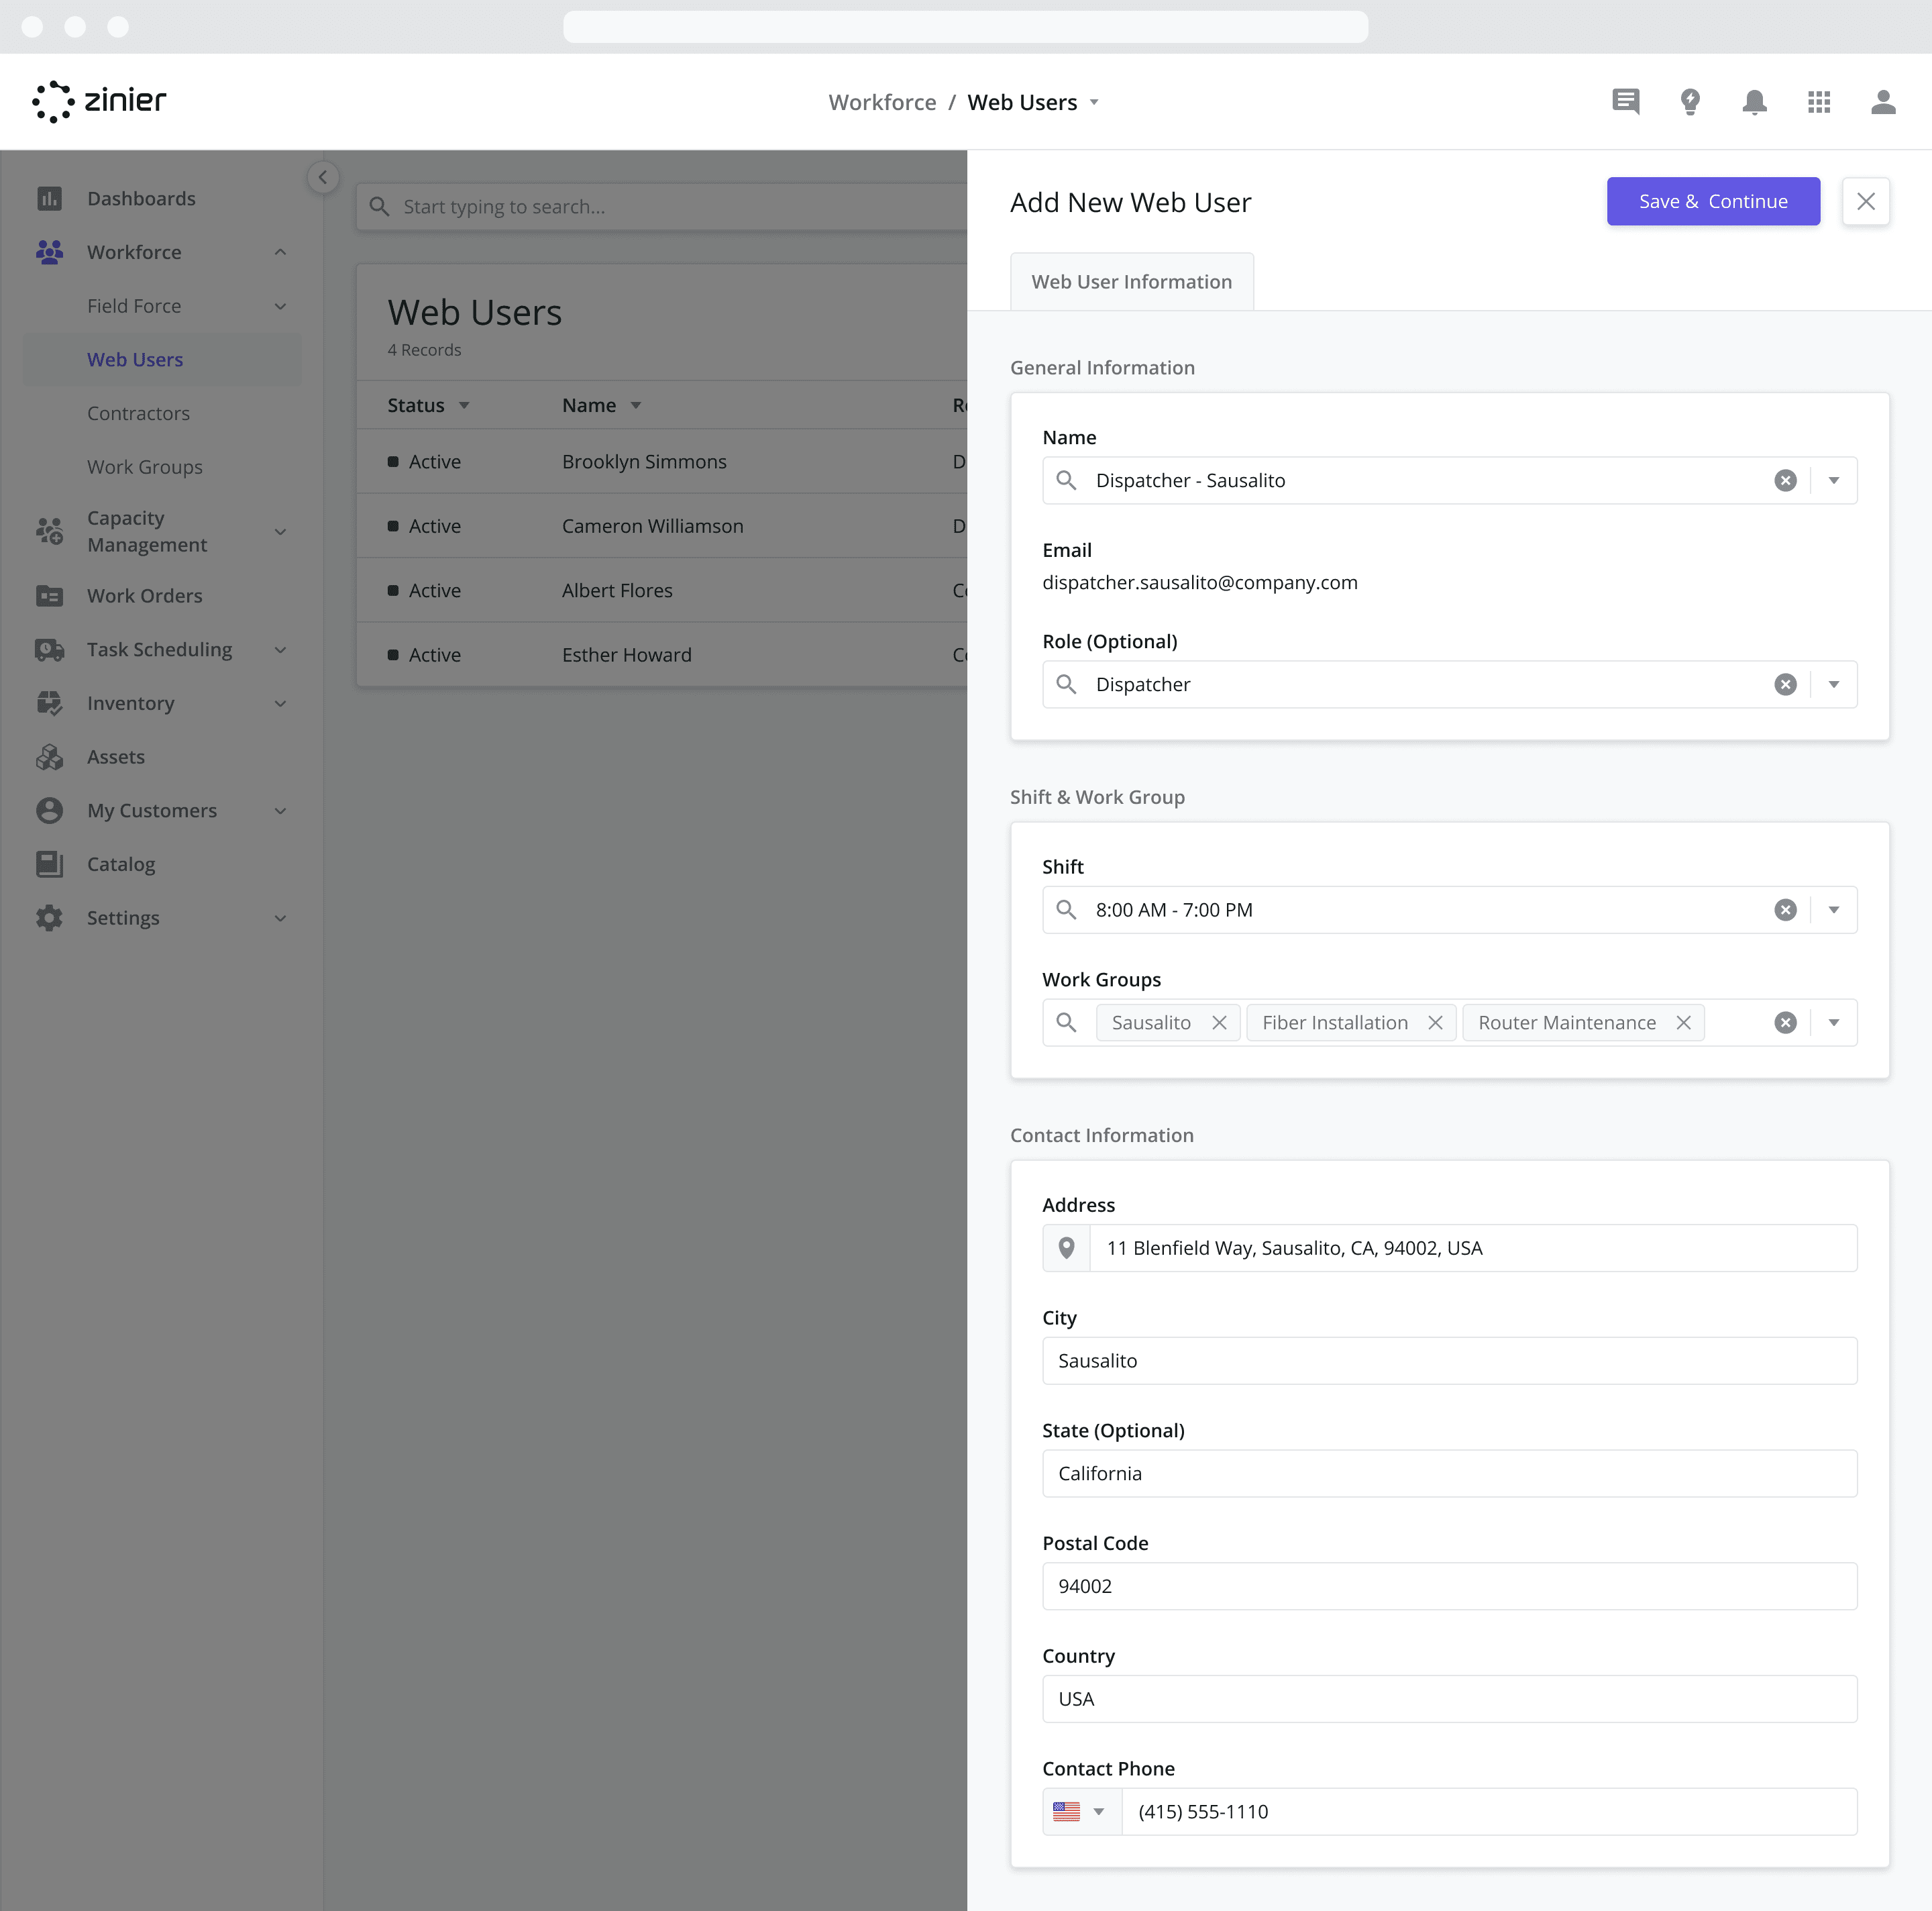
Click the “Add New” button in the top right of the data grid
From the Name dropdown menu, select the first dispatcher “Dispatcher - Sausalito”
In the Role (Optional) field, select “Dispatcher”
In the Shift field, select “8:00 AM - 7:00 PM”, the Shift you created in Step 2 above
In the Work Groups field, select “Sausalito”, “Fiber Installation”, and “Router Maintenance”. This will allow the user to see tasks related to the Region and Tasks he/she is responsible for.
Provide a home Address for the user
Click Save and Continue and close the side panel
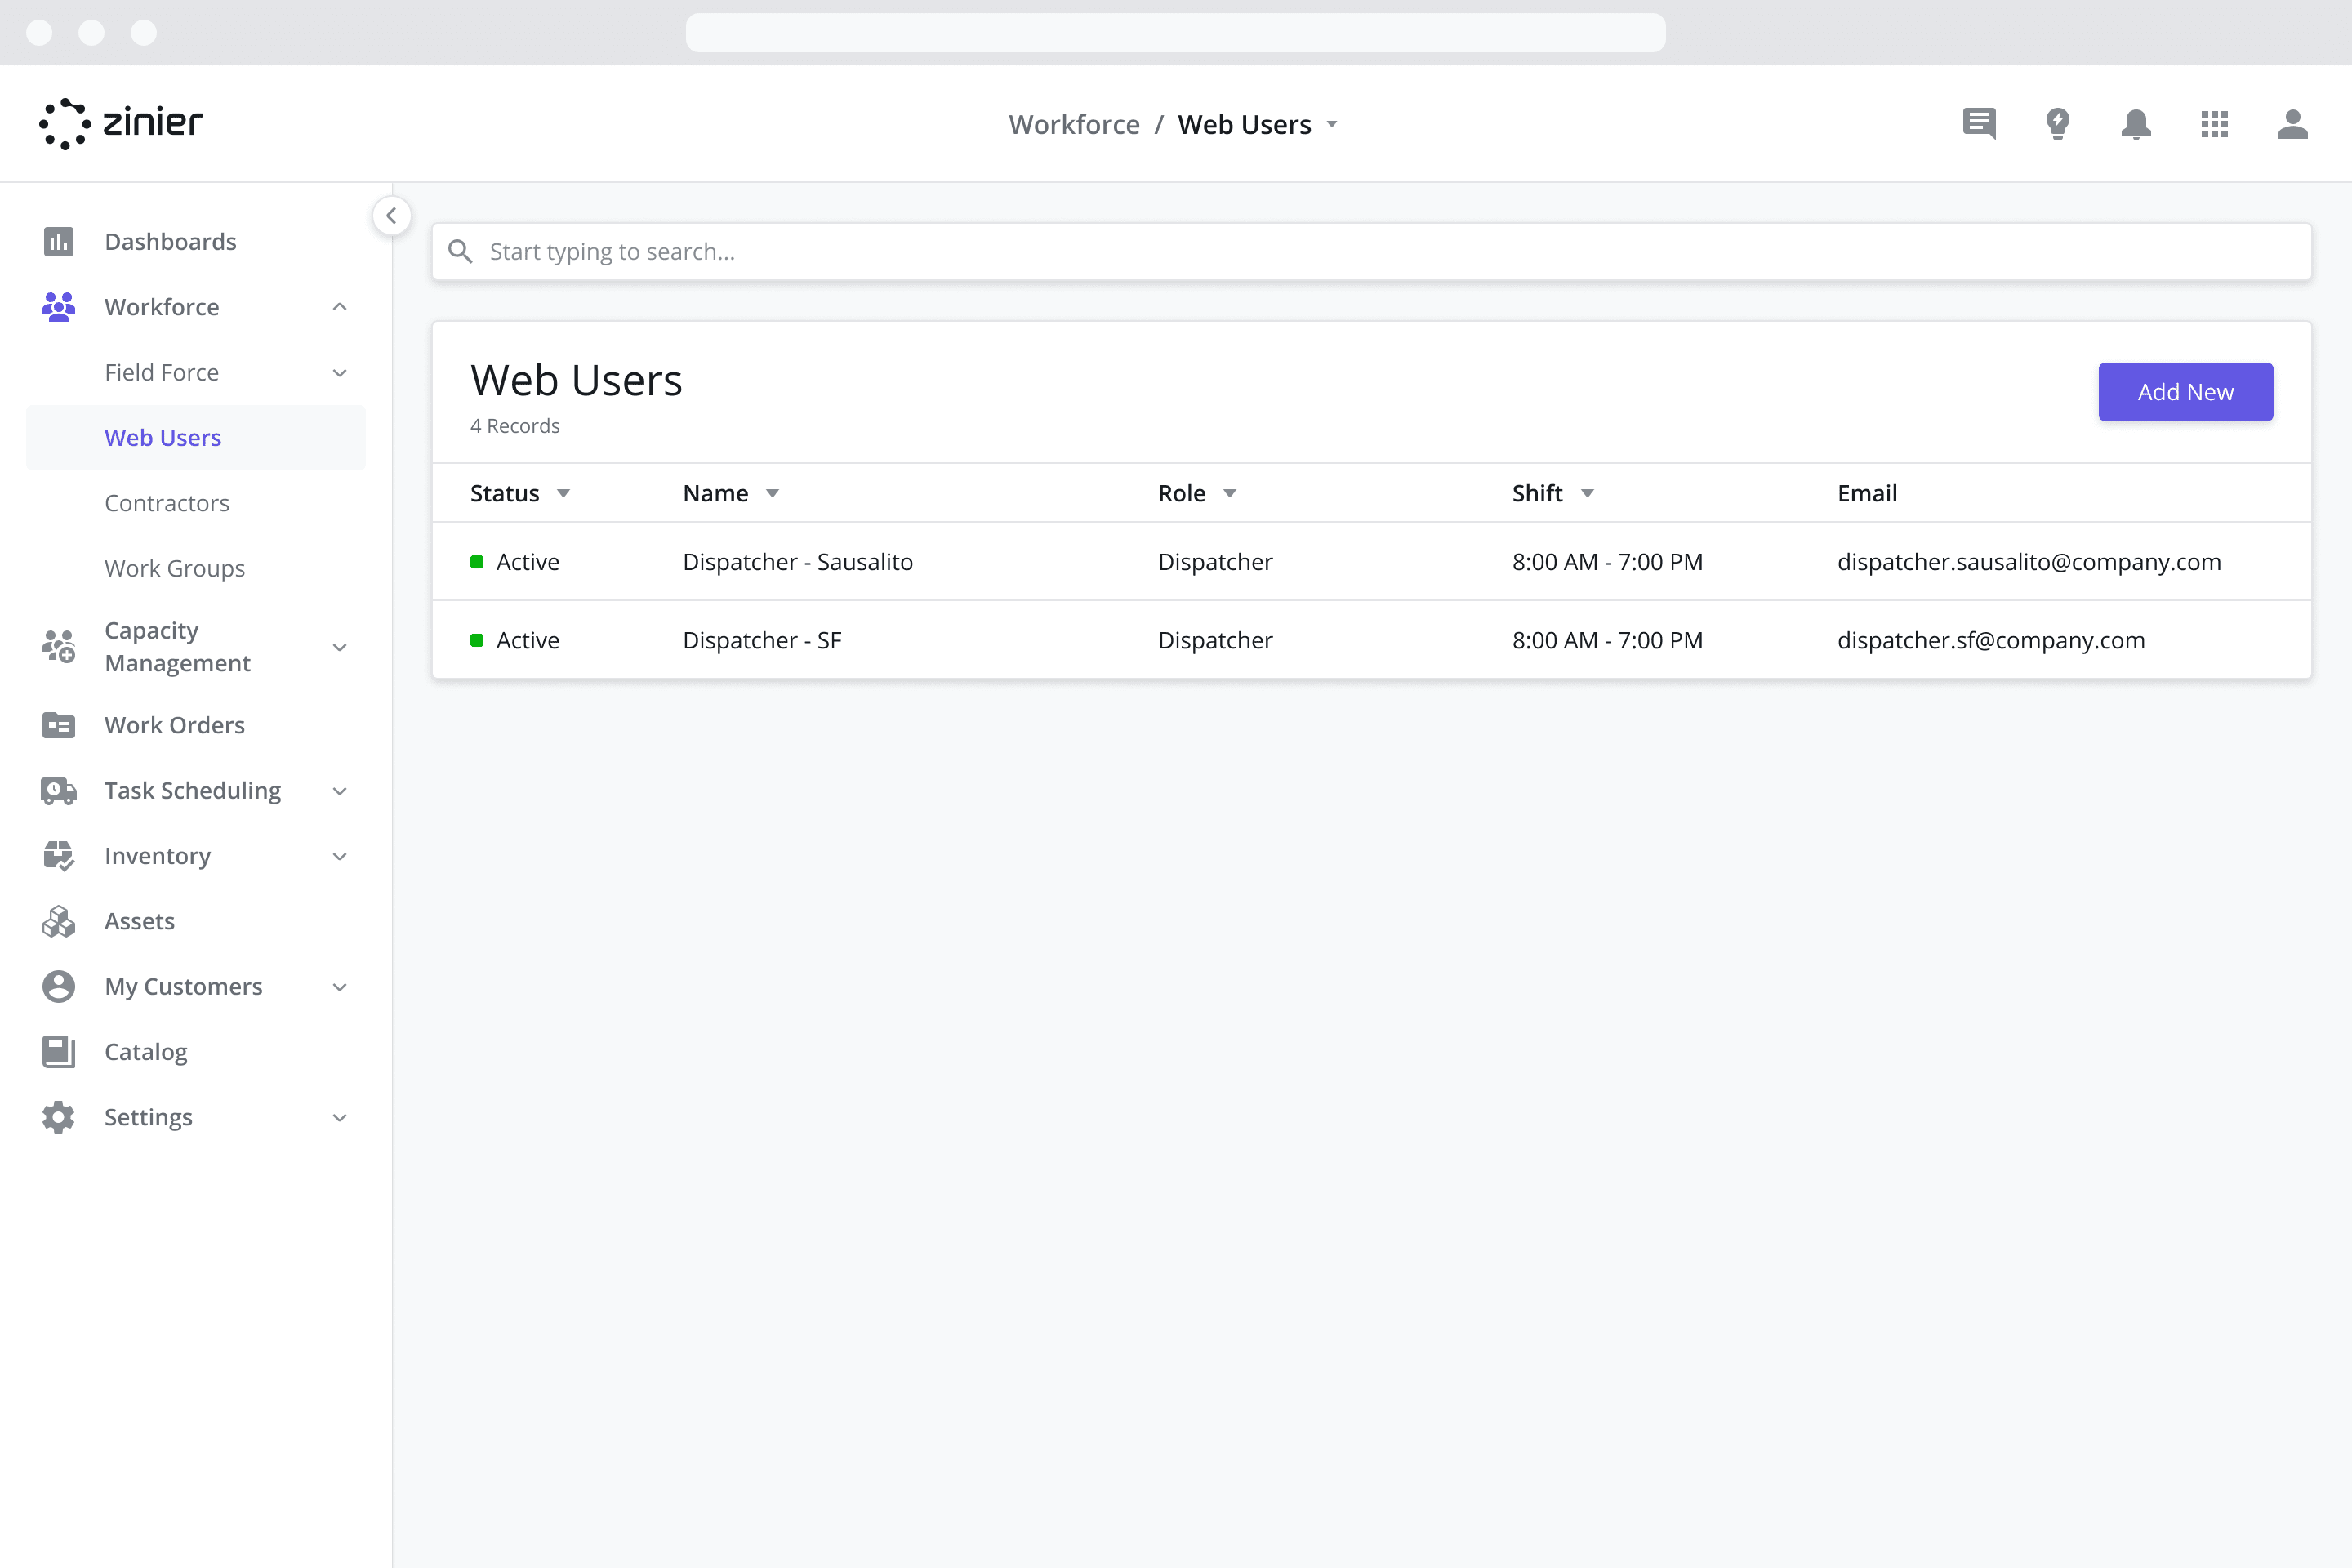
Repeat the process for the second dispatcher (“Dispatcher - SF”), making sure to select the following Work Groups: “San Francisco”, “Fiber Installation”, and “Router Maintenance”.
Once you are done, the Web Users page should look like this:
Add Technicians to your Workforce
The next step is following a similar process to add the 4 technicians to your Workforce using the Technicians module. To do so, follow the steps below:
Open the Solution app by clicking on the Zinier Apps icon on the top right of the screen
Go to the Workforce > Field Force > Technicians module
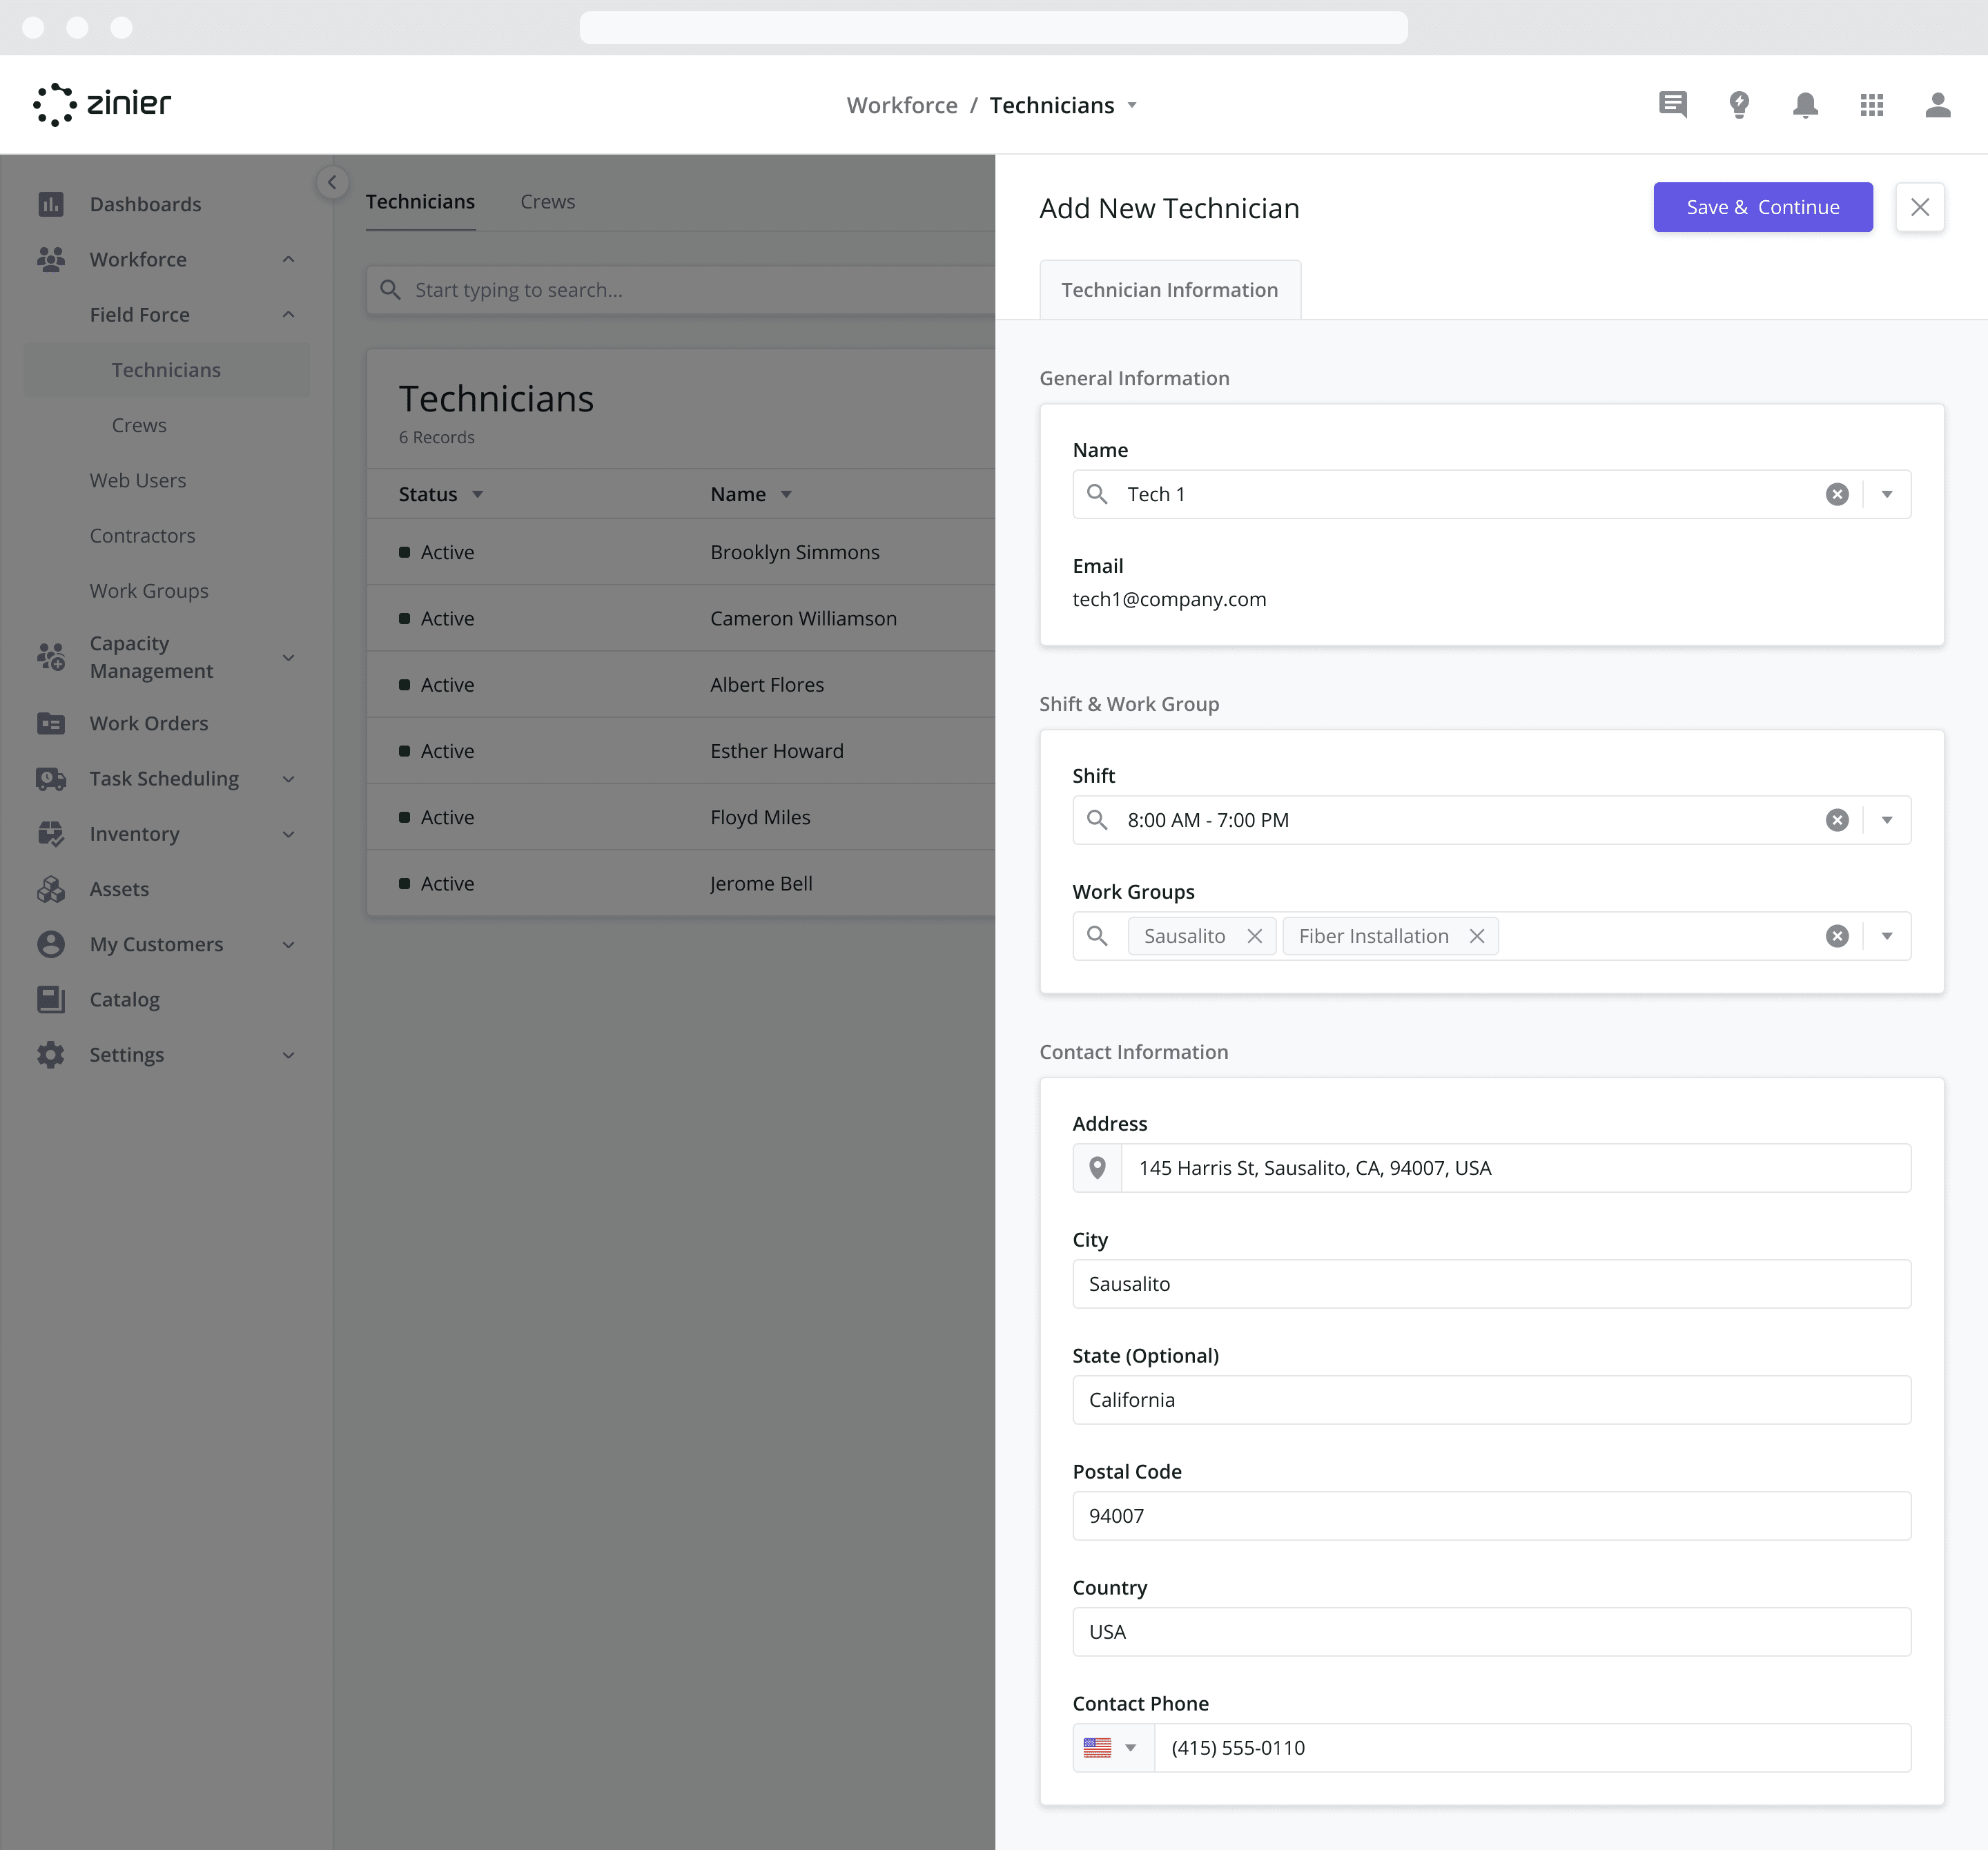
Click the “Add New” button in the top right of the data grid
From the Name dropdown menu, select the first technician “Tech 1”
In the Shift field, select “8:00 AM - 7:00 PM”, the Shift you created in Step 2 above
In the Work Groups field, select the Work Groups corresponding to the technician’s area of responsibility. In this case, select “Sausalito” and “Fiber Installation”.
Provide a home Address for the user
Click Save and Continue and close the side panel
Repeat the process for each of the remaining 3 technicians, making sure to change the Work Groups based on their areas of responsibility.
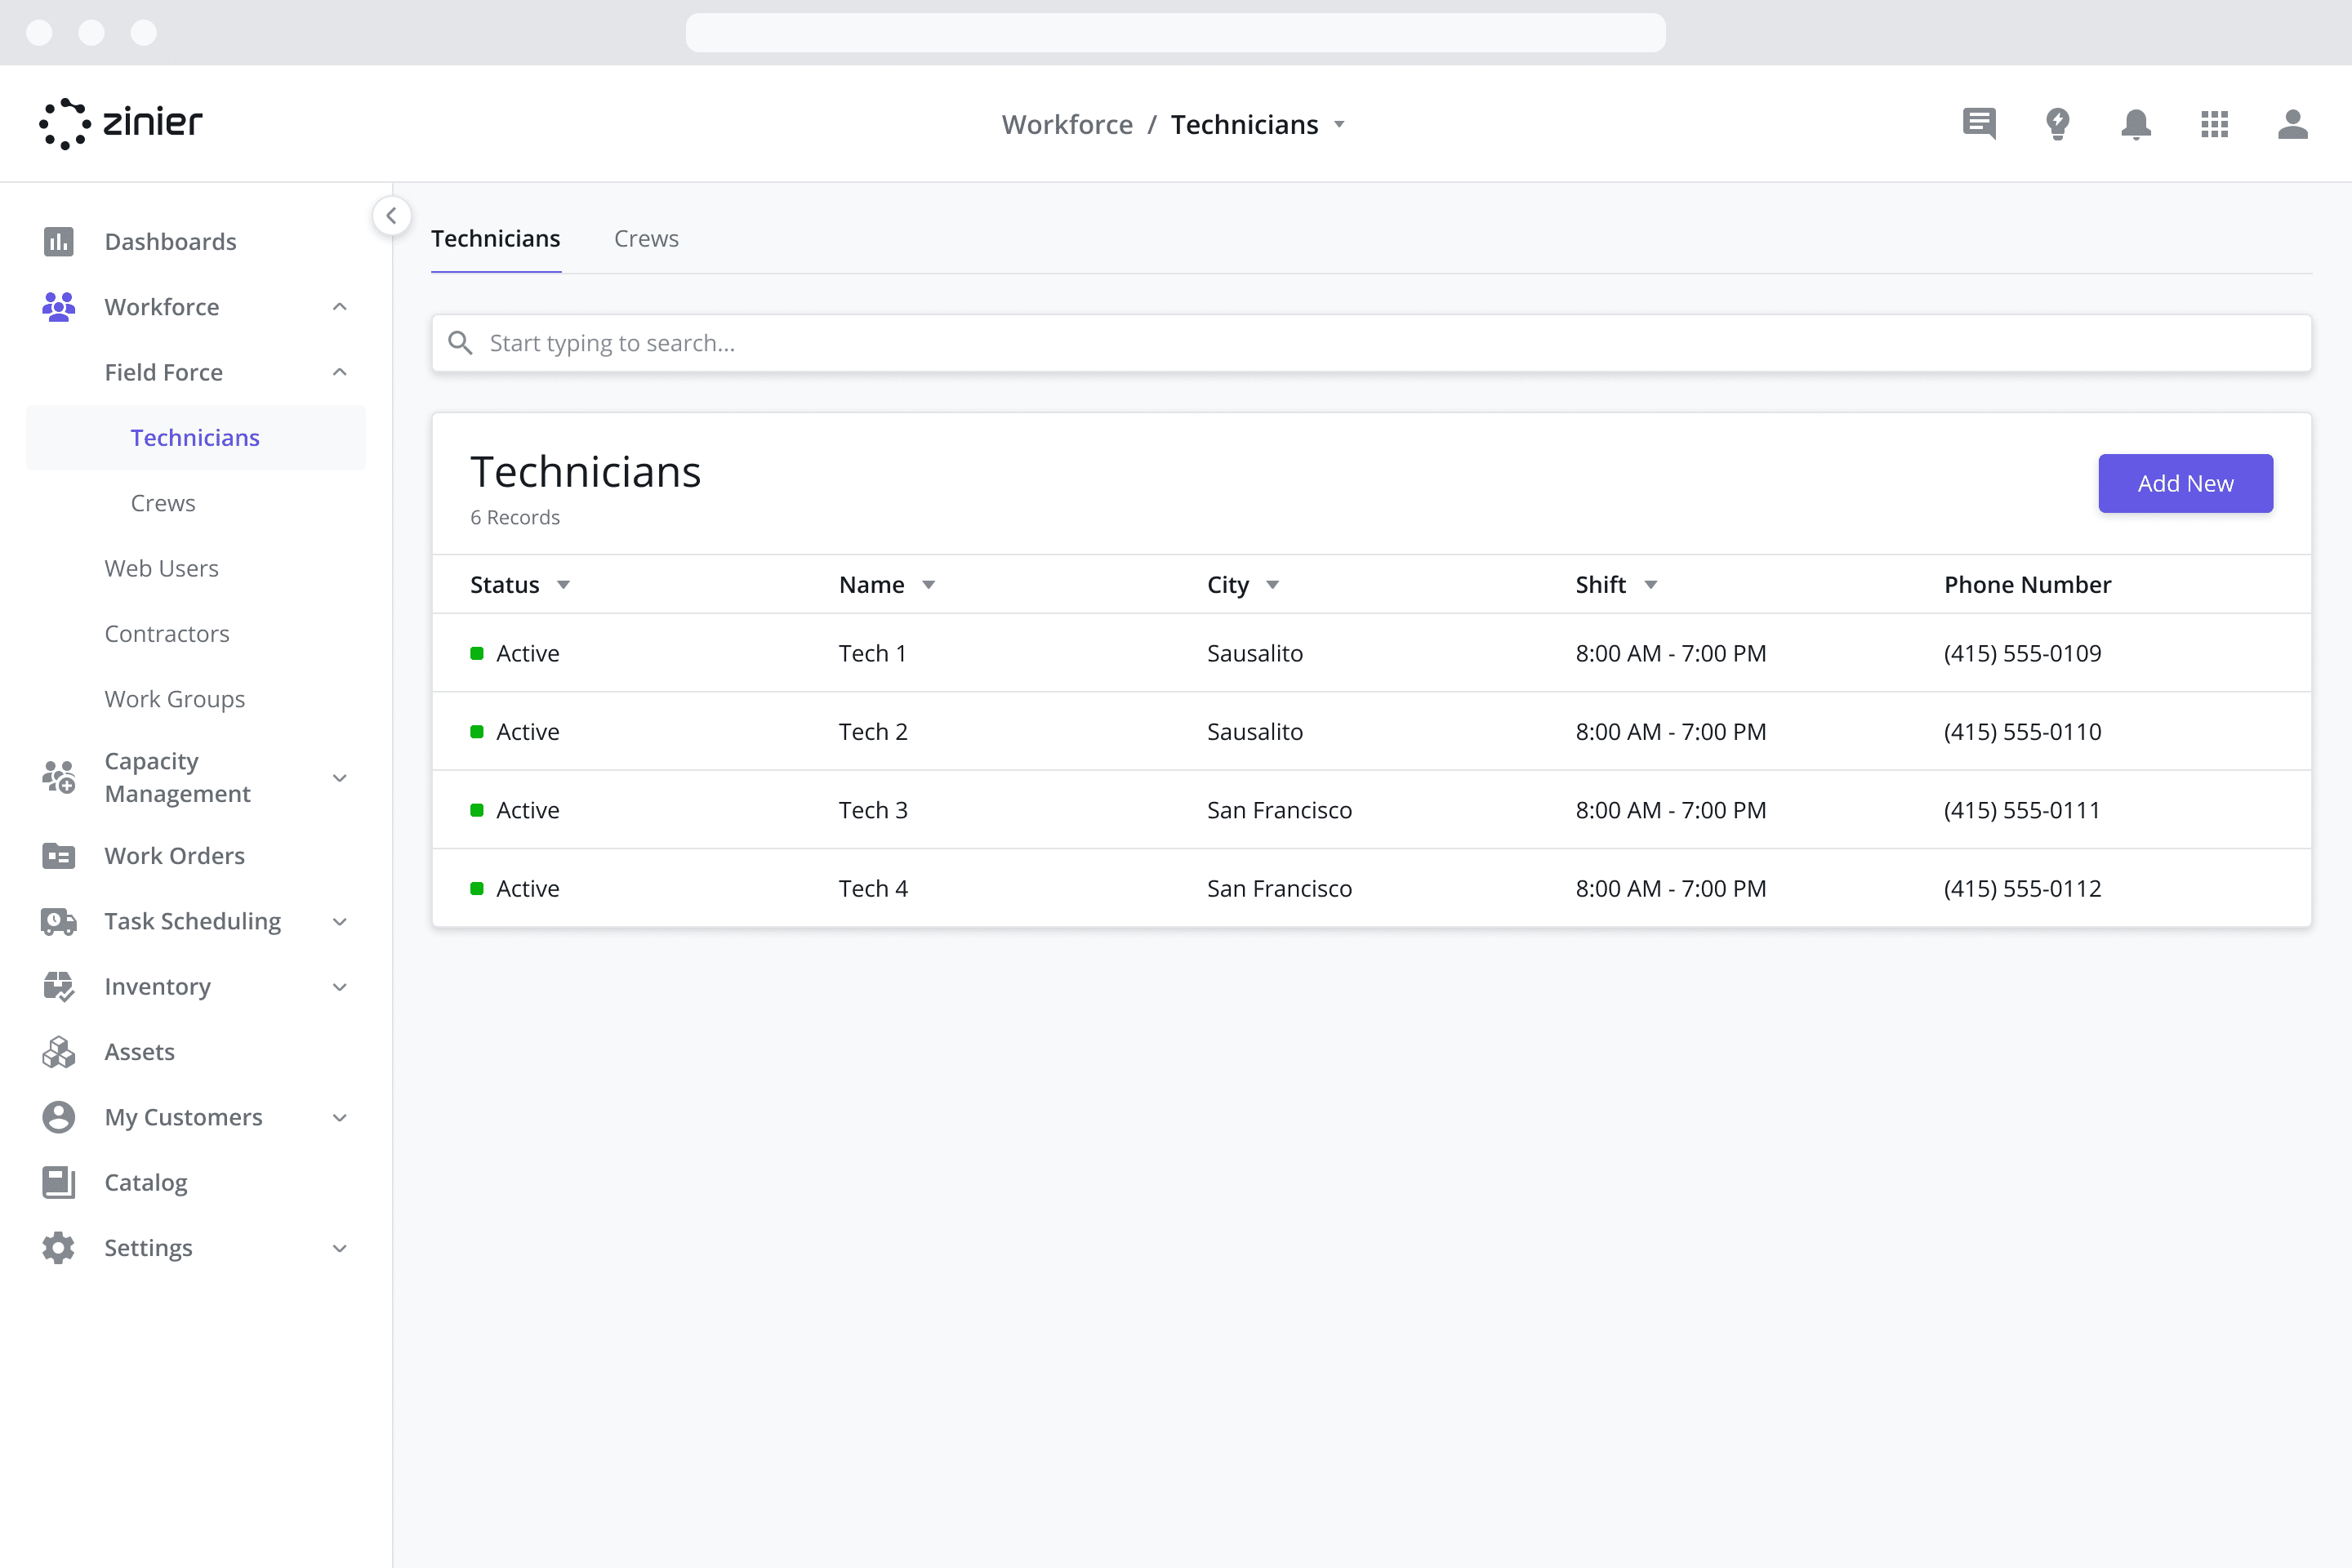
Once you are done, the Technicians page should look like this:
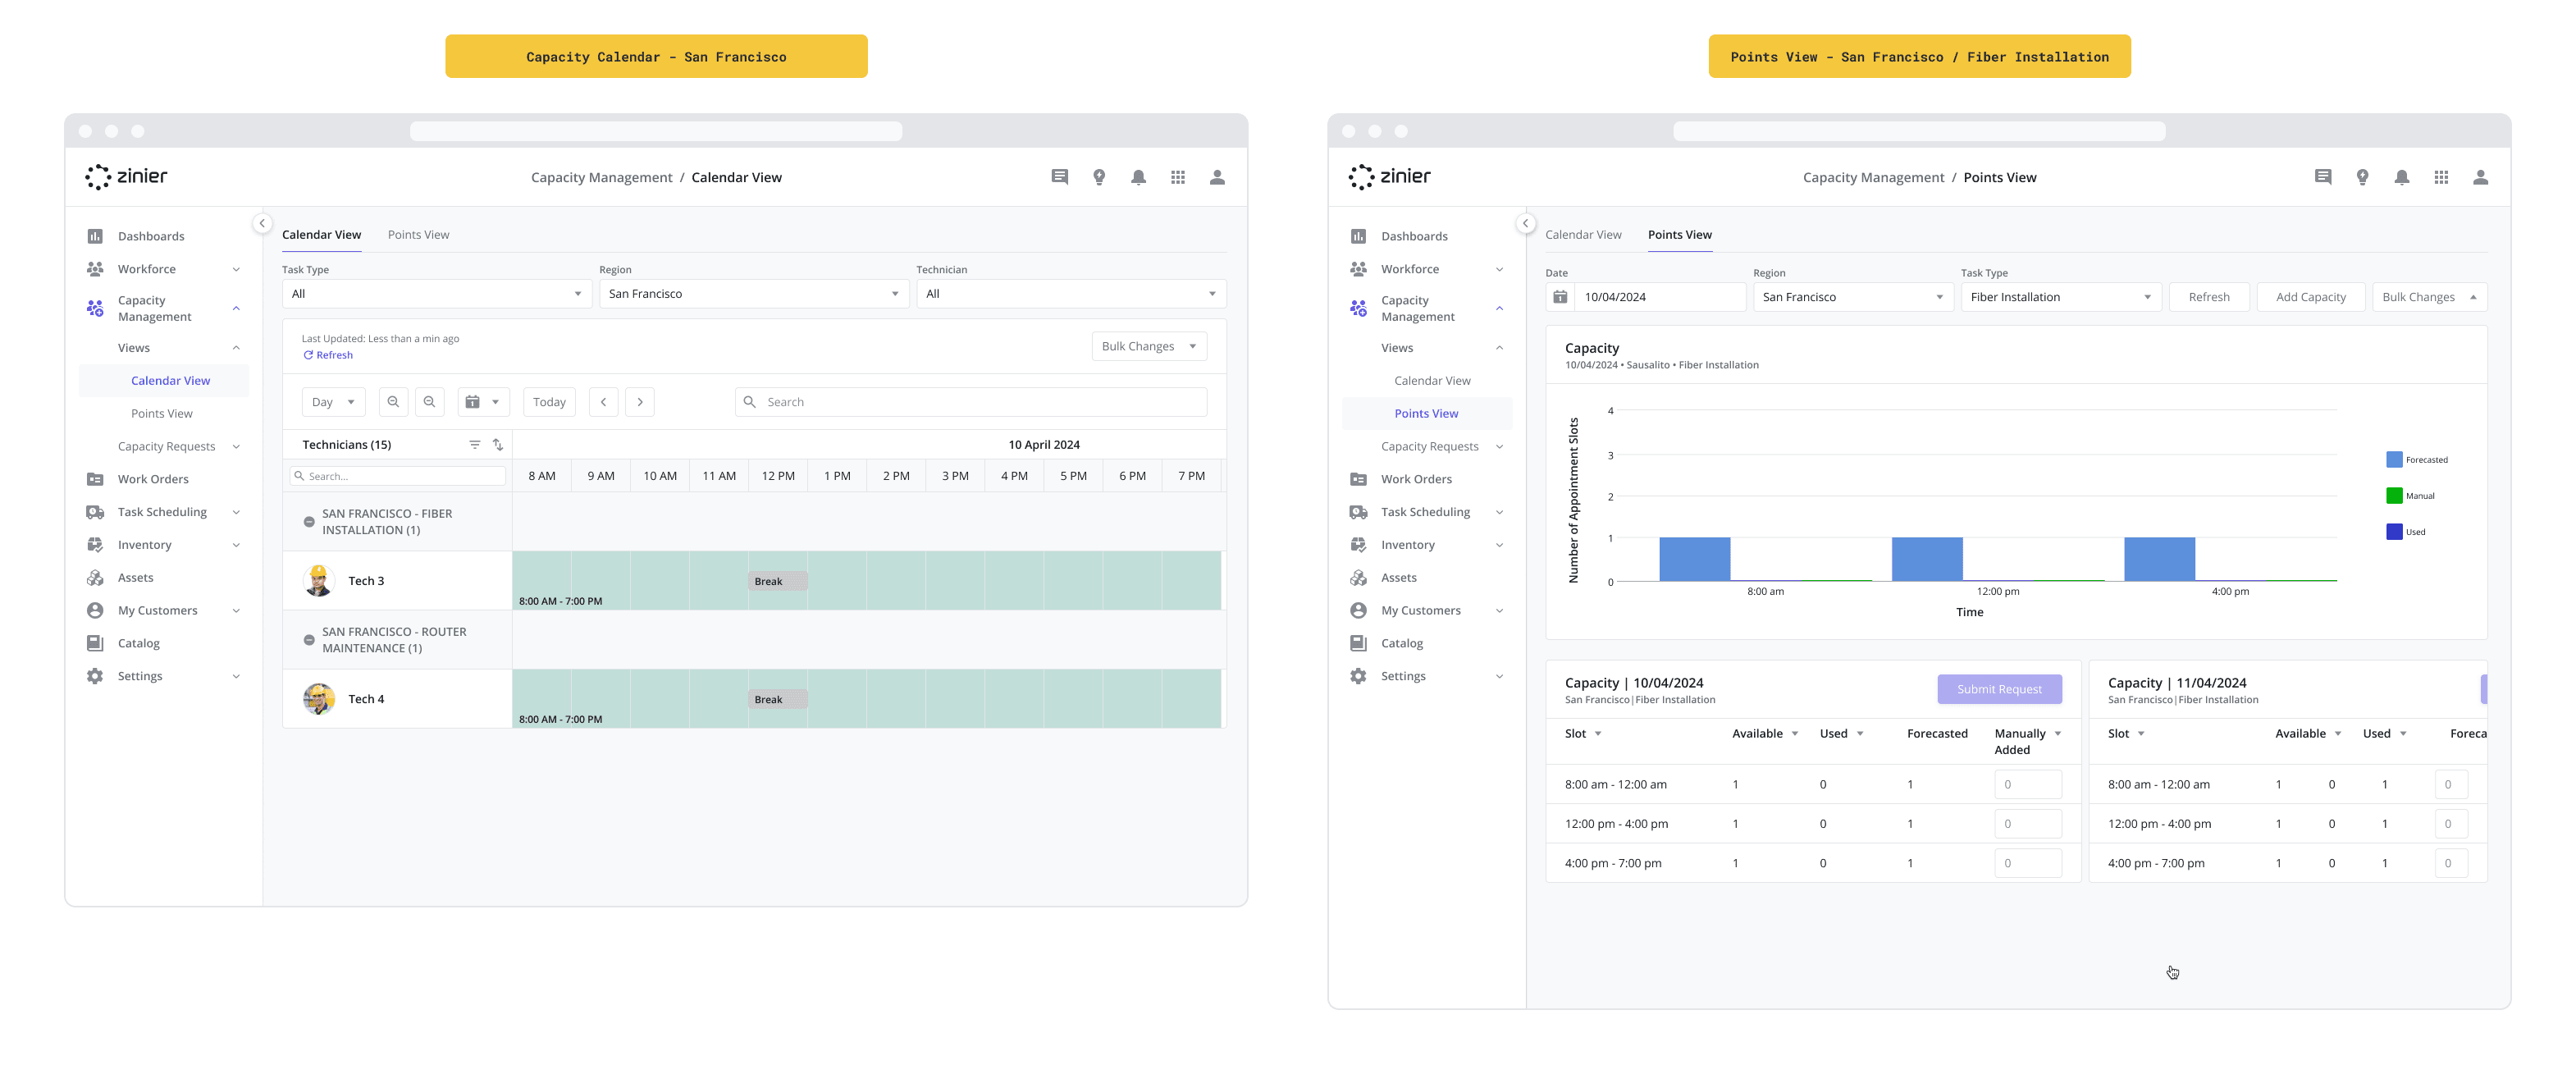
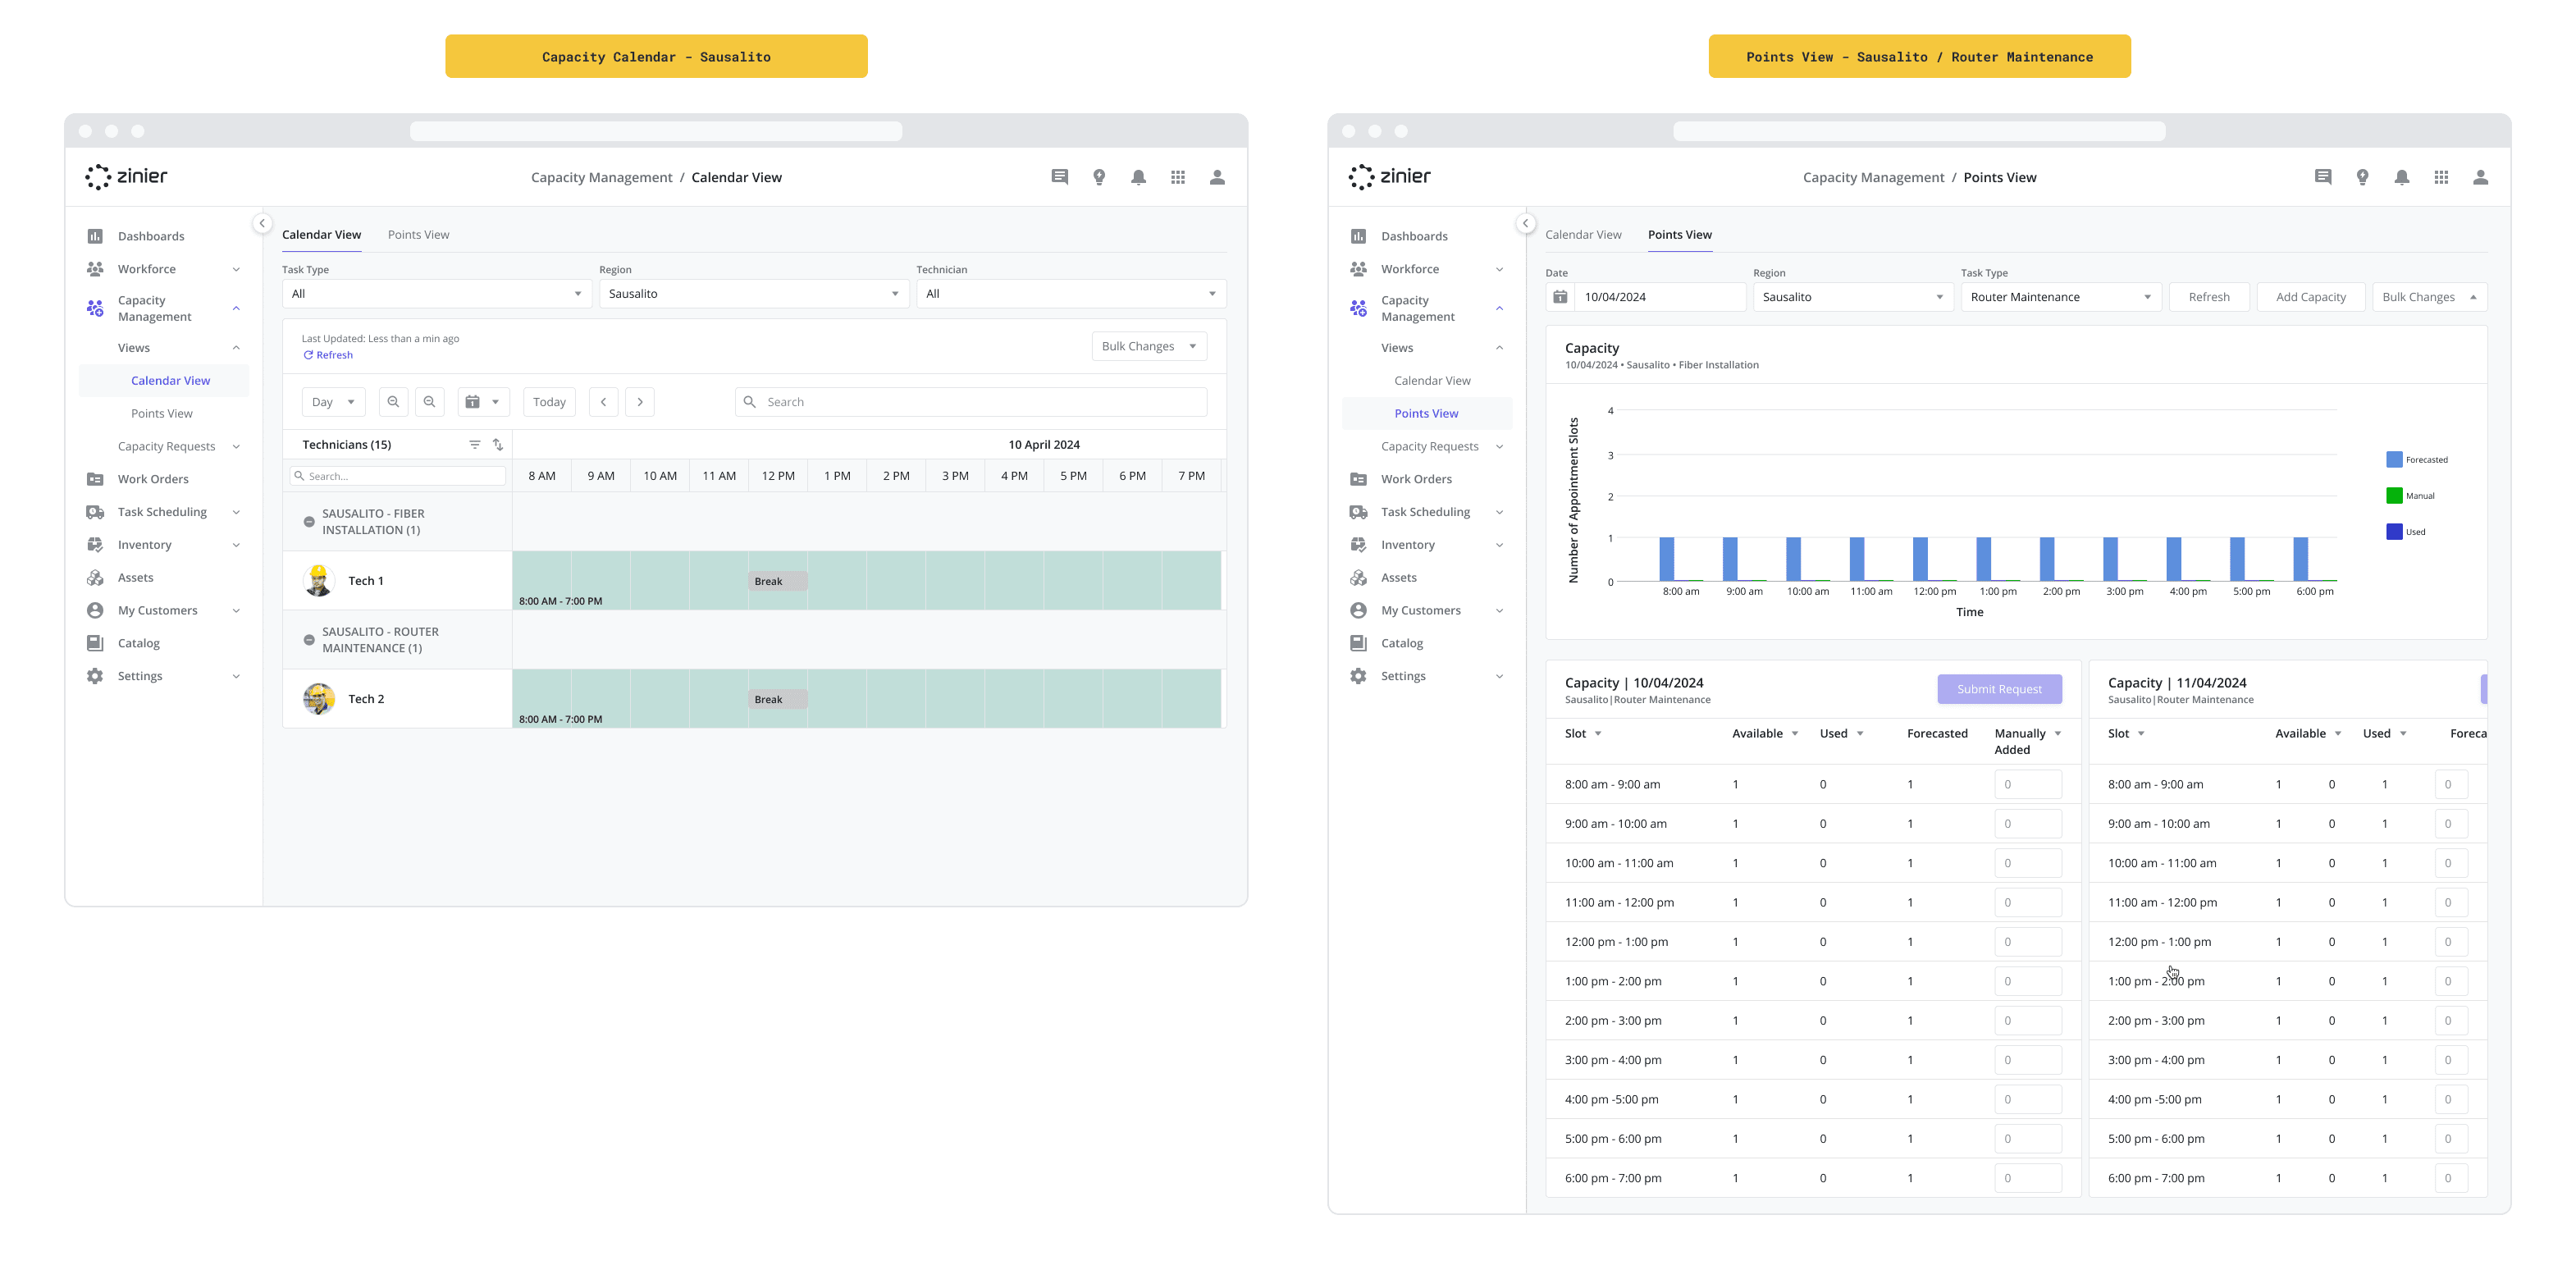
Summary: What the Capacity Calendar View and Points View Look Like
After completing the steps above, the two dispatchers added as Web Users should see Capacity Management screens similar to those displayed below:
Resulting Views for the “Dispatcher - Sausalito” User
Resulting View for the “Dispatcher - SF” User